
Not all OldGuitars are old. If you get more or less free hands to work with a finer and modern X-braced Levin from 1961, you can't say no. The assignment was to make a OldGuitar and, in addition to the usual, change the truss rod to a carbon fiber rod. A little extra *bling* in the form of old-style inlays in the fingerboard was also a request.
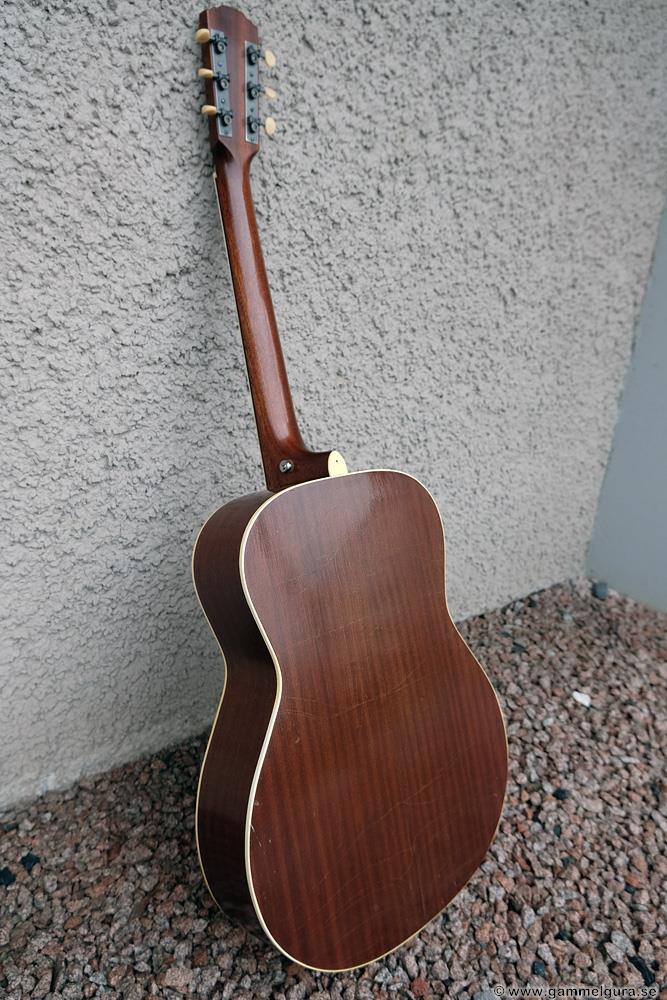
When it came in a huge case, I could see that it was in a slightly worn but in good condition. Pictures of this particular guitar can be found online. Maybe it needed a neck replacement and better tuning screws, but otherwise it was in original and playable condition. But it was going to be better than ever!
After loosening the strings, the neck was loosened. It turned out to be easy as the neck is just glued under the fingerboard on the top. The two nuts holding the neck via two bolts through the neck block were easily loosened with my long special screwdriver through the endpin hole. The bridge also came off without a problem, although the modern glue was tough and held well.


Wise from previous experience with soft mahogany and crack-prone and brittle cellulose lacquer, it was time for some ultra-violence in the form of a Japanese saw. The best way is actually to cut the side, kerfing, bottom and neck blocks just below the bottom binding. If you try to loosen the binding to access the glue joint behind it, the cellulose lacquer will crack and chips will come off, there is also a great risk that the soft mahogany in the sides and bottom will crack. What you get with the saw are two puzzle pieces that can be glued together almost invisibly. The only thing you can see afterwards is an extra glue joint in the kerfing through the sound hole.


Once opened I could see that it was well made inside, but as usual with Levin with a little too strong braces. Since a OldGuitar means that the bracing is replaced if it is not as they should be, the next step was to remove all the braces in the top and bottom. As the glue did not react so much to water and heat, the best method was to use pliers and snap the braces and then plan and sand. More ultra violence! It was interesting to see that Levin used a real knot to connect the X-braces, not like Gibson who cuts one of the braces in half and glues them flat together with just a glued linen cloth over the knot. Thin bridge plate too. Very good.
The base and top had good thicknesses. Which was lucky as I couldn't thin the bottom as usual in my drum sander. I made and glued new bottom braces. My latest invention with rollers under the wooden clamps worked great on top of the aluminum cauls. No risk of the braces being pulled askew when tightening the clamps.


The neck was going to get a carbon fiber rod and a 16″ radius fingerboard, but since it was bolted to the truss rod it had to be a special solution. With the fretboard off, I could see how the truss rod was mounted.


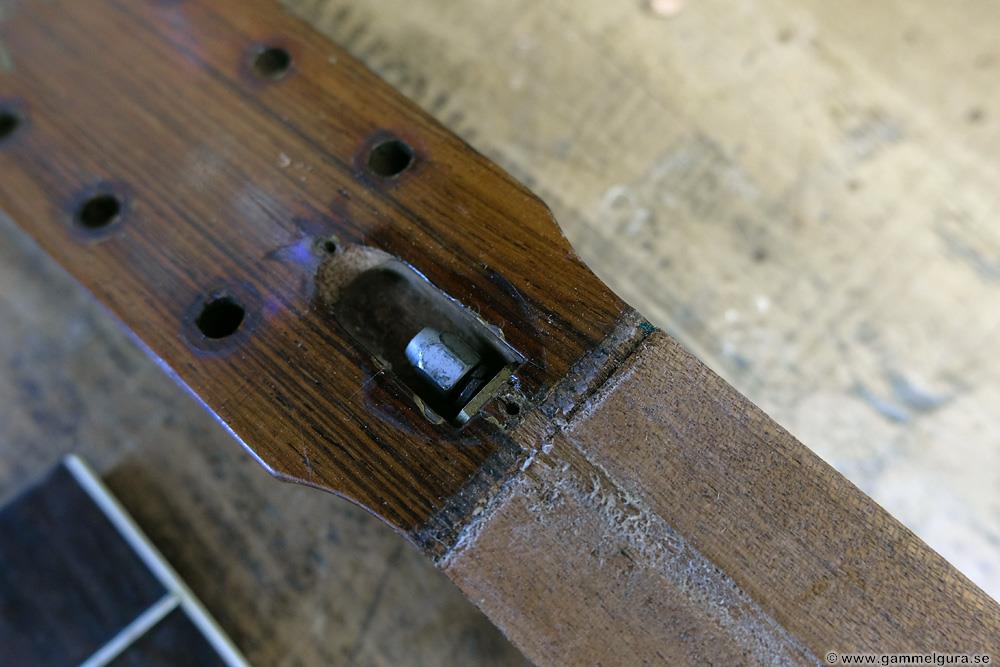

Levin had a special solution where the truss rod bends off and continues down the neck foot and is attached with the upper nut on the inside through the neck block. Below it is a second short rod attached to a metal stop for the lower nut. When the truss rod adjustment nut at the top was loosened, the trus rod could be pulled out, the mahogany stick over the truss rod could then be easily removed with a chisel.
In order to mount a carbon fiber rod and retain the attachment of the neck, the truss rod was cut near the end of the neck and the end of it threaded. A stop metal block was made and attached with two nuts under the milled channel for the carbon fiber rod. To make the carbon rod stiffer, a piece of 8 mm round carbon solid fiber rod was glued into the square and hollow carbon fiber rod. The hole for the old truss rod and the empty space behind it were filled in with wood.


Since the original fingerboard was in the finest rosewood, but needed to be thicker to be able to get a 16″ radius, I glued in an approx. 2 mm thick rosewood shim under the original board in a "sandwich".

With a thicker fingerboard I could use my jig and give the flat board its radius.


First, the carbon fiber rod was glued with slow curing epoxy glue.


Then the fingerboard was glued. I drill two nails through the fretboard so the fretboard doesn't slide on the glue. I also use different gauge sticks on top of the curved fretboard to be able to use a flat caul, on this one 2,3mm on the sides and 1,7mm in the middle . Nowadays, I always start with a thin hot glue mixture that penetrates deeper into the wood before gluing with regular hot hide glue. I imagine there will be a stronger glue joint that way.


New braces were made for the top. The X-bracing takes longer to manufacture than a ladder bracing. The bridge plate was, of course, made of spruce with dowels and hardwood buttons around the stringpin holes. The double braces under the fretboard were replaced with an A-frame.
Swedish manufacturers in the 1950s had an idea that the bottom block should be small, thin and flimsy. Maybe to make the guitar sound better and be lighter. The problem with that is that you build in the risk that the sides, top and bottom will break when you drop the guitar on the end plug... I've seen several instruments that have been seriously damaged that way. I therefore replaced the small, thin piece of plywood with a normal-sized spruce end block. The pictures also show my new improved internal cauls made from cut down carbon fiber rods.


I made the mistake of peeling off the label before regluing it. The paper is Bible-paper thin and still got thinner when I peeled it off. When I then glued, the thin paper became very dark. Next time the label will be reglued in place, alternatively I will glue a piece of white paper behind the label.
New inlays with extra *bling* were fitted to the fretboard. The pickguard was secured with 3M adhesive tape.
The intonation was measured after frettiing and crowning and installation of new tuners. The hole under the truss rod cover was filled in with a piece of mahogany.


The bottom, side and neck received a coat of spirit varnish, the top only needed to be hand polished with a dry cotton cloth.
Behind the extremely ugly and yellowed lacquer on the bridge was rosewood of the finest variety. So much prettier without varnish! However, the paint stayed on well, it took quite some time to remove the misery with a knife, sandpaper and razor blade. Two of the original galalith string pins broke when I was going to loosen the strings, so I had to use new ones in ebony in the style of the *bling* in the fingerboard.
It was strung up with regular 0.11 strings. I kept the guitar for a few weeks and played it quite a bit. The sound is a mix between a regular OldGuitar with ladder bracing and a modern X-ribbed guitar. I really liked it, but still prefer a ladder braced OldGuitar for the open sound, but that's my personal taste!


Been playing the guitar since it came home, Absolutely wonderful! This one opened up significantly more than before! This guitar will be the first guitar. Has as number 2 GG gura 115 !😉👍👍. Many thanks Roger! Your magic only gets better with age! Will probably send the Levin 12 in the coming spring winter if it goes well.
Thanks so much once again!
Regards
Jörgen Torparn Wahlnemo
Thanks for the feedback. Yes, it turned out well that one. Your 12th is welcome for service 🙂 Interesting that it opened up even after quite a long vibration. But that's the way it is, a played guitar is a good guitar.