
Lately, I've been busy with a new project, recording demos of most of my approx 400 (!) songs over the years. My home studio is now almost complete, but I also have to assemble a new computer as the old one is not compatible with the new sound card. I've been working as usual in the shop, but haven't taken the time to write about the finished GammelGura's. I have done four that I have not reported yet. There has also been a lot of repair and tuning work done on all sorts of newer and older guitars.

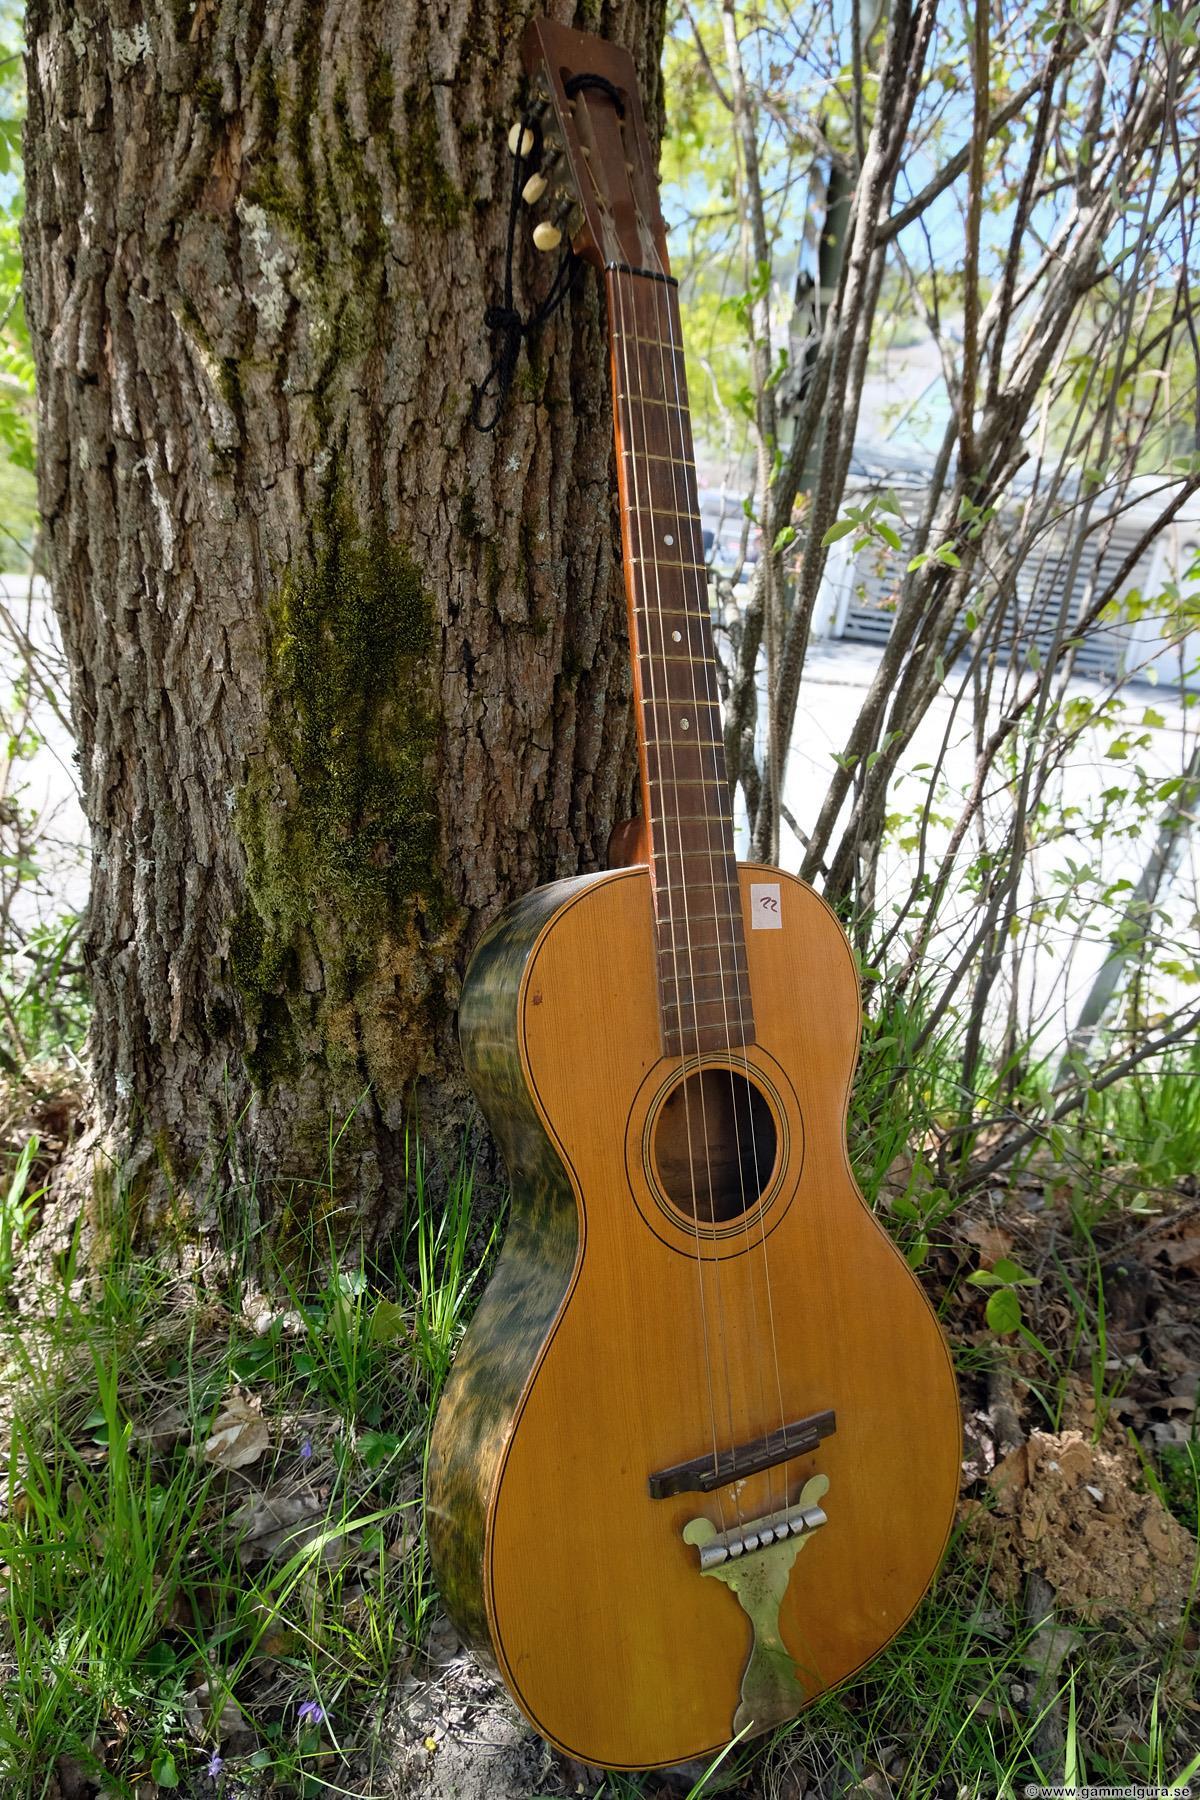
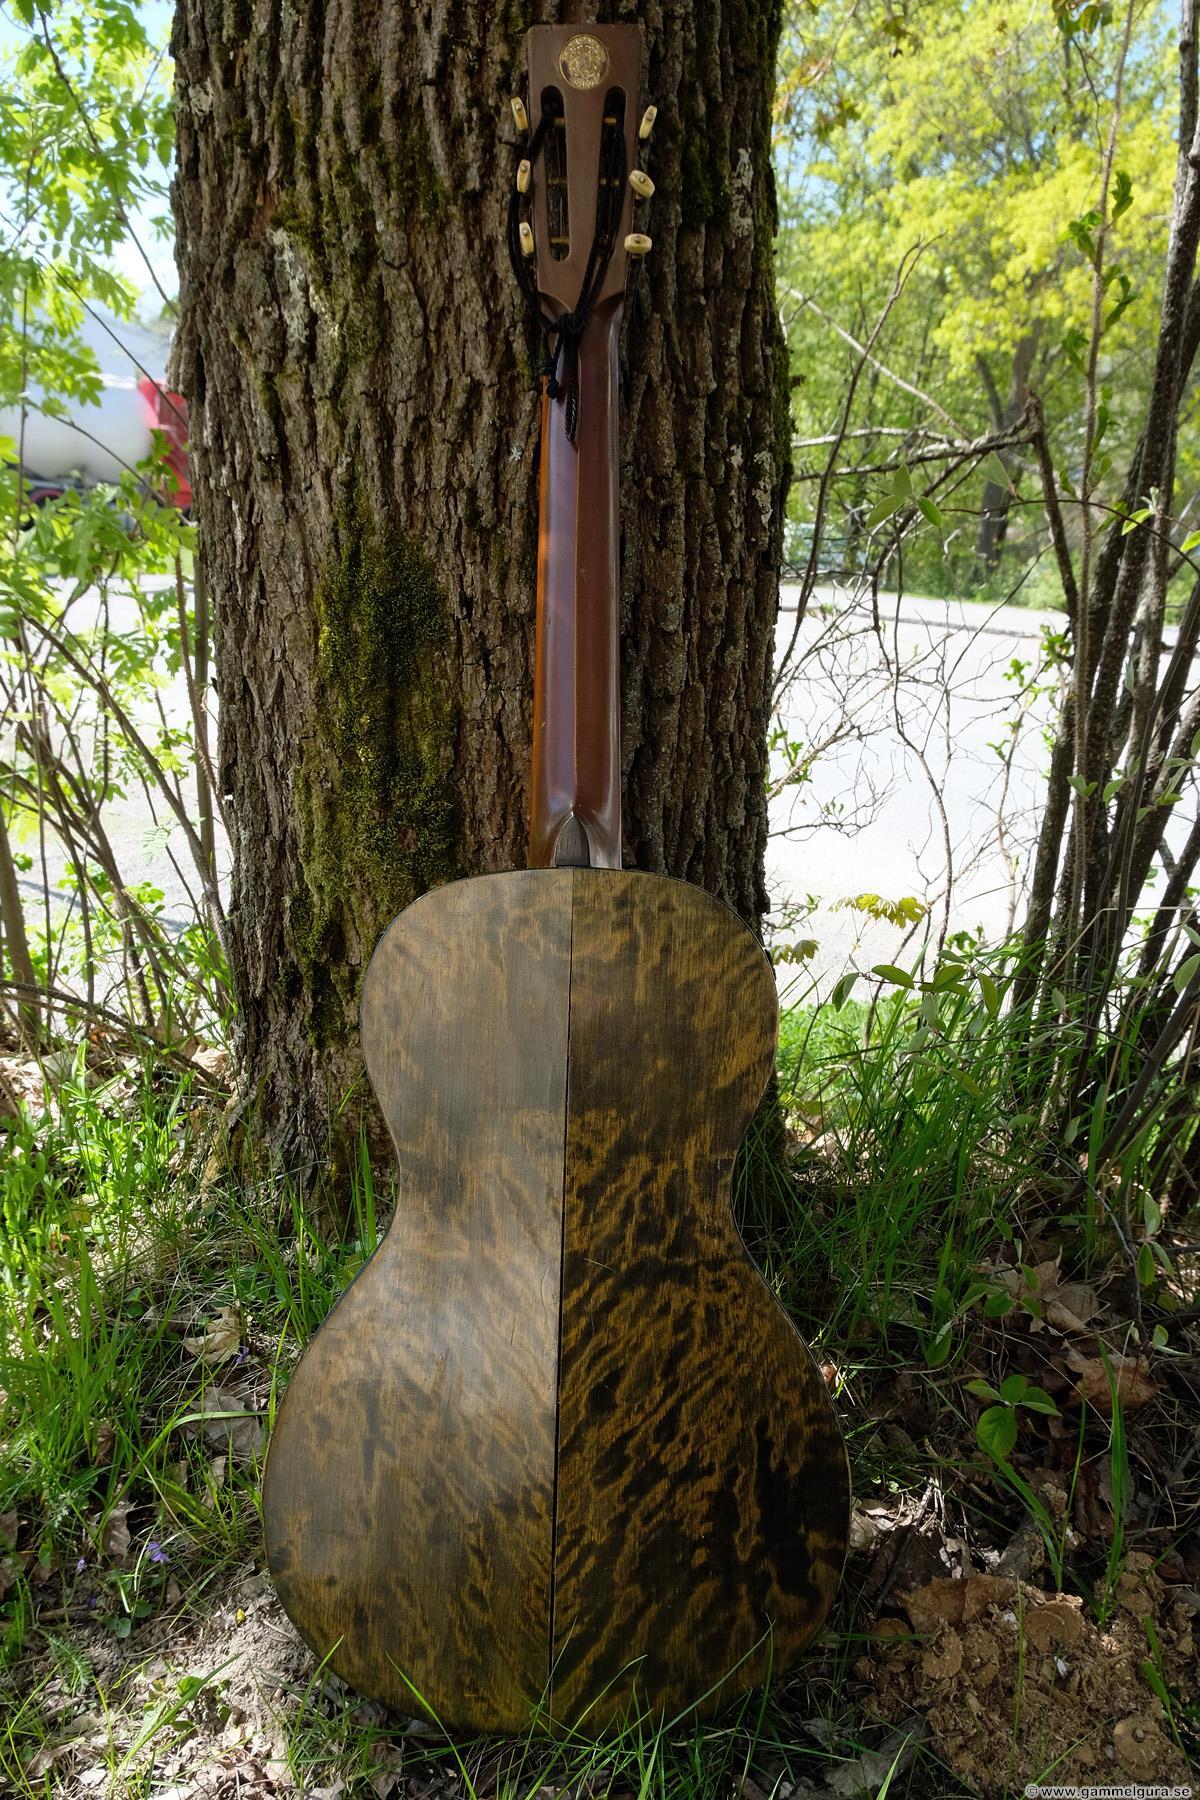
The very latest to be finished was a nice Levin 1915 from my waiting room; number 22. It was in decent condition, the biggest problem was that the flaming birch at the bottom had shrunk and left a big crack along the middle joint. It had a floating bridge with the charming "Mickey Mouse" tailpiece and tuner in good condition. A nice detail was that some of the original paint on the brass plaque on the back of the head remained. The neck was in soft slightly green colored poplar, not birch as in examples after about 1920. For me the poplar neck is better, poplar is too soft for steel strings and most have a bend in the middle, but with a carbon fiber rod, you get a neck that is both stiff and light which usually sounds better than a birch neck. Levin parlor guitars are available with three different deep sides, this one was the thinnest; about 8 cm. Immediately when I felt it, I noticed that it felt promising with long sustain. It turned out that it was also very good when it was finished.


Opening it was not a problem. Inside it looked as they usually do, one of the bottom braces had disappeared on the way. The classic birch stick under the bridge does not enhance the sound, if you remove it the guitar sounds at least twice as good. After several attempts at the beginning of my career, I have concluded that it is not possible to make a floating bridge sound as good as a fixed bridge. Nowadays, it is obvious to convert to a fixed bridge, not least to be able to use plugs and a segmented saddle. It is also much easier to mount a K&K mic with a fixed bridge.
The braces in the top and bottom were removed, the ones at the bottom almost came off by themselves; the ones at the top sat better. The bottom block was split in half and a piece of thin plywood was glued on as reinforcement. The kerfing around the bottom needed to be re-glued in a few places with hot hide glue, a few cracks in the top were also glued. The poplar neck had a carbon fiber rod glued in.
The customer wanted to keep the original tuners if they were good enough. Because the cog with the post is placed above the screw on old tuning screws (up to the early 1920s), even old and slightly loose tuning screws can become tight once the strings are tensioned and the cog is pushed against the screw. These worked almost as well as new after straightening the posts and a round of lubrication. Some of the knobs were a bit loose, which can rattle when playing. A drop of thin superglue in the gap between the knob and the post solved that problem.

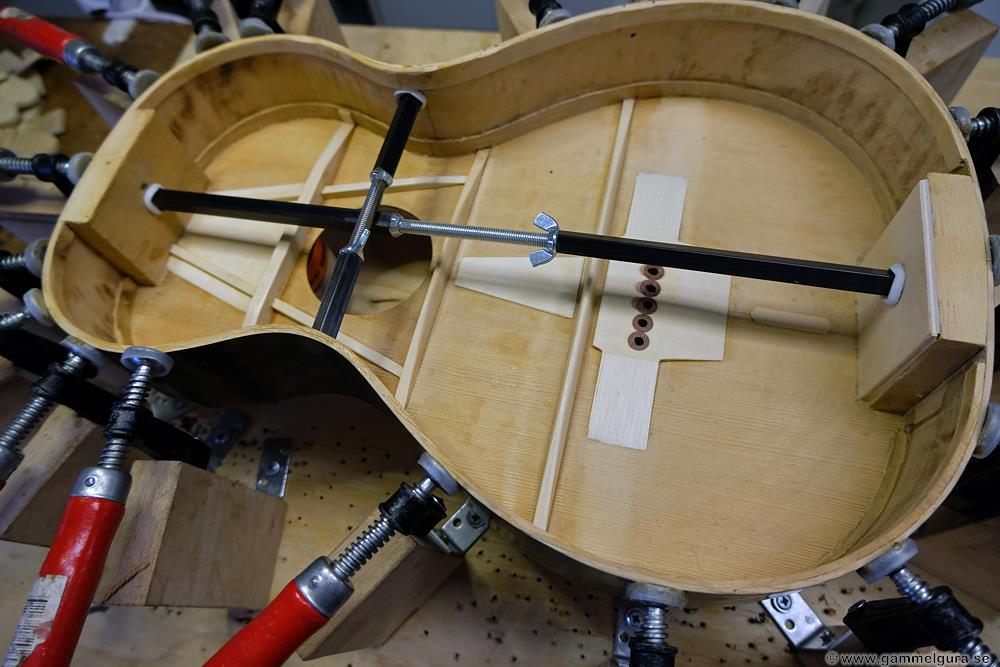
The top was slightly deformed in the middle, to make it flatter before gluing the braces, the top was wetted up and pressed overnight. The bottom had shrunk considerably, the crack was too wide to close only with clamps and glue. New wood was needed, either in the form of a center stick or a binding around the bottom. Nowadays, I have concluded that the binding is preferable to a center stick, it is very difficult to smooth a center stick without scratching the paint. The crack in the middle was glued together and when the bottom was then to be glued, I tried not to squeeze the sides together more than a 2 mm thick strip of rosewood could fill the gap all around the rim. In principle, the bottom was widened by 4 mm. A channel for the rosewood binding was milled out when the bottom was glued in place, and the binding was glued with hot hide glue. It also looks much better with a binding than a center stitch in a figured bottom.
The top and bottom were about 0,5 mm too thick, as usual. The inside of the bottom was thinned out in my drum sander using my vacuum jig, while the top had to be planed and sanded on the inside to just under 3 mm. The burn stamp at the bottom had to be sacrificed in that process, on this one there was still a bit of the stamp left as the bottom was thinnest in the middle. The bottom also received a center stick to hold the two halves together.


The walnut fingerboard was changed to a light-colored Madagascar rosewood that gotwas sanded to a 16″ radius; a new pyramid bridge was made in the same wood. The customer wanted to keep the pearl dots on 5, 7, 9. I prefer a clean wood fingerboard myself, but it didn't take long to drill and glue the dots into the new fretboard.

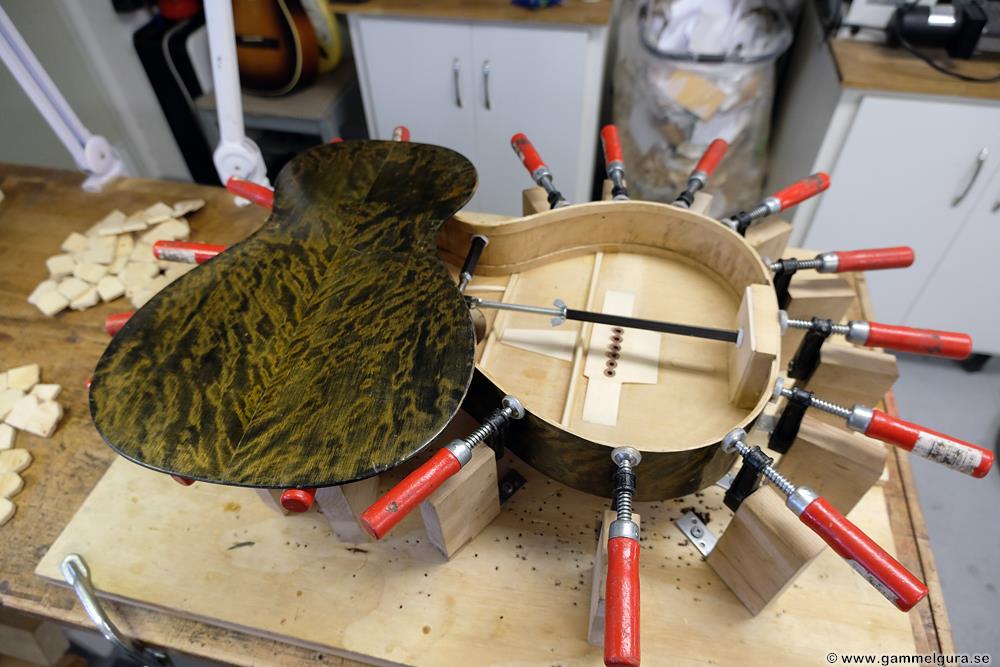
The flamed wood in the bottom and side was a beautiful yellow-green, the picture taken on my work bench when the bottom was glued is most true to reality. In the middle of the darkest winter, it is difficult to take fair pictures of guitars outdoors. The G-string at the nut intonation needed the most correction, and the A-string the least. About 1 mm of the fingerboard was cut off at the nut. The intonation points in the saddle also varied a lot, the saddle had to be about 4,5 mm thick to reach all the intonation points.

It was strung with Newtone Heritage 0.12 strings and allowed to vibrate for three days. It turned out very well with high volume and long sustain; the typical GammelGura sound 🙂 I rarely have problems with wolf tones in my GammelGura nowadays, it's always there of course, but not so dominant that you react to it. I think the segmented saddle spreads the frequencies from the strings so that they don't all end up in the same place as the body's resonant tone for a particular note on the fretboard, which either enhances or kills the tone. It turned out very well!


What is the difference between shellac and spirit varnish, really? Can you use shellac young as you do spirit varnish, apply with a brush?
Ok, thanks then I know 🙂
Alcohol varnish consists mostly of shellac dissolved in alcohol, but also small additions of other resins which mean that it can be easily brushed on. There are those who, for example, spray paints with alcohol varnish. Pure shellac is applied by hand using the French polishing method. It is difficult, tedious and takes a very long time. The advantage is a mirror-like surface when finished, think piano. Spirit varnish can be varnished in a day or two if you are not extremely particular about a mirror finish, which I am not on an old parlor guitar.
Turned out great. The bottom, not least, looks fantastic!
Craving for games! "Mickey's shadow" will eventually disappear "in the sun", ...right?
…but you. 400 songs. Impressive!
Yes, it turned out very well. The "shadow" will slowly disappear over time. Exactly how long it takes, we'll have to wait and see. If you have it in the sun or in UV light, it goes faster.
For a while I did a song or two a week, it will be a few over time. I've scrapped the first 100 that don't count, except for a few that happened to be pretty good. Actually, I never even tried to get good at the guitar, it was only used as a tool to make songs. With time and slow practice, I've of course become quite adept at the most common chords, but don't ask me for a solo! 😉
😊👍🏼