
When I make new ribs for the lid and the bottom they always have a weak curve / radius at the glue joint. You do not want either the lid or the bottom to be completely flat for several reasons. Partly for strength but also for better tone mainly in the lid.
When wood dries, it shrinks. If a thin plate, such as a lid or bottom of a guitar, has a curvature and shrinkage, the curvature will decrease but the plate will not crack until the plate is completely flat as the shrinkage begins to pull the fibers apart. Thus, a curved spruce cap or bottom has a built-in safety that allows the cap to shrink some without cracking. A curved lid also becomes stiffer and gets a more focused tone, a completely flat lid is looser and vibrates smoother and less controlled. If you curl the lid too much, you lose too much bass and get too much mid-register and treble, which is always best.
Personally, I also think it is positive that the lid and bottom inside the guitar are not completely parallel, the curvature spreads the sound waves' reflections better with less risk of standing waves.
Well. So far, I have used a "brace sander" from LMI to shape the ribs. 30 ″ radius for the lid and 20 ″ for the bottom. After a rough planing, I sand the ribs to their curved shape with a coarse sandpaper in the jig.

Polare Per Marklund uses another better method with the help of a sharp planer that I plan to use in the future. To release the abrasive dust and get a smoother surface for the skin glue to attach to the lids, maybe it can go a little faster too. Here are some pictures of the finished jig.

The jig consists of a “sliding board” for the planer, a special clamping clamp, a couple of wedges and my two templates for 20 ″ and 30 ″ curvature (made with the LMI jig).
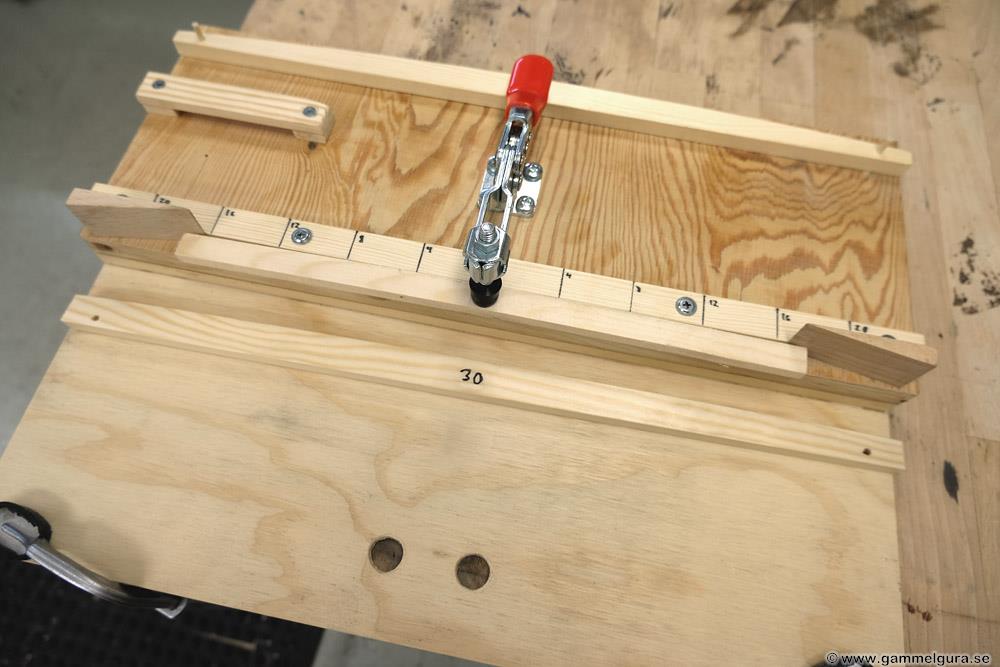
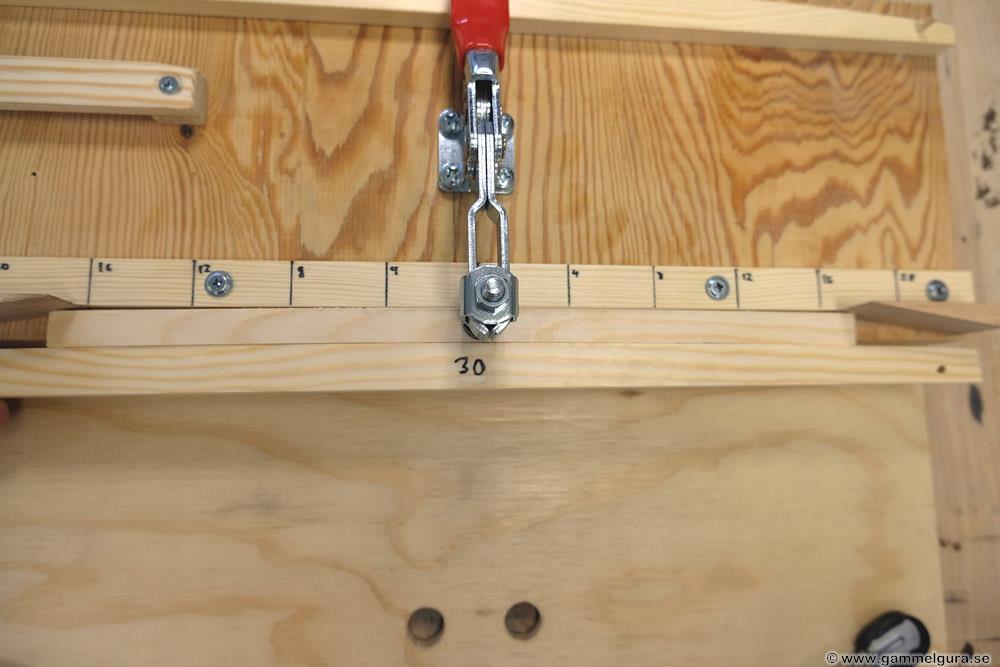
The ribs in spruce, which have a standard shape 15 mm high and 8 mm thick, are clamped with the clamping wing in the middle. Marked every 4 cm to more easily place the rib in the middle with the eye dimension. I folded a small piece of coarse sandpaper into the jig during the forcing to hold the bar better and not to clamp too hard. Two wedges are pressed equally far in between the rib and the abutment on both sides to curl the rib. Depending on the length of the rib, the wedges are squeezed into different depths, the further in, the greater the curvature. The curvature is double-checked and adjusted to the template.

With a larger and sharp planer, the underside is planed on the bar plane. When the planed bar is detached from the jig, it springs back so that the curvature is inverted and gets exactly the curvature you wanted, 30 ″ in the example. The planing also gives a nice 90 degree angle between the underside and the side of the bar along the entire curve, which can be difficult to achieve if you sand freehand (the LMI jig also gives a 90 degree angle).

Luxurious to it with a small "stall" for the wedges and two round sticks in birch to clamp my two templates for lid and bottom. The jig can easily be hung on the wall together with other larger plates for different purposes 🙂
Brilliant!