Refret of a Russian Krasnoshokov guitar from 1873

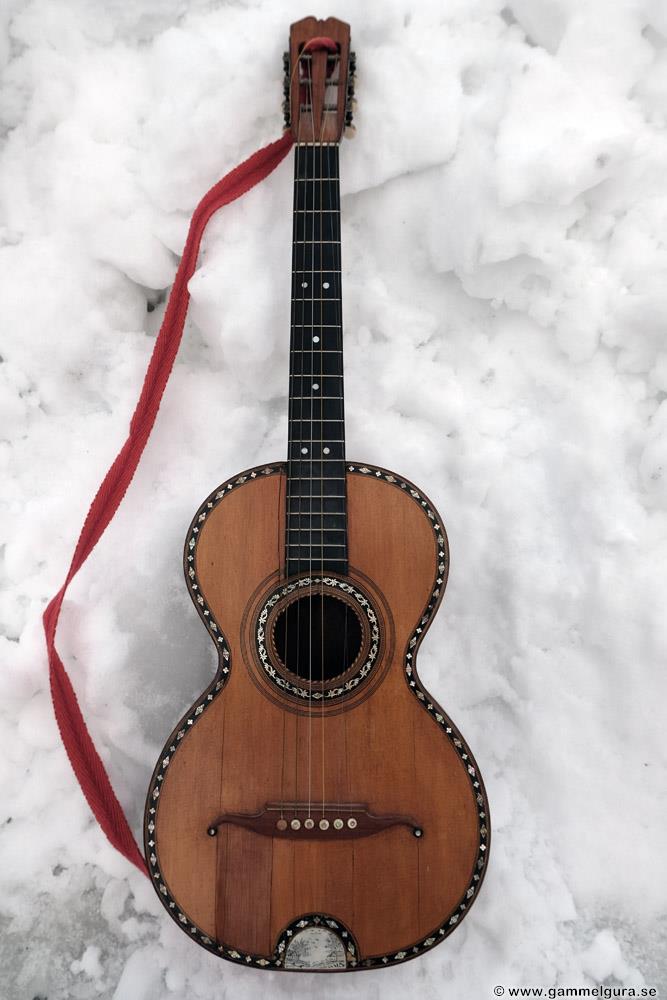
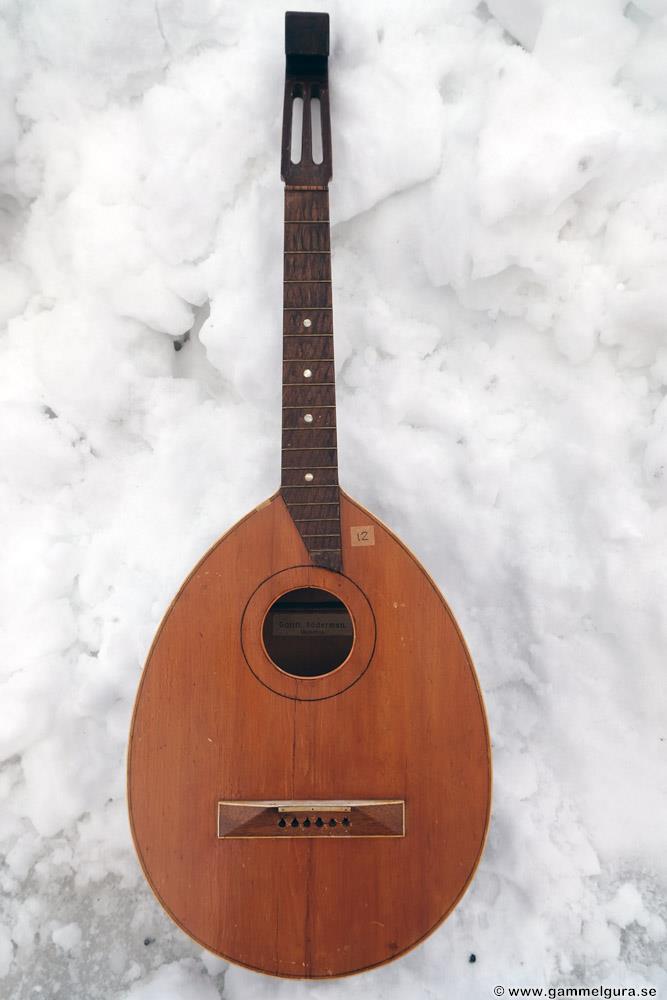
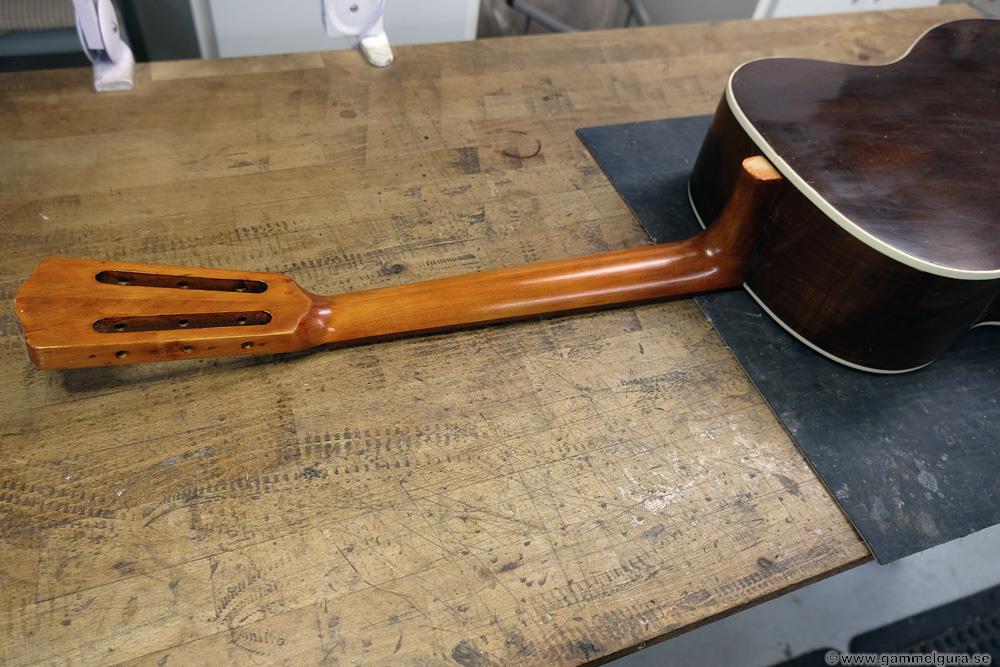
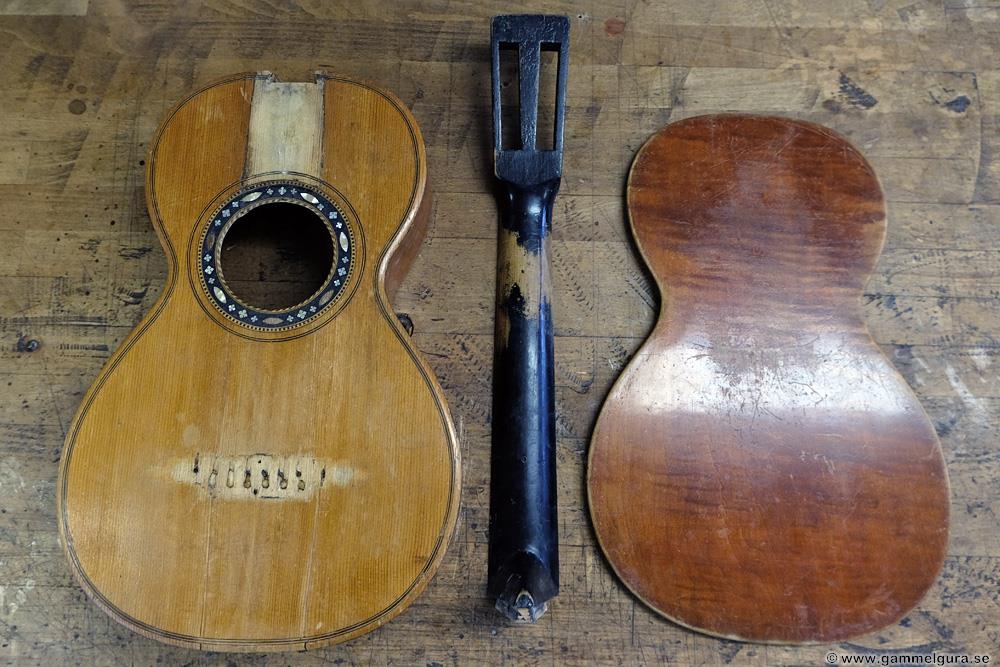
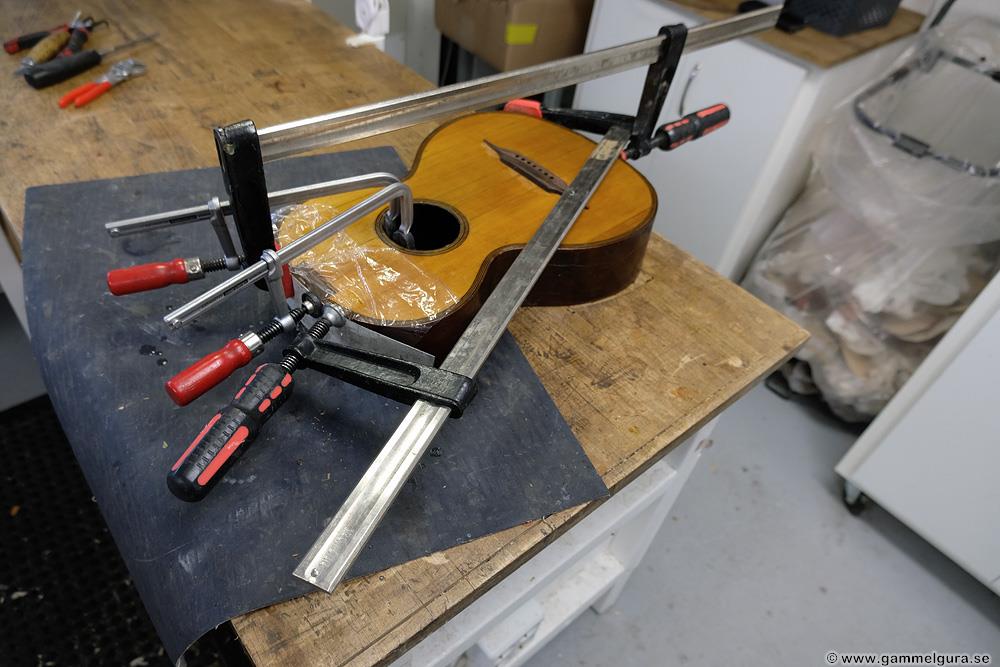
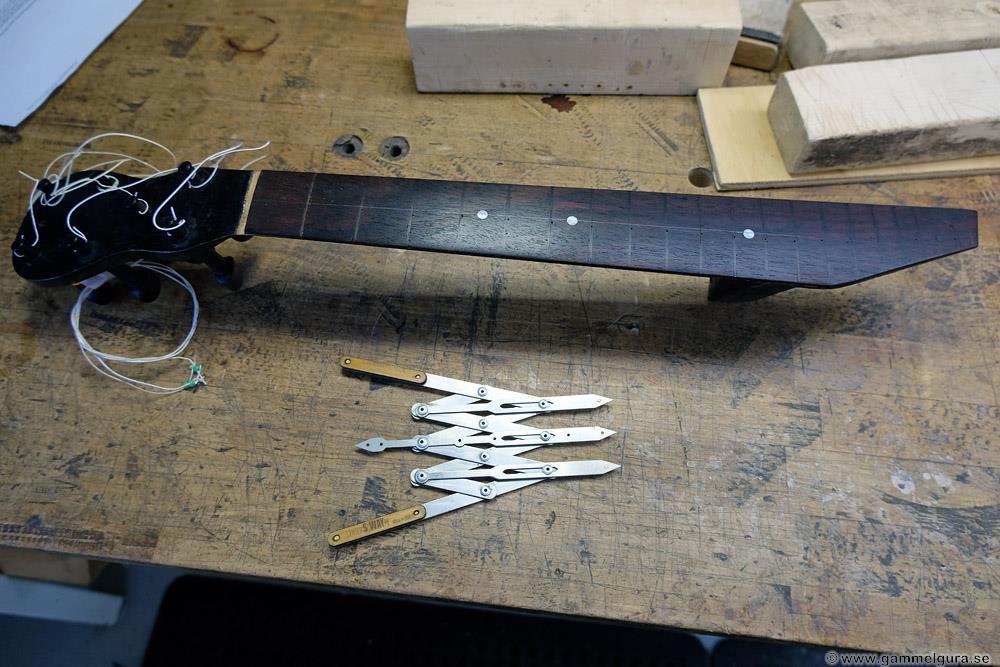
It's not often I get a repair or GammelGura back. But I got this renovation back when it turned out that the guitar played false above the 12th fret. In a GammelGura I always double-check the fret placement if an original fretboard is to be reused, this was a renovation.

All frets below 12th were placed by eye, no less than 4 mm error in the placement on the worst frets! It's a phenomenon I've come across several times on 1800th century guitars, that the frets up to the 12th are OK, while the ones below are completely misplaced. What this is due to can be speculated on, perhaps there was a table that many people used that ended at the 12th fret. Whatever the reason, it doesn't cost more to place the frets correctly instead of incorrectly. You might think it's a bit charming and that the correct placement looks more boring and less organic, but if you're playing the guitar, it's probably best that they're in the right place.

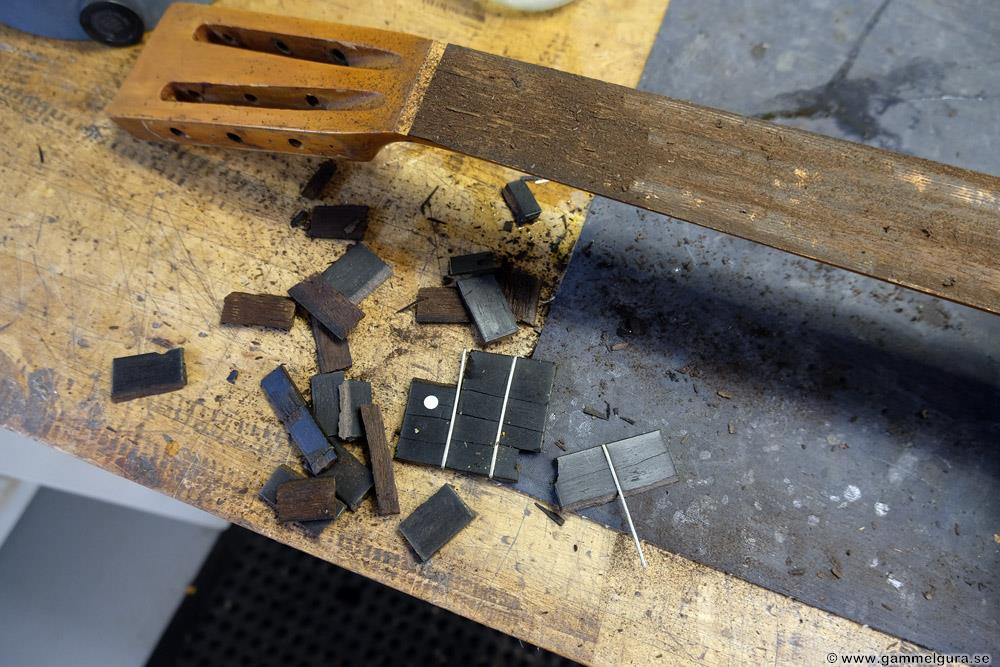
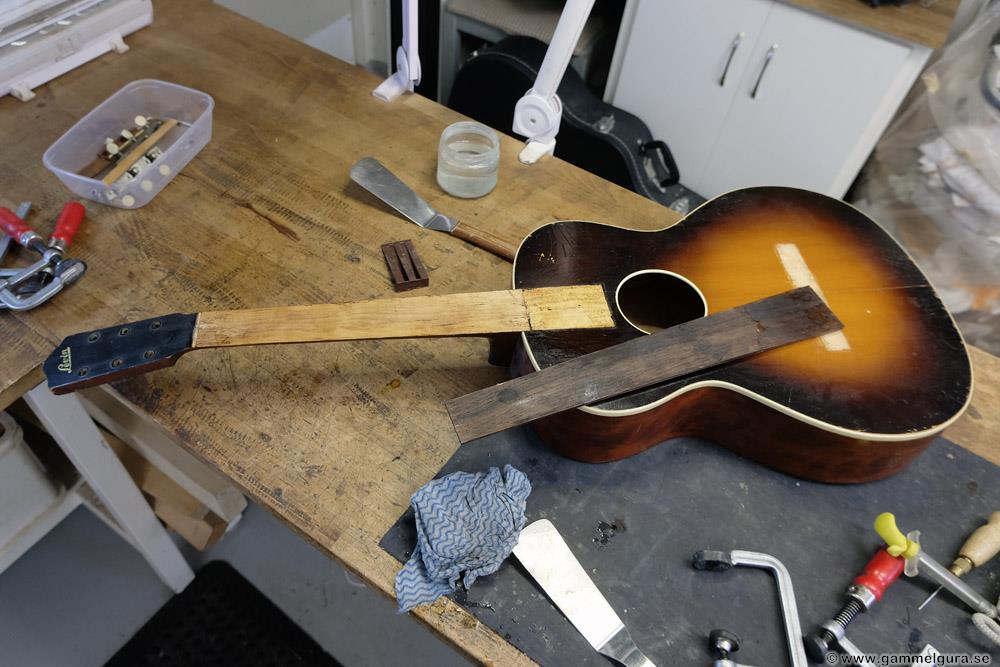
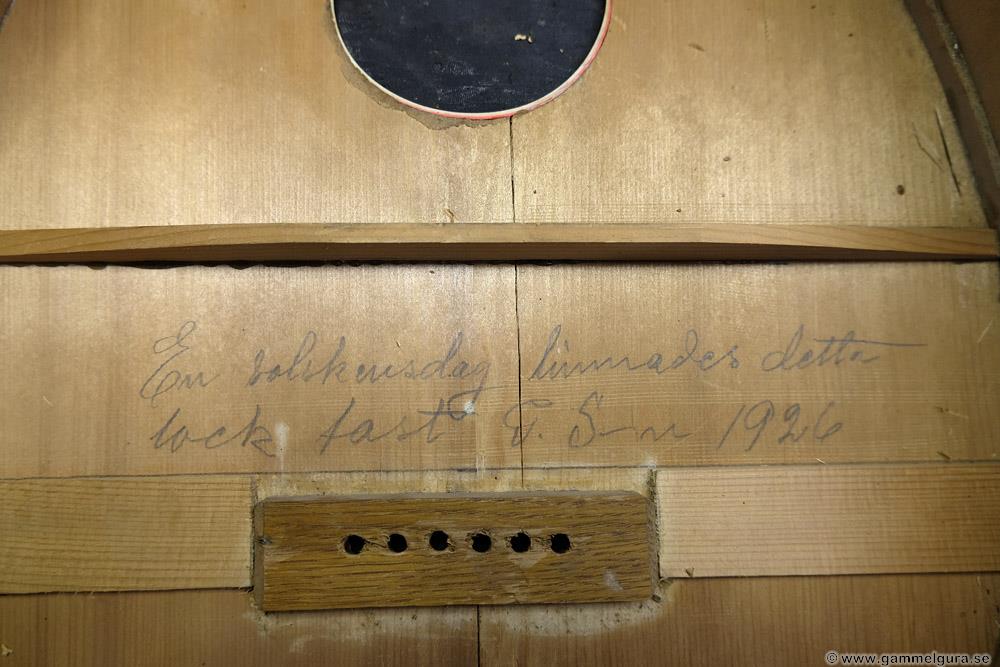
To move the frets, the old fret slots must be filled again with sticks in the same type of wood as the fingerboard. The frets were of the type "bar frets", they are completely flat and as thick as the top of the T in modern T-bands. They also have the function of giving the neck a backward bend by pressing down thicker frets than the frett slot is wide. With different thick bar frets, you can adjust the back bend and keep the neck straight with taut strings. It is an art that few have mastered these days. Only Martin kept bar frets right up until the 1930s, if you see bar frets on an old guitar it is most likely a guitar from the 1800th century. In parentheses, the modern T-fret on the Bay State guitar dated to about 1888 was in the current batch, and they appear to be original, they probably came earlier than I thought.

There was a risk that the neck would be bent more by the string pull when changing to regular T-frets. But since the fingerboard was very thin and in rosewood, which is not the hardest wood, I didn't think it would be a problem. It was later found that the relief became larger with the T-frets.

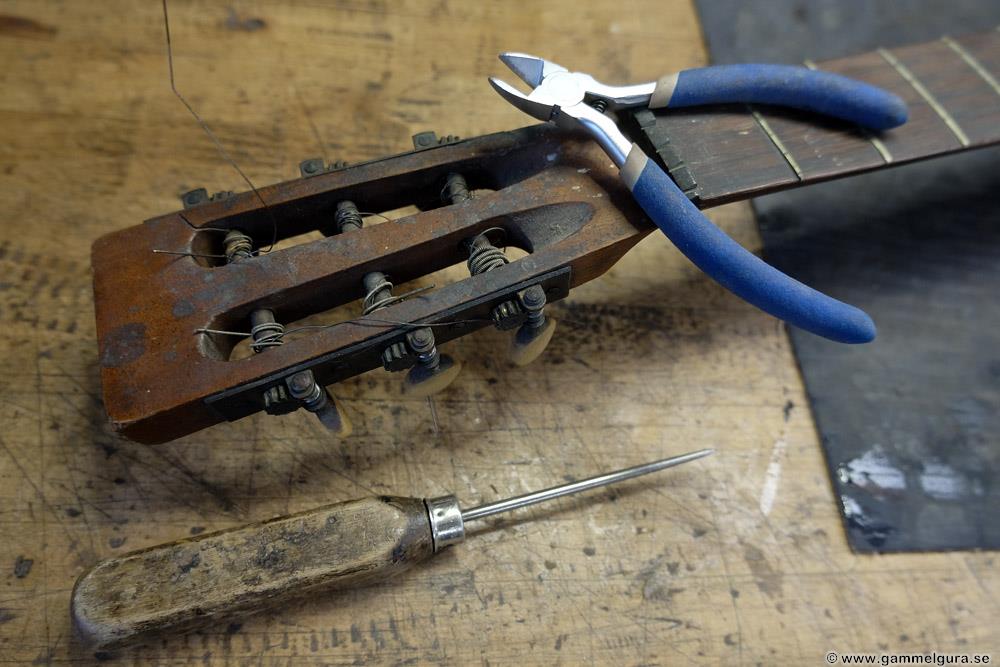
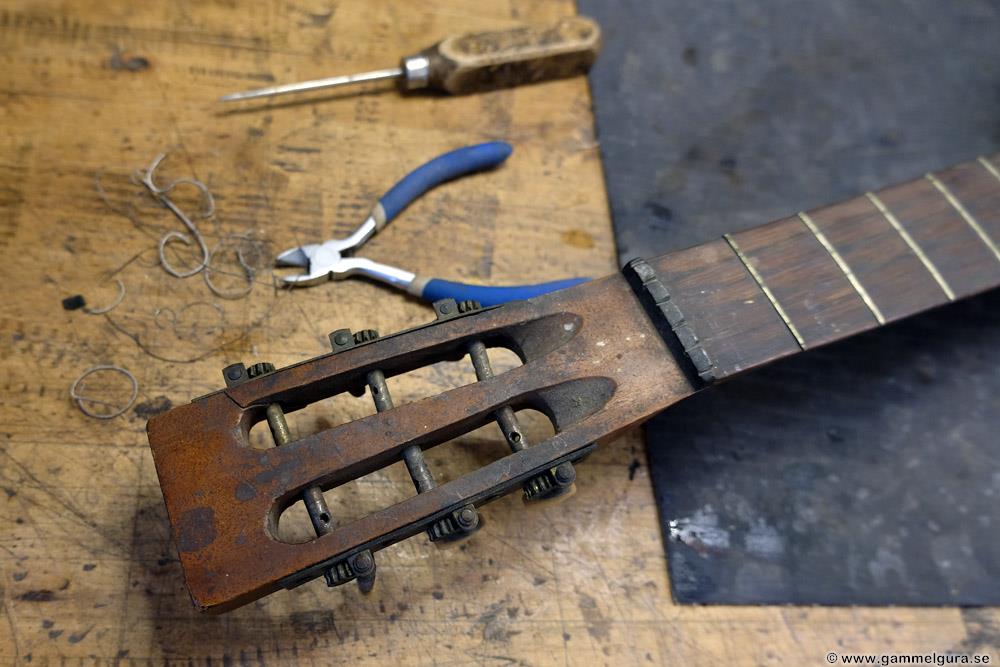
It was relatively easy to pull up the bar frets with pliers. If they had been completely smooth there would have been no problem at all, but many notches had been made with a knife on the underside of the brass frets with small sharp protruding bristles as a result to make them more secure. The small chips in the fretboard that were pulled up with the frets were quickly glued back with thin superglue before they would come off. Modern T-frets have "nibs" to make them more secure, there you always have problems with the fingerboard wanting to split when the frets are pulled up.

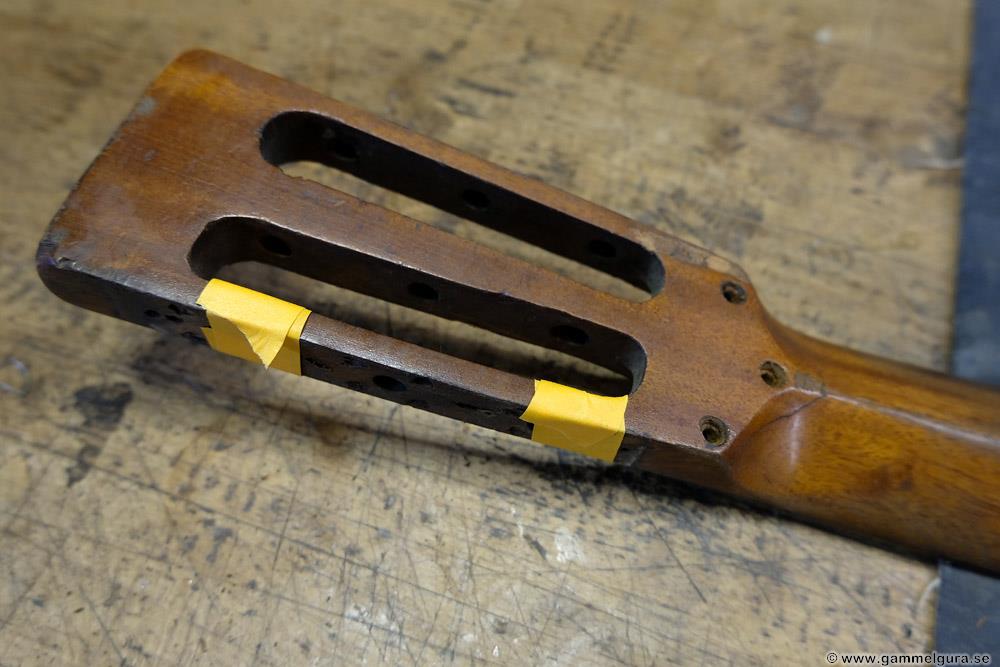
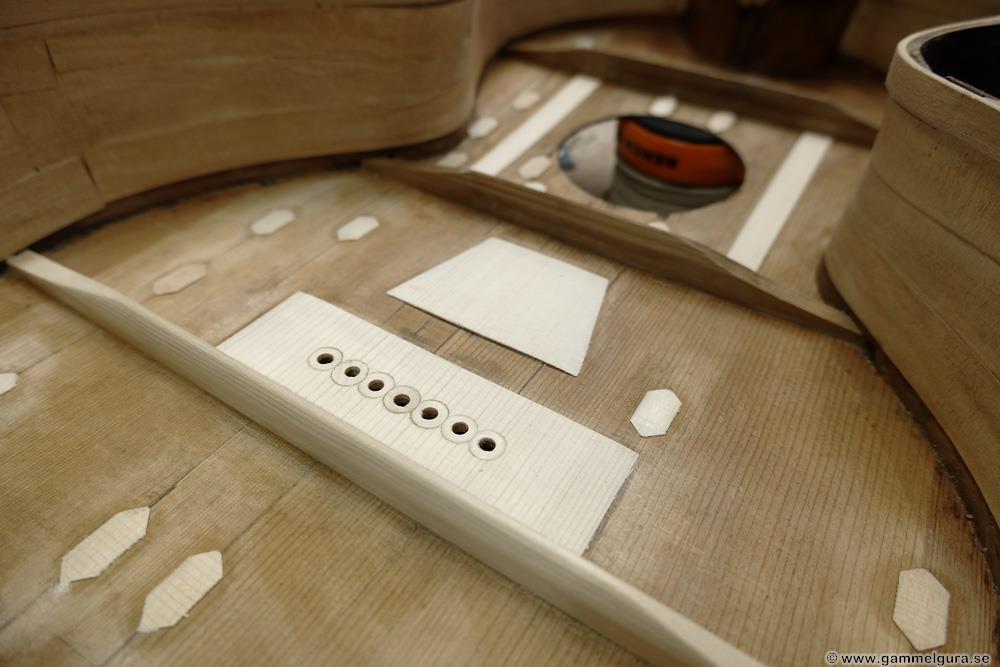
Sticks in rosewood with the same thickness as the fret slots were wide were made and cut to the right length and height.

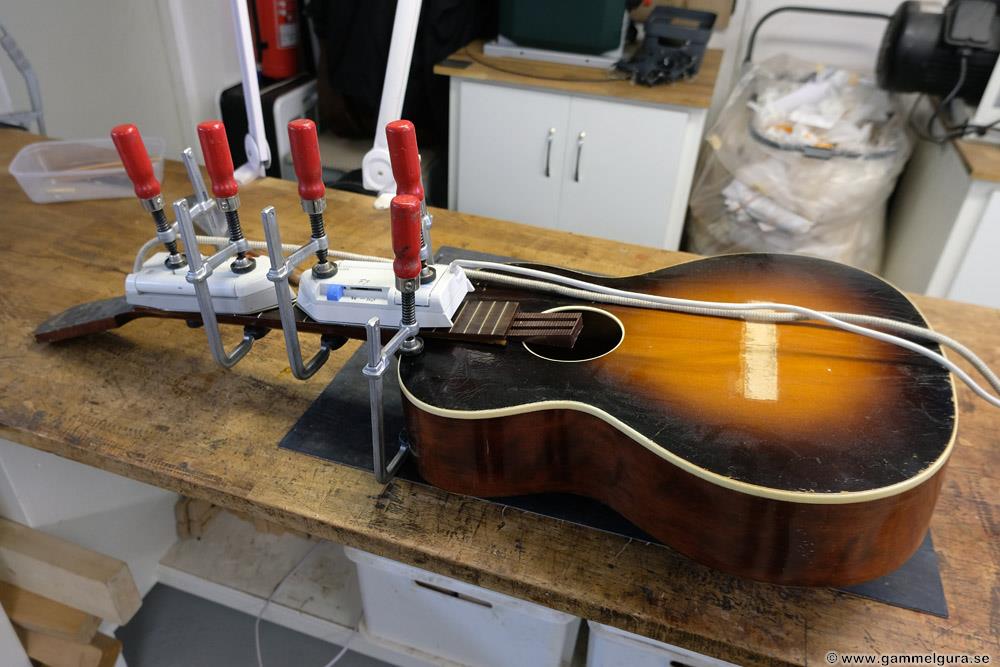
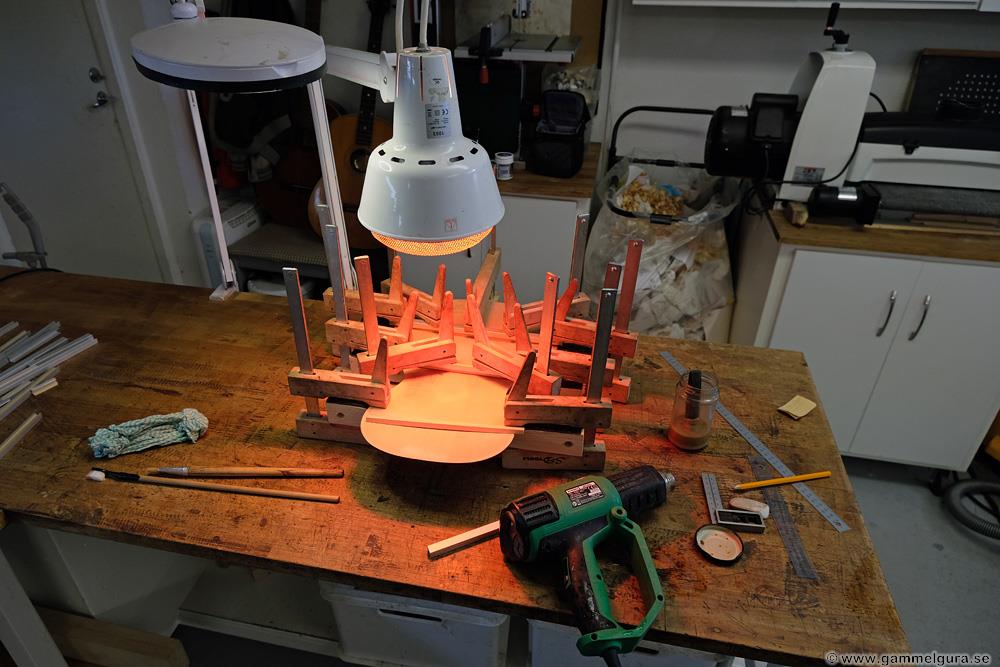
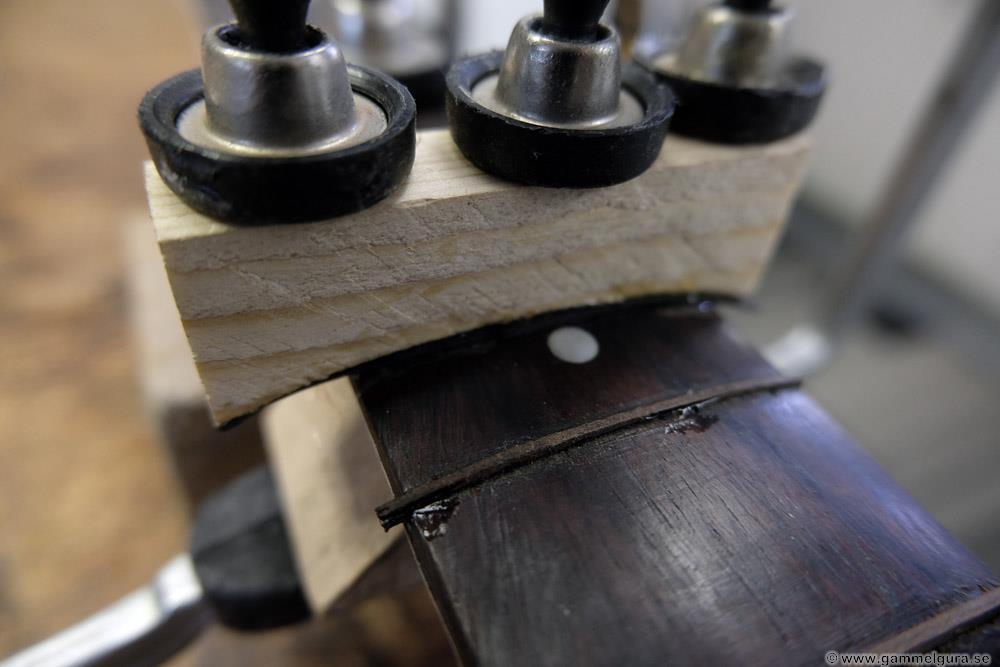
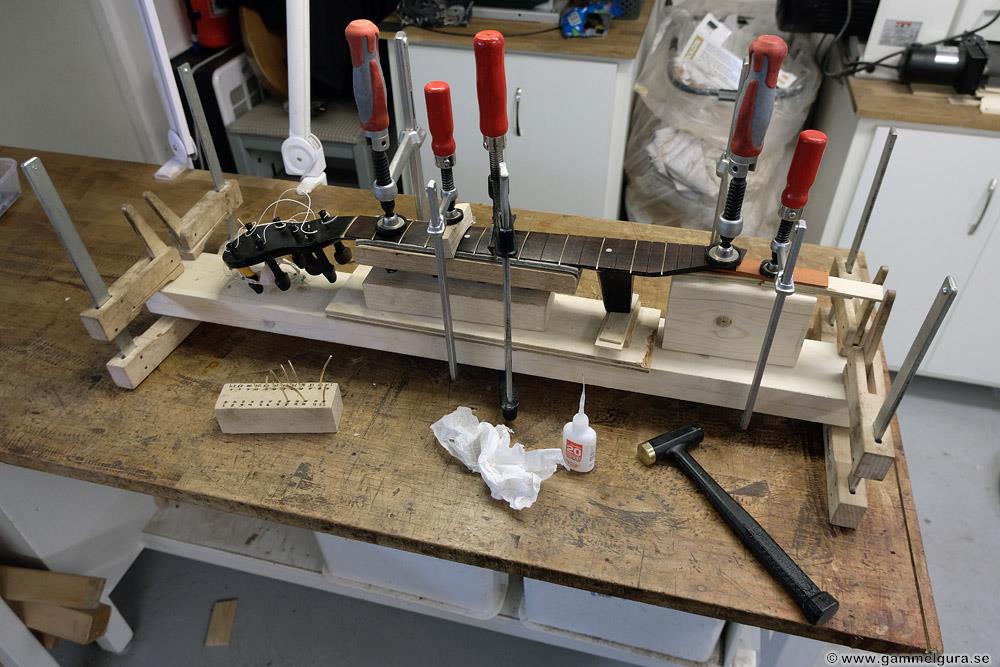
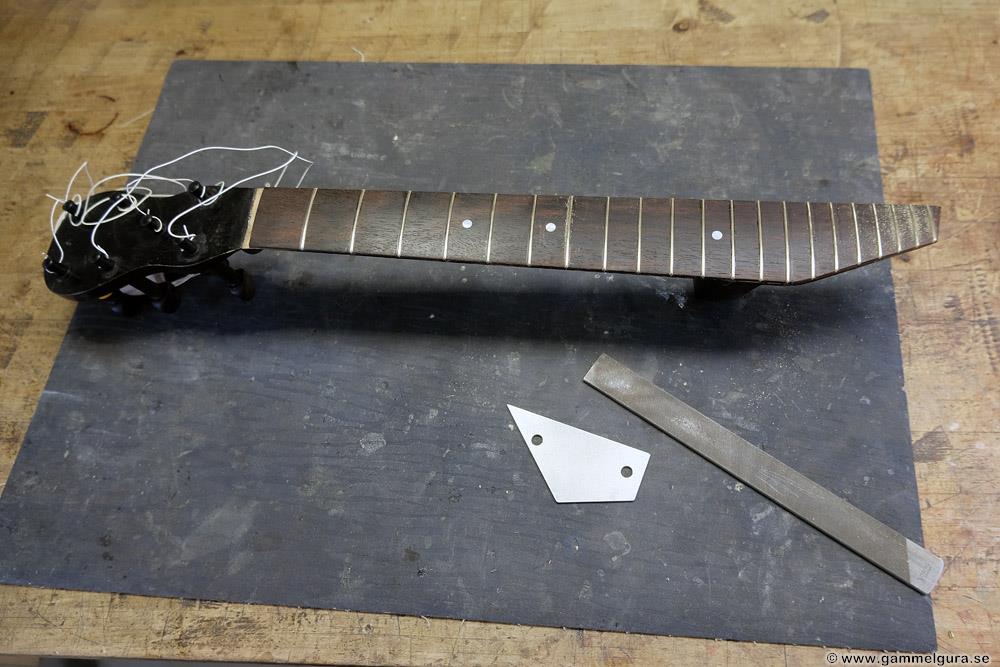
The extreme radius of the fretboard was bigger than the 6″, which is the most curved insert you can buy for my fret press. I had to custom make an insert with a larger bend and also a stop to hold down the most recently installed fret while the glue dried. Even the tool for bending the new frets had to be converted with an extra screwdriver to be able to make the big bend!

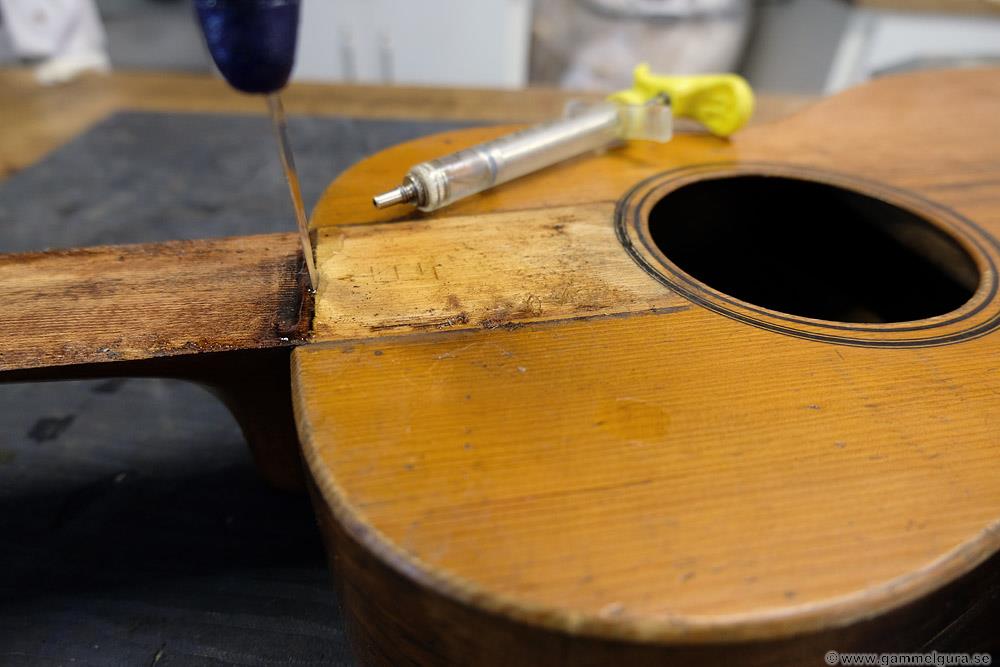
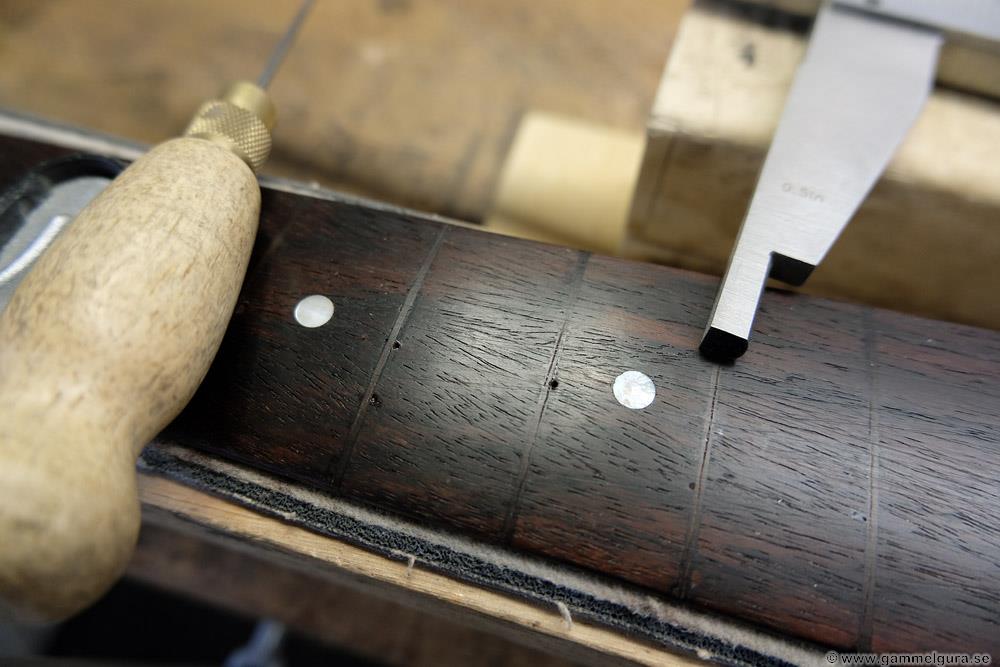
The straight sticks were glued with superglue and pressed into place. When the glue dried, the excess was planed down and the sticks were sanded against the board.

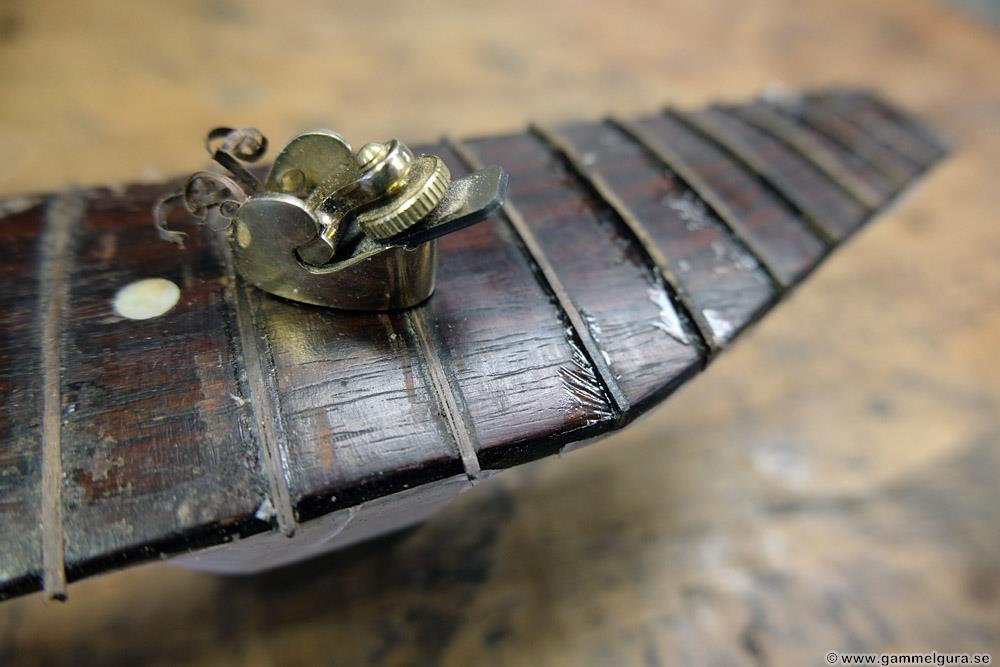
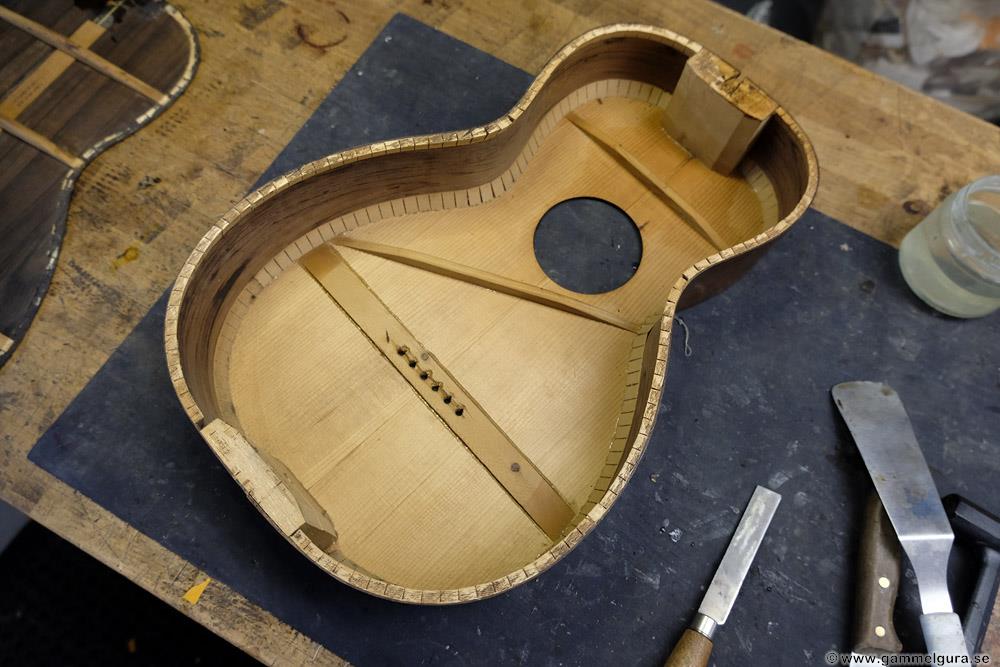
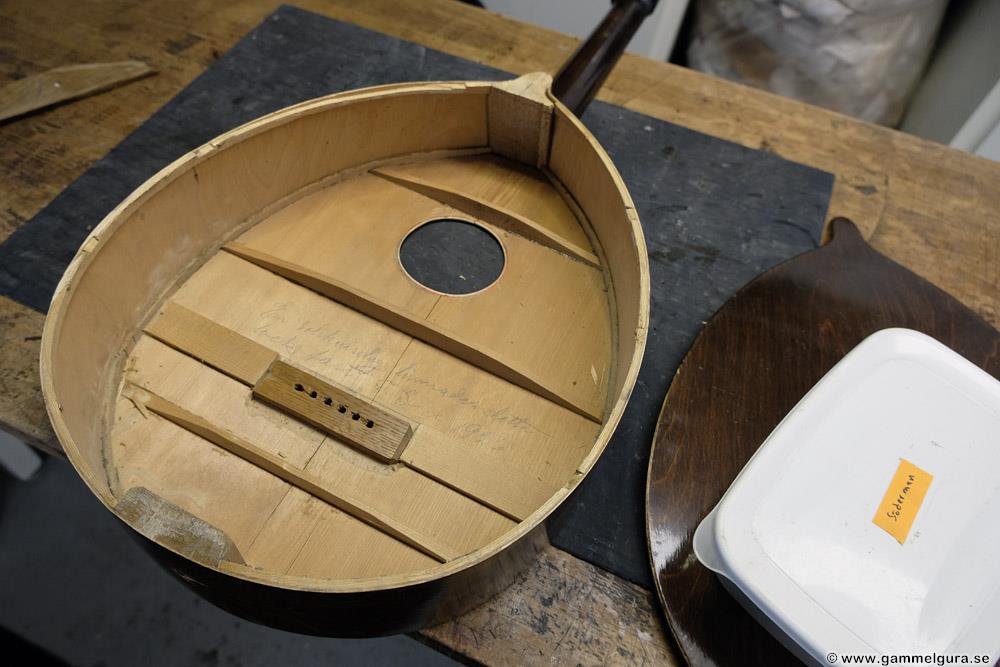
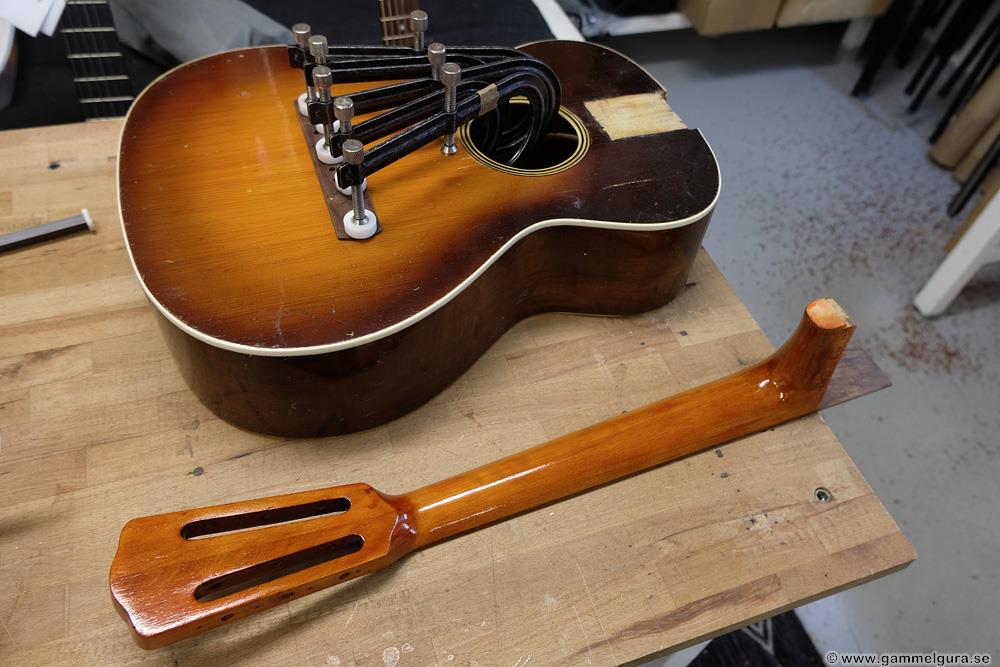
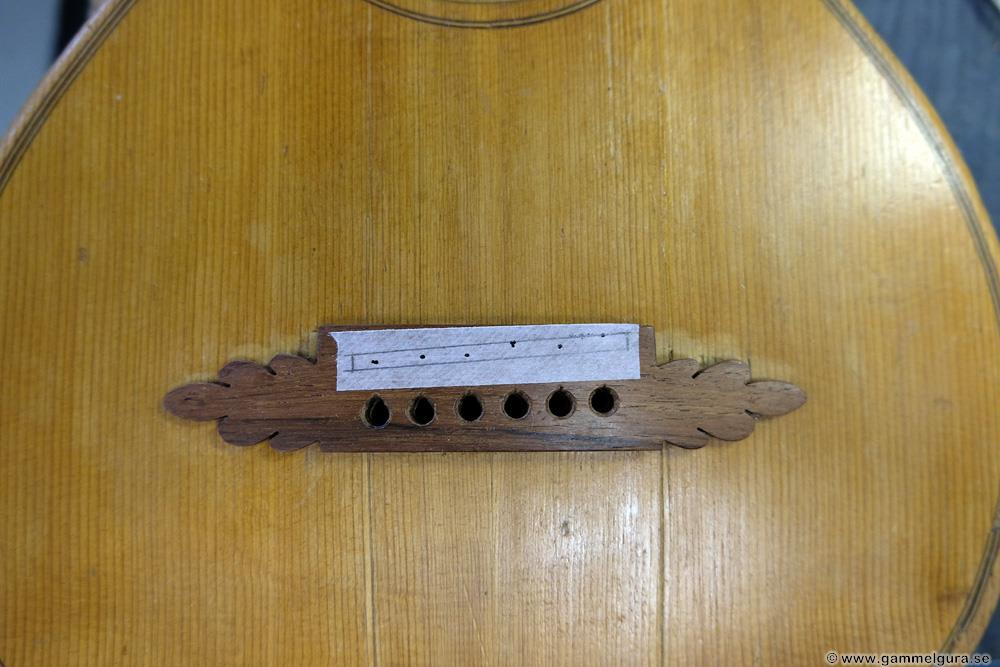
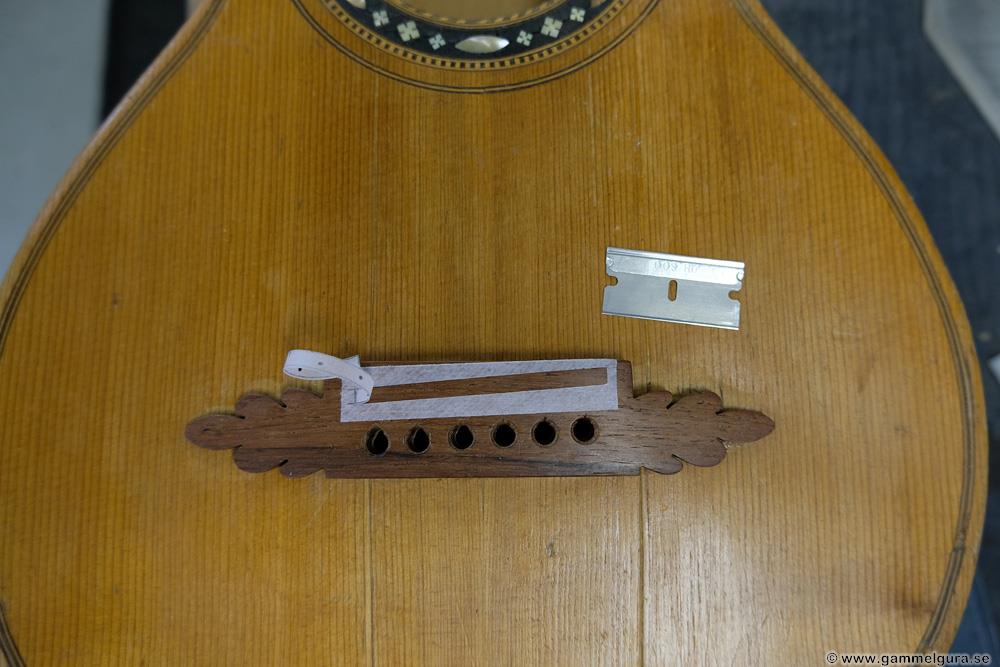
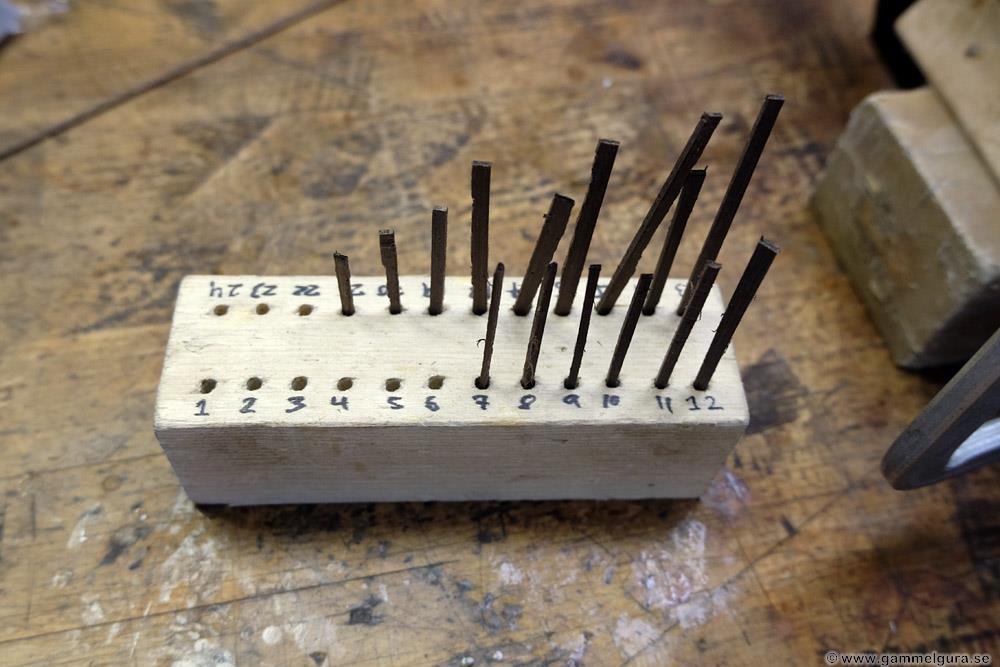
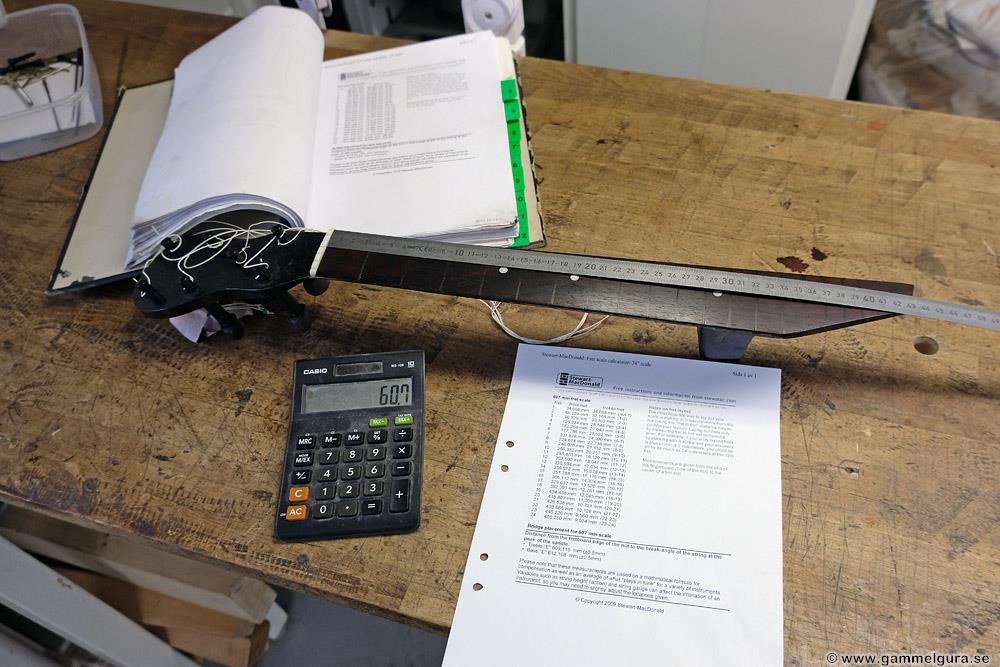
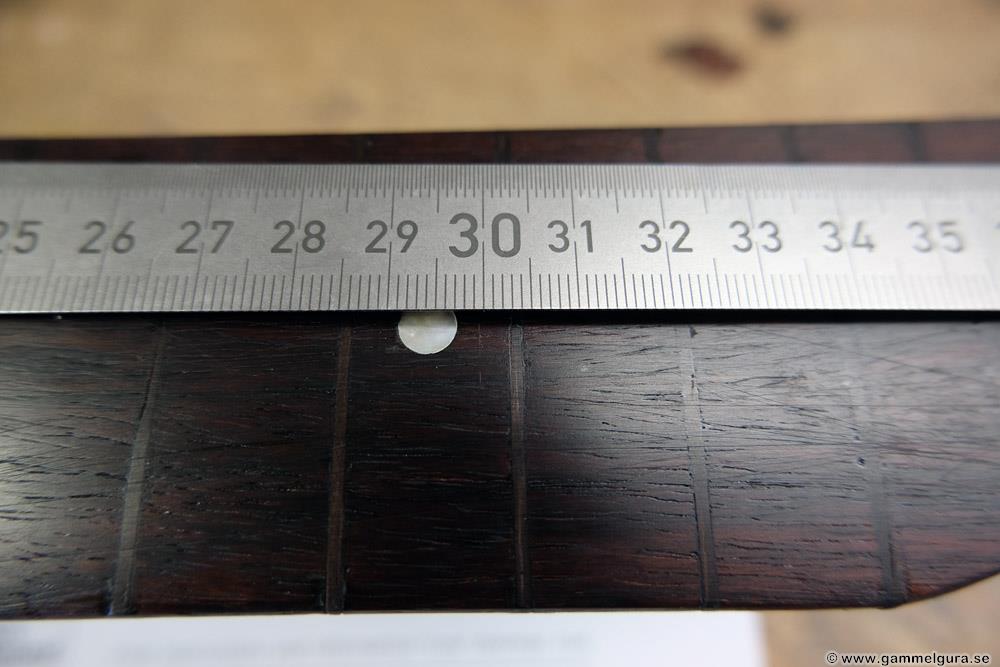
By measuring the distance to the 12th fret, which I used to intonate the bridge, and multiplying by two, I got the open string length (scale) 607mm. About 10 years ago I used Stewmac's fret calculator and printed out a stack of A4 sheets with the distances for all the frets for most guitar and mandolin gauges at 1mm intervals on open string length. The sheets are collected in a folder, and it is quick and easy to find the right measurements. The fret locations were measured on the fretboard with my 50 cm long caliper with 0.1 mm precision and marked with a sharp awl. All the frets up to the 12th were placed about 1 mm too far up the fretboard, the ones below 3-4 mm wrong except for the very last fret which was actually in the right place.

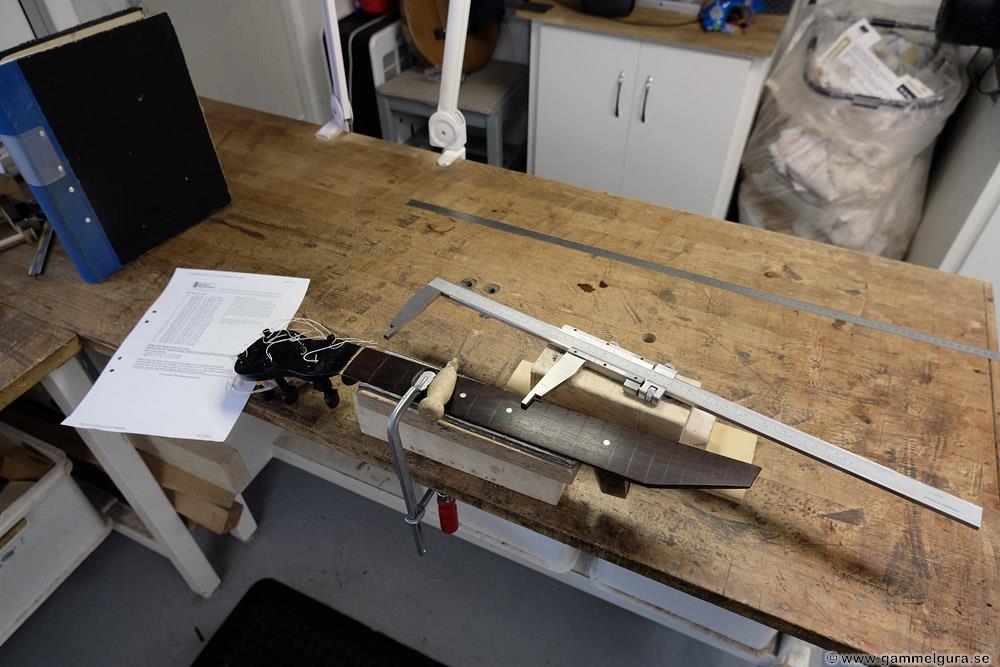
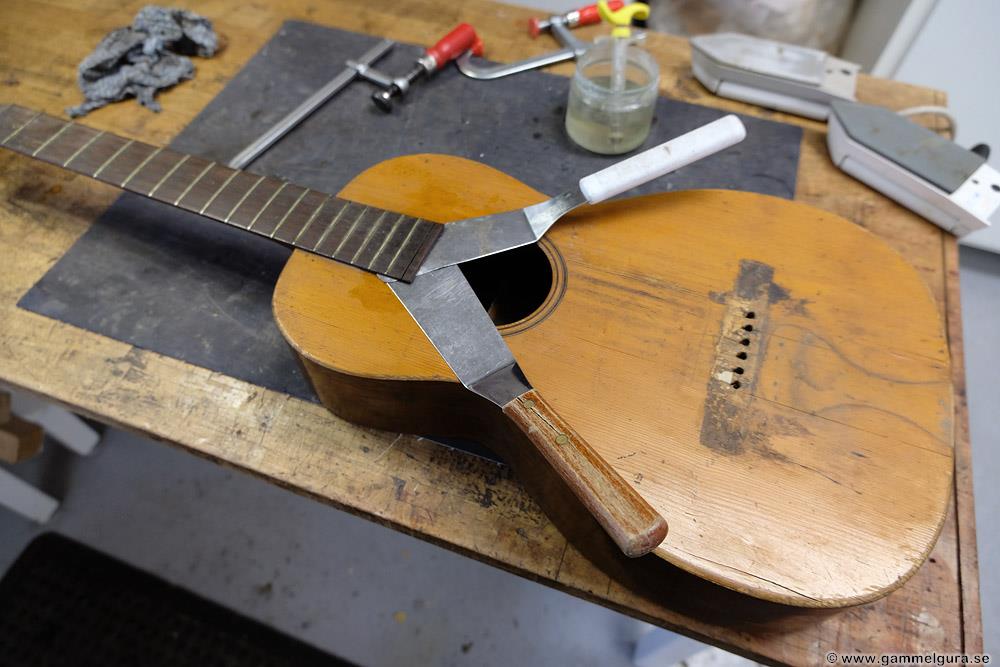
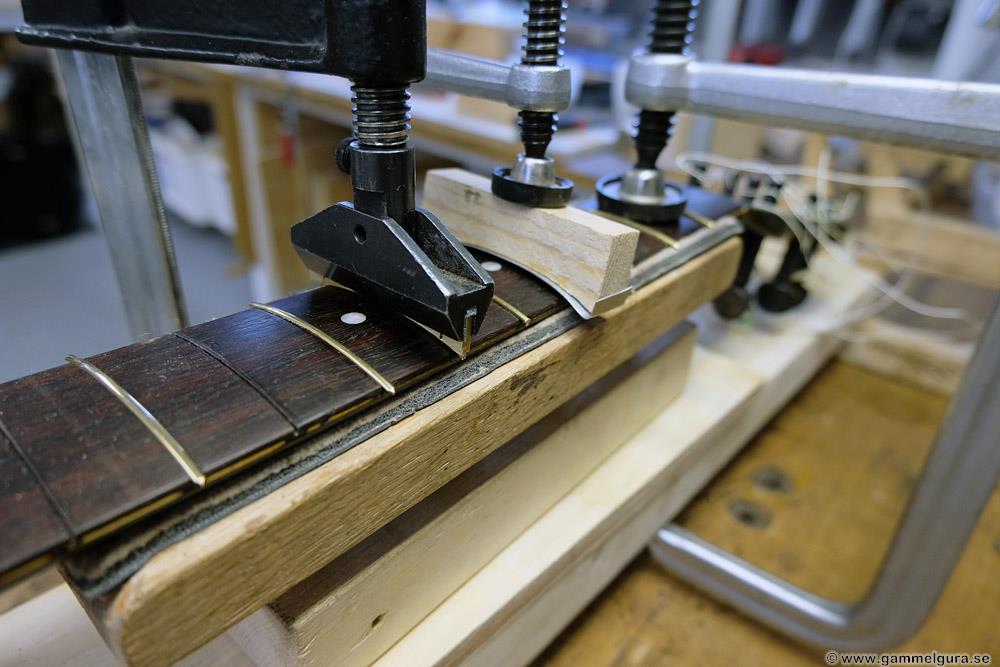
Usually the fretboard is loose, and I can use my Stewmac saw box jig to cut the frets parallel and to the correct depth. When the board is attached to a guitar, I instead make a temporary jig from a straight wooden beam, some wooden clamps, pliers and an angle. Using my cool center finder, it's easy to draw a center line along the tapered fretboard. The neck is clamped so that the distance between the wooden beam and the center line is the same at both ends. The angle is placed so that the saw cut ends up in the middle of the mark. The saw is guided by the edge to the angle, and I saw a fret notch no deeper than the fret tang.

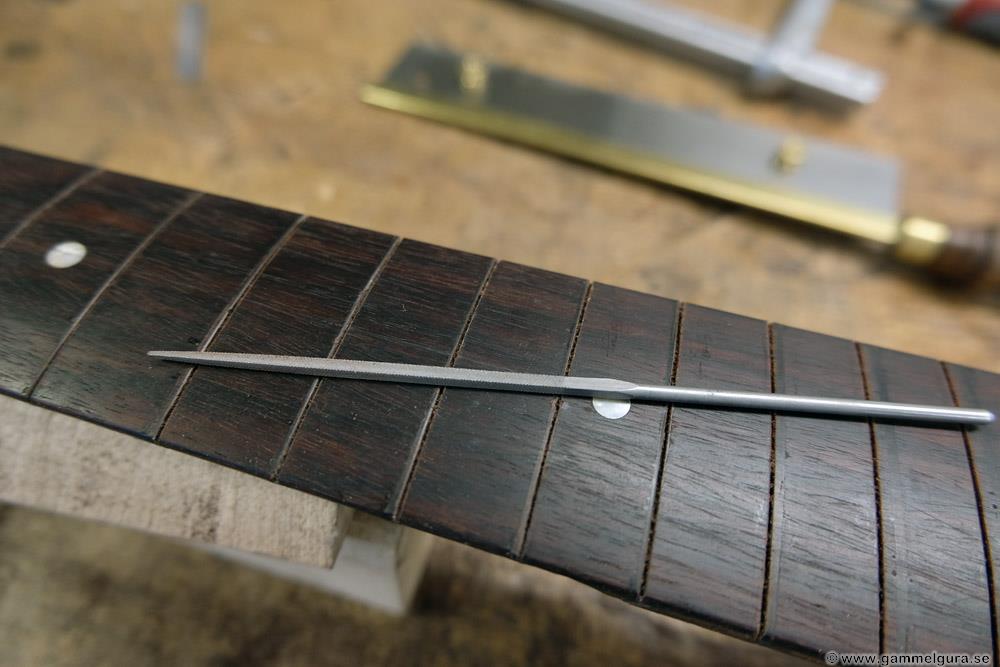
Once all the slots are cut, I use a fret saw with a stop to cut the fret slots to the same depth, just a little deeper than the fret tang. To protect the surface of the fingerboard from abrasion from the saw stop, I use a thin aluminum plate between the saw stop and the fingerboard. Finally, the edge to the notch is chamfered off with a square needle file. I have bought a set of needle files with a coarser cut than the fine one you usually see in hardware stores. I also have a set of needle files in the form of rasps, the round rasp is perfect for filing up the notches for the strings in the bridge for unslotted string pegs.

The fretting was tricky as the fingerboard had such a large radius, but with the specially made insert for the fret press it worked fine. The frets were glued with superglue. Nowadays, I mount every other fret (all odd and then all even frets) to reduce the backward bend from the tang in the fret slots, but in this case I should have fretted as usual! It turned out that the relief was a full 0,7 mm in the middle with tensioned strings, my ideal is about 0,15 mm.

I don't really know why, but the compression and back bend from the bar frets is certainly greater than the one you get from the T-fret tangs. The neck also had a little too much relief even before I refretted. Next time I do something similar, I'll brace the neck to a slight back bend and open up the fret slots a bit more before fitting and gluing the wooden sticks.

So, what do you do? You don't want to play a banana neck. My patented solution, which is the very best, is to mill in a carbon fiber rod under the fretboard. But in this case it would have been a lot of extra work and besides, the fingerboard was so thin and bent that it probably couldn't have been saved. In addition, the frets would have to be reattached once more. There are two solutions, to heat-bend the neck straight or replace the frets with frets with a thicker tang. I chose to start with heating and only change frets in case of emergency.

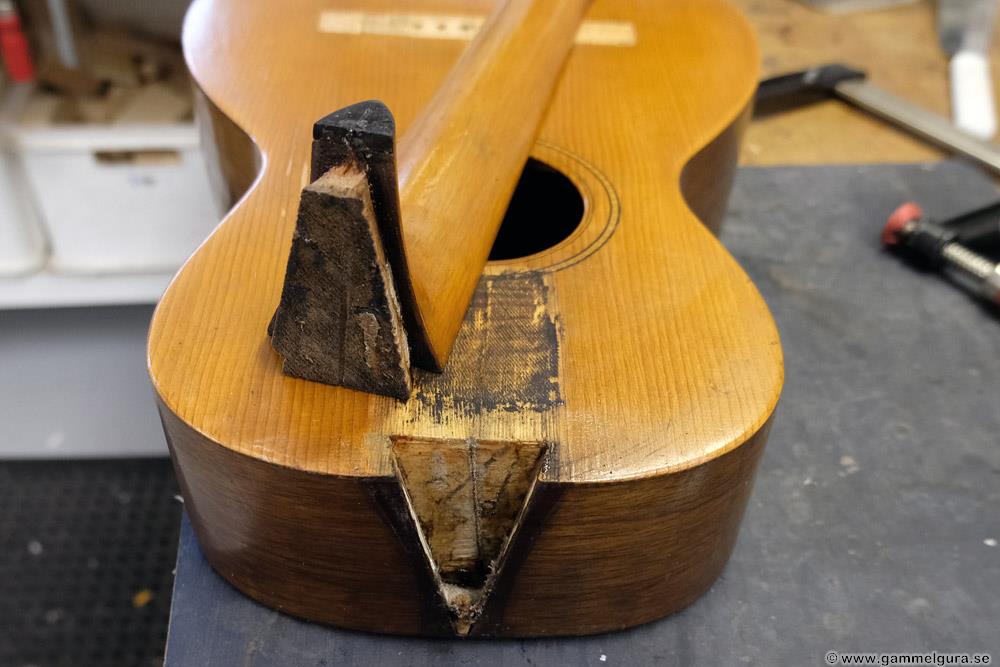
Bending back the neck with heat is a double-edged sword, you can succeed, but it's always a gamble. A disadvantage is that the heat always dries out the fingerboard so that it shrinks and that the lacquer under the neck at the stop can melt from the heat and be damaged. To reduce the shrinkage of the fingerboard, one should first saturate the fingerboard with oil. What you are looking for is to heat the fretboard and the neck wood hotter than the melting point of the lignin and at the same time bend the neck back to a curve roughly the same size as the banana bend/relief, but in the other direction. Wood consists of equal parts cellulose fibers, lignin and hemicellulose, lignin is a bit like a putty that binds the cellulose fibers together. It is hoped that the lignin will solidify into its new form as it cools and that the neck will become more or less straight with the strings at tension.

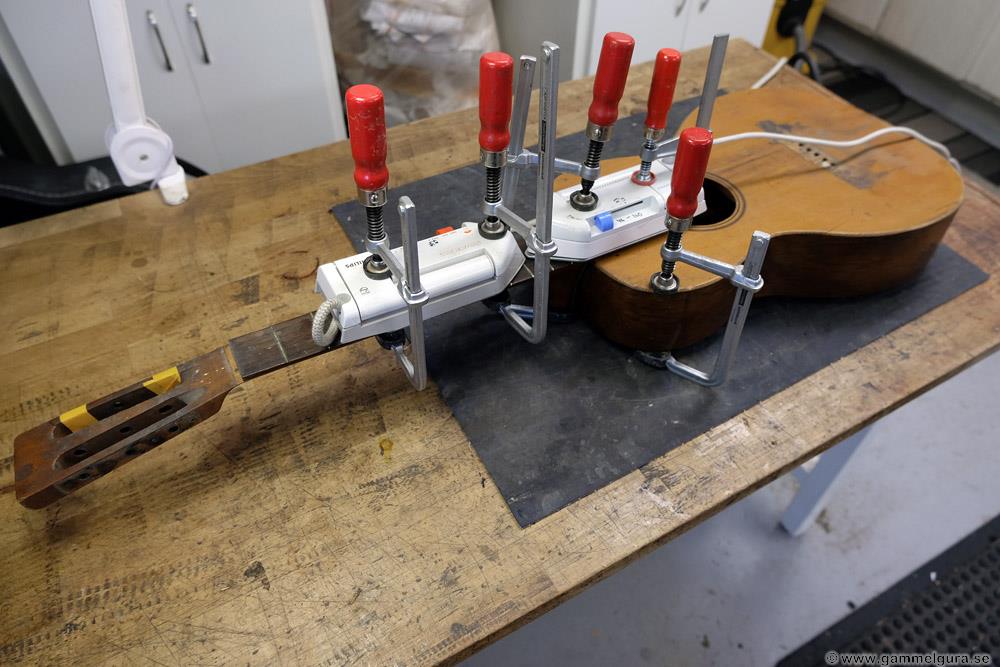
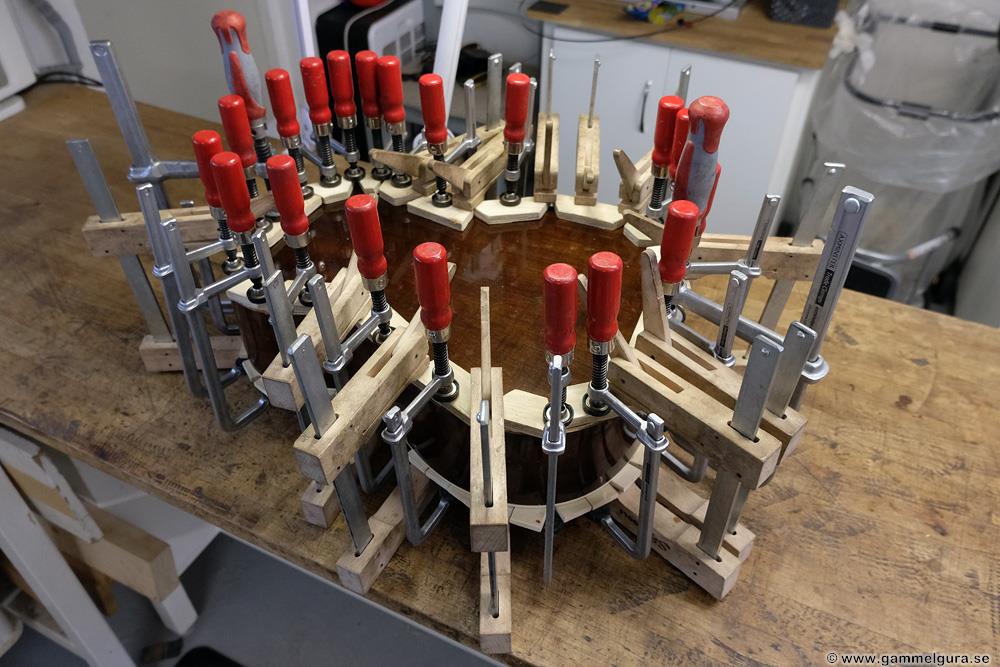
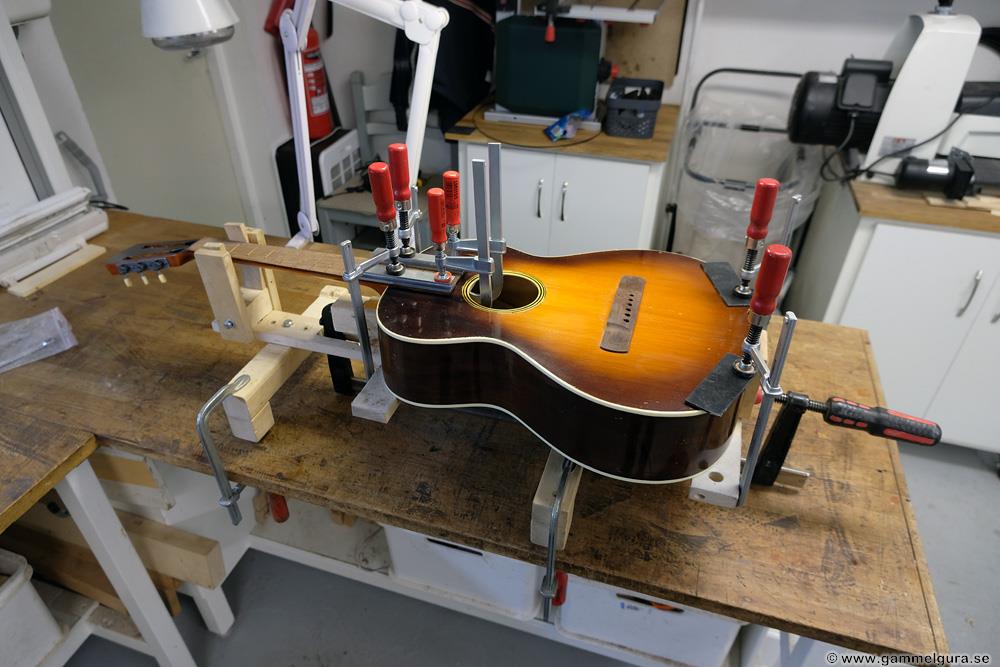
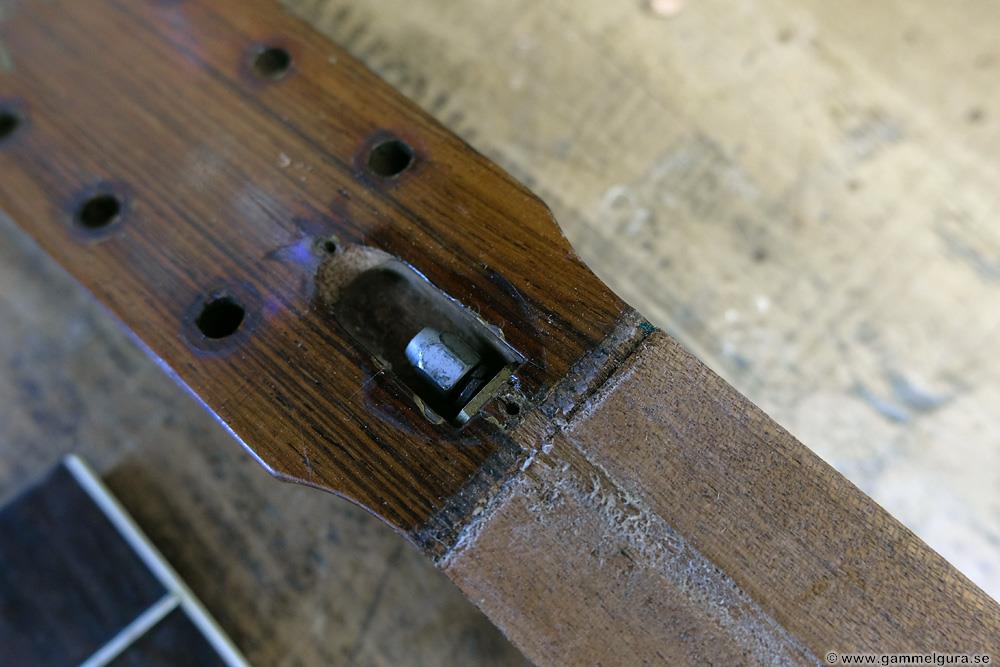
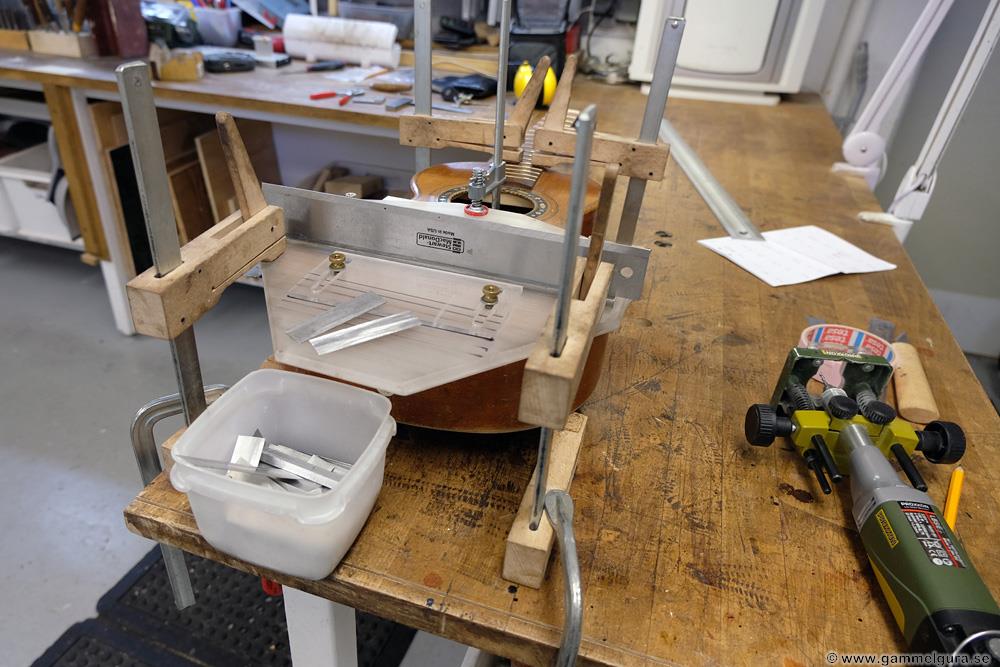
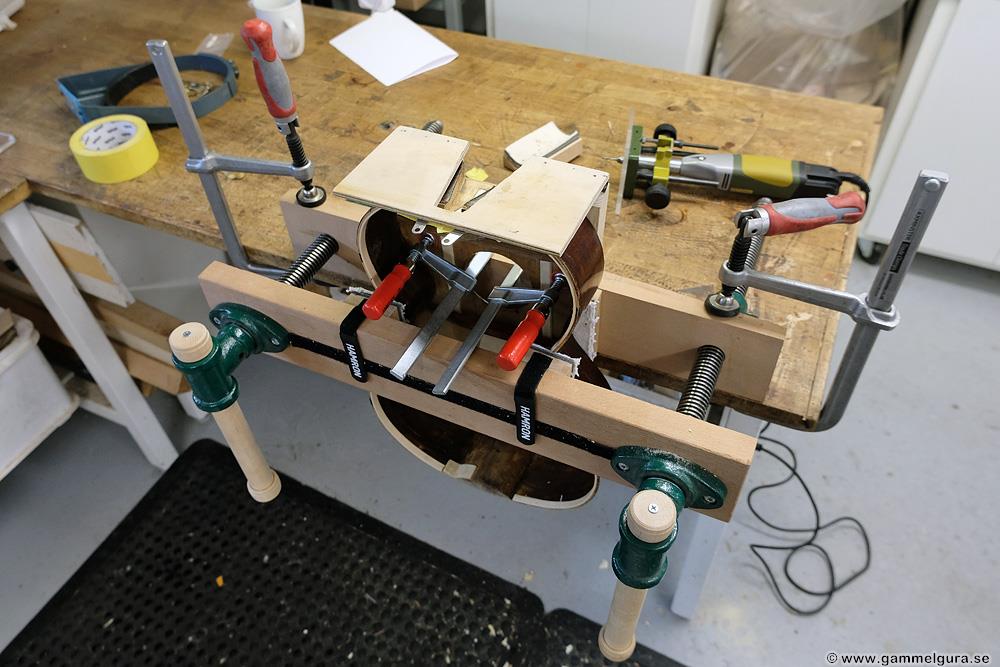
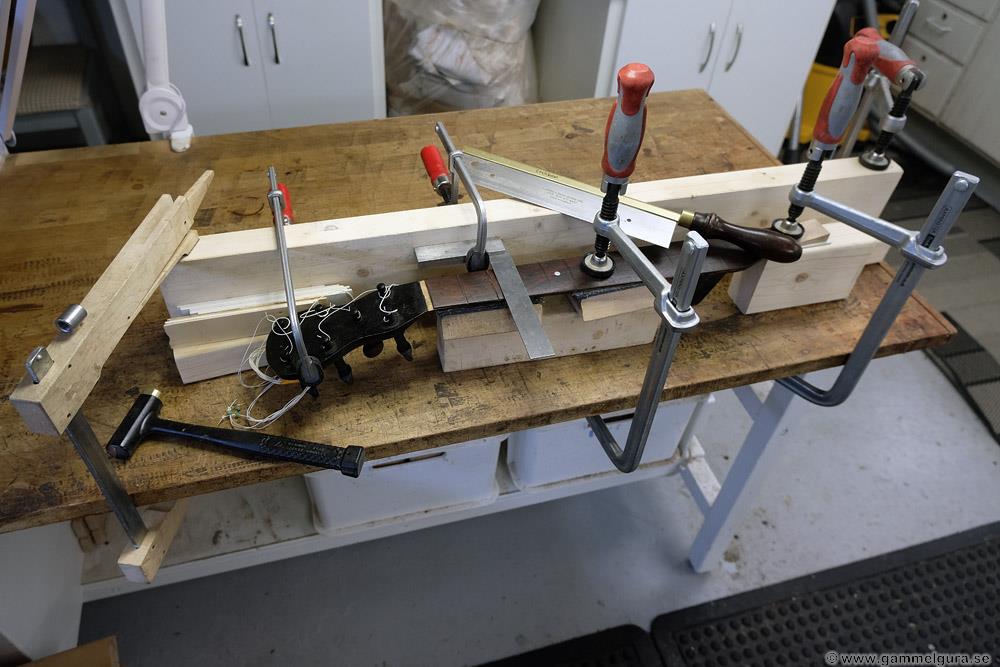
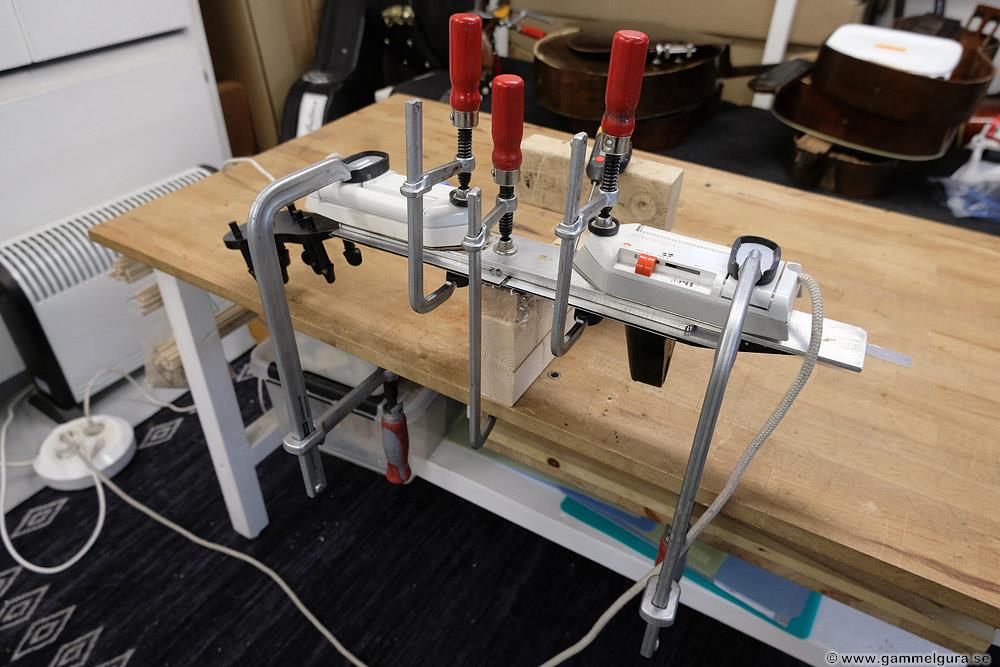
My jig consists of an aluminum plate that is thick enough to give the back bend an even curvature and at the same time distribute the heat evenly. In this case, the fingerboard was longer than both of my two plates, so I had to use both and a shim to cover the entire fingerboard. The neck gets a rest just at the spot where the relief bend of the fingerboard is deepest. It is important that the surface of the stop is smooth and even, otherwise you can get a pattern pressed into the soft lacquer if the lacquer becomes sticky from the heat. A little household plastic between the stop and the neck means that the lacquer cannot stick to the stop. The clamps are tightened so tightly at both ends that the fretboard/neck gets a backward bend that is as big, or a little bigger, than the relief was before. You aim along the edge of the fretboard and hope for the best. A practical digital temperature gauge allows you to easily adjust the temperature of the irons, which are regulated with a thermostat.

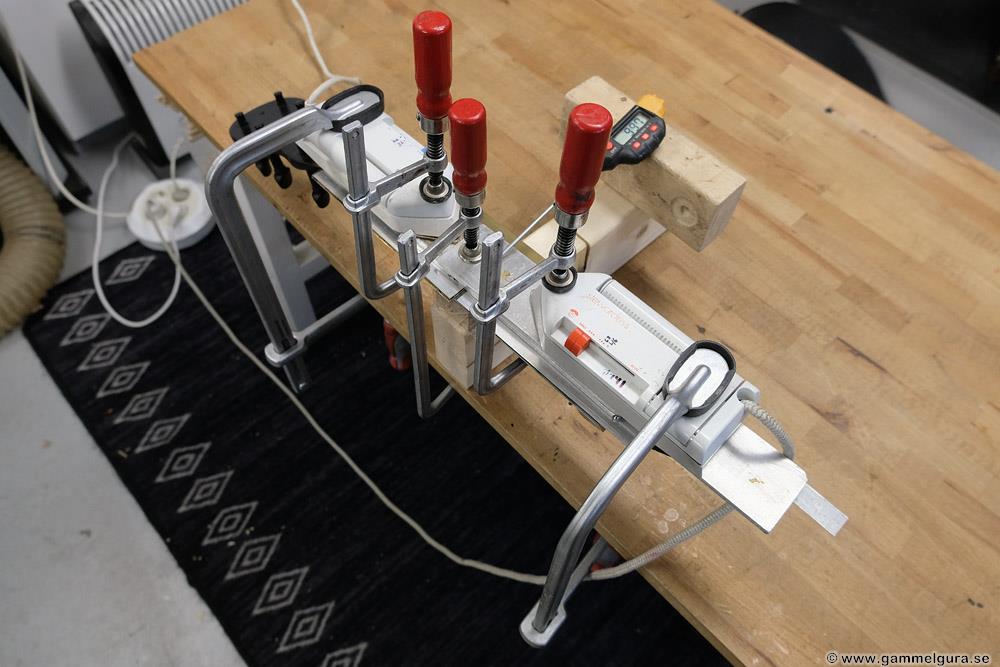
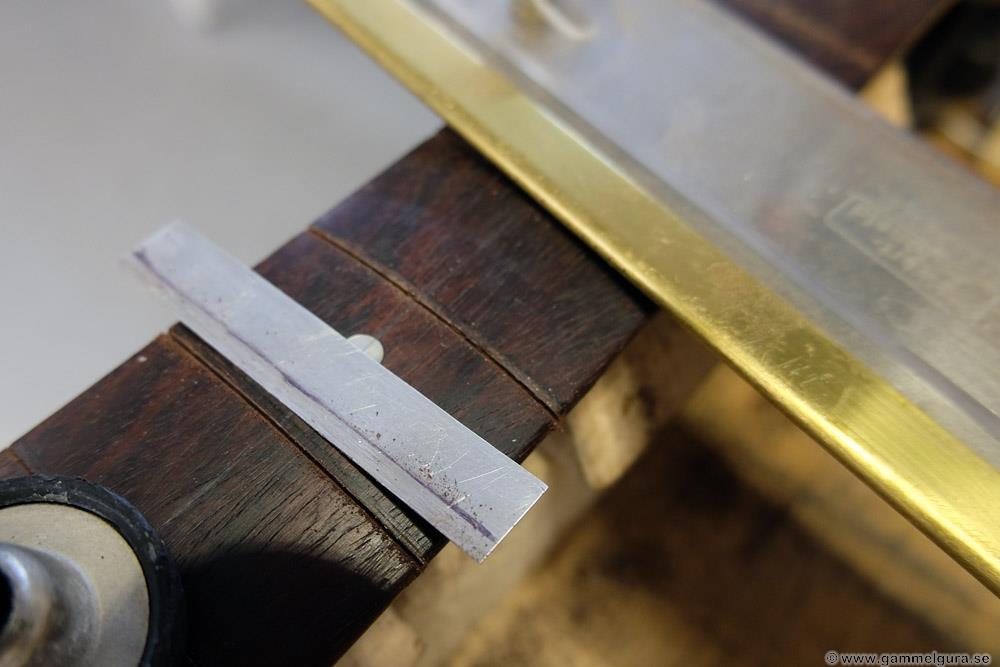
The large radius of the fingerboard was a problem as I couldn't get good contact between the fretboard and the frets to transfer the heat, but I solved that by sandwiching thin strips of metal on the sides between the frets and the fretboard.

After thinking about this in retrospect, perhaps I happened to do things more right than I thought. The greatest bending of the neck always occurs near the nut, where the breaking of the strings over the nut gives an extra bending force. With two overlapping aluminum plates at the bottom end of the fretboard, the bending from the clamps was greatest on the upper part of the neck in my jig, where I only had one aluminum plate. The lower part with double aluminum plates was stiffer and bent less. It also occurred to me that you can use a layer of folded aluminum foil shaped according to the fingerboard radius to fill in between the aluminum plate and the fingerboard to more effectively conduct the heat down into the neck. I also have to mention that it takes a lot of force on the clamps to bend back a guitar neck, perhaps in the region of 20-50 kg of pressure on the middle caul under the neck. I use a caul that is shaped to the neck and lined with soft rubber.

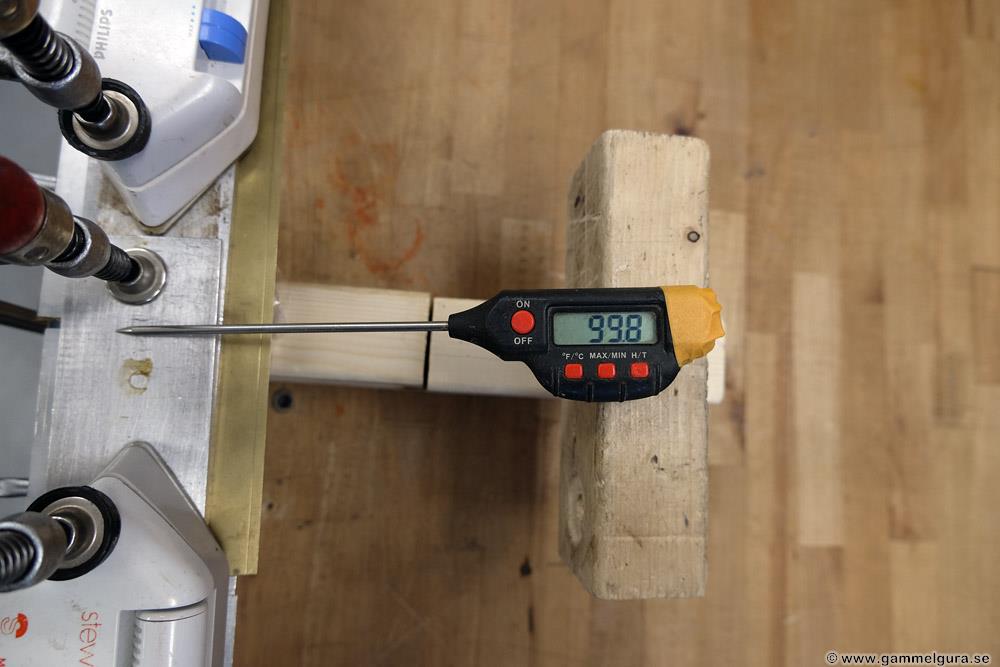
The melting point of lignin should be about 65 degrees C. I made a first attempt with about 70 degrees C measured on the iron. Absolutely nothing happened, the same banana bend as before. I repeated the process with 5 hours of heating and a few hours of cooling before loosening the clamps with 100 degrees C on the irons. With 100 degrees C in the irons and aluminum plates, the temperature on the back of the neck was 42 degrees C. This means that the lignin in the fretboard and the neck closest to the fretboard will be reshaped, but not in the entire neck. I think you should reach at least 80 degrees C to successfully soften the lignin.

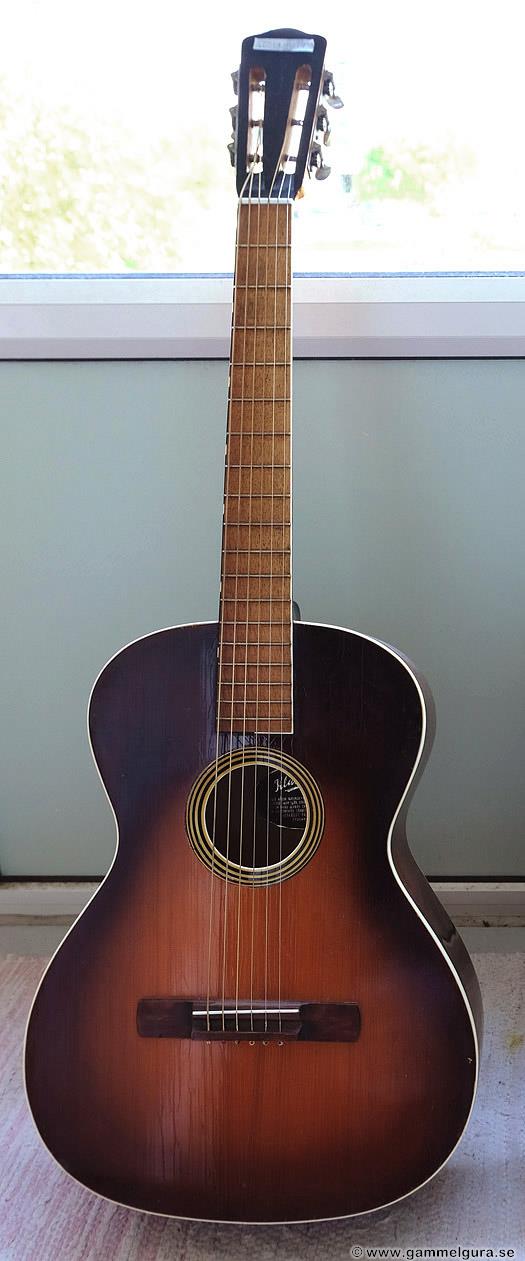
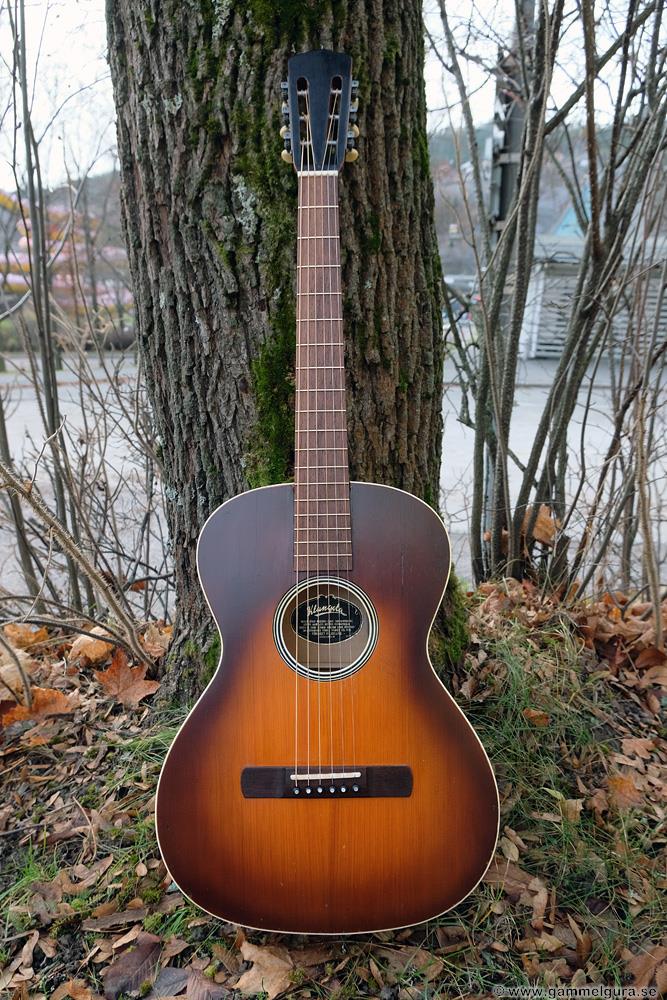
The result was successful, an essentially completely straight neck and a minimal shrinkage of the fingerboard. I just had to trim down the frets ends that stuck out a little. The lacquer had also done well under the counter-hold. Time to send the guitar back again, hopefully it doesn't play out-of-tune anymore!

Humidifier

In my shop, I need a dehumidifier in the summer and a humidifier in the winter. Around 40% is the target. After two humidifiers with a built-in sensor to turn on and off broke at a certain humidity (the electronics shut down), I have bought a simpler humidifier without electronic controls and a separate and better unit for the control. The control can be calibrated against my hygrometer and should be significantly more robust. It works very well, I must say. The humidifier has room for 4 l of water, and it lasts overnight without any problems, even if it is very dry. Over the weekends, however, it may happen that the water runs out.

The humidifier is of the ultrasonic type that breaks the water into a mist, a disadvantage with that principle is that all the minerals in the drops are deposited where they end up and can give a white coating on everything. No problem in the shop, but at home I have humidifiers of the water boiling type. With such, all the minerals stay in the humidifier itself, the disadvantage with them is that they are pretty loud where the ultrasonic humidifier is completely silent.

The stuff I bought are these: Beurer LB88 Humidifier and Inkbird IHC-200 Humidity Controller. They are complemented by a better hygrometer Text 608-H2 and one Qlima DD-208 dehumidifier bought from Jula a few years ago (also have a Woods dehumidifier).

I can also plug the dehumidifier into the empty outlet, should the humidity exceed 40,5% it turns on and turns off at 40%, if the humidity drops to 39,5% the humidifier turns on instead. Braces and sling!

New batch, GG199-203

I will willingly admit that my work discipline in the shop has faltered a bit lately. My interest in playing music has had a revival and has taken its time. Also, the most boring of all; the accounting that has finally been completed. But at least a lot of general repairs have been done in the meantime, I'm now back in my old ways. A new batch has been started with several interesting old guitars. It feels good.

The first step in the renovation is to loosen the old strings, the tuners, any tailpiece, the end plug, the bridge, the fingerboard, the neck and the bottom in that order. The braces in the top and bottom must also be removed before the next step, which is to repair all cracks and any other damage. The tuners, screws and other loose metal parts are cleaned in my small ultrasonic cleaner. Bent posts on the tuners are bent straight and the tuners are lubricated. All loose parts, that fit, are collected in a lunchbox with a lid and marked with a descriptive text. The fretboards are also labeled and stored in a larger box (most will be replaced, but they are good to use as a template).

Since there was a lot of snow outside, I had to take the pictures before I took the guitars apart in a snowdrift! I also took some pictures during the actual process of dismantling.

GG199 American Conservatory, circa 1900


This is an exciting parlor from the USA with the finest rosewood in the bottom and sides and neck in mahogany. It was guitars like this that Herman Carlsson Levin basically copied, but made with local woods, when he came back to Sweden from the USA in 1900. The body shape is familiar, so is the simple attachment of the neck and the wooden stick across the top under the bridge.


It was in good condition, almost completely without cracks. However, the ebonized fingerboard had about the consistency of biscuit chocolate! It was very easy to shatter it into a thousand pieces. This is an extremely lightweight build, definitely made for gut strings. Removing the bottom without damaging it was not the easiest, as it was only about 1,9 mm thick, 1,7 at the thinnest place. The precious wood was not wasted when making the guitar. The bottom had three braces and the top only two. The stick under the bridge was made of spruce, which I love, but there was no reinforcement around the stringpin holes, which meant that the stick was worn out by the ball ends. The bridge, which came with it, had come off and the top under the bridge was in good condition. The tuners were substantial, but perhaps a little loose. I think they can be kept as they are extra nice.

GG200 Bay State, circa 1888

I'm saving the even number 200 for the guitar I was sent free from the US after my first long article in American Lutherie. The fact that I got it for free is because no one in the US wanted to take it on as it was in bad shape and the owner wanted to save it. I'm going to write an article about the whole restoration process with this guitar for the magazine, so I'm taking extra pictures of it.

This is also a typical USA parlor guitar from the end of the 1800th century with the finest rosewood in the bottom and sides, and a neck of mahogany. This one is not as light a build and the neck has a sharper V shape. It had been given a tailpiece, the head had been hit and repaired with three wooden screws. One of the tuners had been replaced and the edge of the head where the tuning screw is attached to was completely broken off, it showed when I loosened the tuners. It will be a special repair. The rosewood fingerboard was very thin. It was easy to loosen the neck with a little water and a thin knife in the joint.

It had five braces in the bottom, the other American Parlor only had three, but also more braces in the top. It had a similar spruce stick under the bridge, this one was also torn apart by the string's ball ends.

GG201 Levin, 1943
No batch with at least one Swedish made Levin, this one had been saved from a junk room. It has a burst (yellow color, not red as in the first pictures) and is a fairly simple Levin, looking a bit like a Gibson from the same time period..

It was in relatively good condition, the tióp had a crack along the center joint. The bridge had already come loose, which made the work easier. The fretboard, neck and bottom came off without a problem. The braces in the top and bottom were more or less loose and easy to pop loose.

GG202 European parlor, circa 1920
A European curvy parlor also had to be in a new batch, this one had extra good quality mother of pearl inlays.

It had received a major renovation in 1975, there was a hard-to-read pencil note on the inside of the bottom. The bottom had been replaced, and it had been given a new one in mahogany. Oddly enough, a replica of the bridge was also made in the same type of wood, which is actually a bit too soft for a bridge. Decorative moldings around the edge of the bottom and the soft mahogany in the bottom made it difficult to pop, but I managed to get it apart in one piece.

GG203, Söderman 1926

A Gottfrid Söderman from my "Waiting room" is the last so far in the batch. I'm waiting for word on another guitar. It's always fun to be able to save a locally made guitar, Västerhus is only a few miles from Örnsköldsvik.


It was in good condition except for a few cracks in the top and with glue coming off the side at the neck block. Some methods were questionable in his production, the saddle in this one was e.g. in celluloid attached with three nails. The extra thick oak bridge "block" was also not optimal, but maybe a later repair of the spruce stick under the bridge. A fun detail is the slightly lumpy mother-of-pearl shirt buttons that he used as decoration in the fingerboard! Sometimes the good Gottfrid wrote under the top in pencil, this one had both a little comment and a year, which is always nice to find. It said "On a sunny day, this top was glued on. G. Söderman 1926".

Kramer power ballad guitar

A lot of modern guitars pass the shop without me writing about them on the blog. When they leave the premises after repair/adjustment, I am as happy to get rid of them as the owner is over having it repaired! But sometimes I am surprised, like this time, by a circa 1988 Kramer Ferrington semi-acoustic parlor guitar of the "hard rock power ballad" type. Everything in the design was black and sharp. The nut and saddle was in black plastic. You can read more about it here. Or here.

After a chat with the owner, it was decided that it would get a major overhaul with a reglued and replaced saddle, a re-fret and above all a nut intonation. A lot of work on a plywood guitar from the 1980s, but when I looked it up, they go for around SEK 10 000. More money than I thought.

Upon closer inspection, I could tell that the neck was in good condition and that, amazingly, it actually sounded really good. The tone was there, but not the volume, which was about half of the volume on a regular GammelGura. The intonation was lousy, I was later able to ascertain that the saddle was placed about 3-4 mm too high up on the bridge!

A new bridge was made. I also took the opportunity to wet the inside of the top around the bridge and put the top under pressure for a few days to flatten out the top which had a rotational deformation around the bridge. The new bridge was glued in place, as it was a plywood top, I glued with slow curing epoxy glue. It turned out that the top had an unusually nice and delicate X-bracing and was otherwise a light build. That is the explanation why it sounded unexpectedly good. The sound hole was extra large, so it was easy to access the inside.

There was no room above the string pins on the bridge plate for a K&K mic. It had an under saddle pickup and a lump with a battery attached to the side that didn't work. The mic did not work as the pickup under the saddle was in bad condition. I ordered a bunch of simple under saddle pickups for this and similar repairs in the future. They are easy to change as there is a small miniature plug at the end which connects to the lump of most similar mics.

The guitar was measured for intonation and about 2 mm was shortened on the top of the fingerboard. On the new bridge, a saddle ditch for the sdadle was milled 3-4 mm further down than the original. One thing I didn't think about was that the hole for the pickup at one end of the saddle ditch ended up right on top of one of the X-braces with the new placement! By drilling the hole diagonally through the top I was able to mount the pickup without drilling holes in the X-brace. When it was done the mic sounded lousy, but with the bass on max and the treble on minimum on my simple acoustic Laney guitar amp in the room it actually sounded OK :)

It made it vibrate all weekend in the shop, probably at least 7 days, while I worked at home with the bookkeeping that I neglected all year. To my surprise, the vibration worked on this one, even though it was all plywood. My usual three days is enough for solid wood guitars, but all the glue in the plywood seems to require at least double that for effect.

The black color was horrible, the slightest scratch or thumbprint was visible. I put some Fulgentin on the top which worked well.

The result was a guitar that intoned and played perfectly and had a great tone with sustain and a balanced, creamy and open tone. I could actually play it for half an hour without getting tired, which rarely happens with modern guitars. I would have liked to keep it to be able to play quietly without disturbing the neighbors late at night. With its small format and lightness, it reminded me of a small parlor. A cutaway, 16 strings to the body and 65 cm scale made it feel a bit like an electric guitar too. Cool guitar!

GG195 Levin/Klangola 1946

Levin also made guitars under a few other names, including "Klangola". I have both seen and renovated a few Klangolos over the years. They were specially ordered by Förlaget Filadelfia in Stockholm and had some extra options. The ones I've seen have had a wide side and a small sound hole with a wide zebra-striped rosette in celluloid in black and white. Also, most of them have a very ugly binding around the fingerboard which also is half black and half white. The wood in the guitar is always better, I think its maple in the bottom and sides on this one, but I have also seen flamed birch. The neck usually has a slightly more angular U shape, which is not that comfortable to play on. Most of the time the name is not found as a sticker on the head, but inside is a fancy black label with gold lettering. The bridge is of the "string through" type, like on a classical guitar.

This 1946 example was in good condition with a Gibson like sunburst on the top and also a black burst on the neck foot. No direct damage was found except for a scratch in the paint on the top, which was not an actual crack. The celluloid rosette was shrunk and had been glued back with Karlsson's Glue (transparent celluloid based glue). The plan for this was a GammelGura conversion with all that implies, but also to give it an X-bracing and a narrower fingerboard and a thinner and less U-shaped neck.

The crux was the burst lacquer on the neck that had to be thinned. I don't have a paint sprayer or paint booth which you must have when doing a burst, it's also a difficult art if it's going to be a good result. The compromise was to give the entire neck one and the same color.

A sound hole that is too small is not good, the sound becomes muffled and closed with little treble. The first thing I did was to peel off two stripes at the very end of the zebra-striped rosette to get a more normal-sized sound hole, it also looks nicer, I think.

The neck and fingerboard came off without a problem. The neck was reshaped thinner and a little narrower with the help of a rasp and coarse sandpapers. The walnut fretboard was replaced with a new rosewood fretboard without the ugly bindings. The original board was already relatively narrow, 44 mm at the nut, but the request was for it to be narrower. I took it down to about 42 mm at the nut. The trapezoidal shape of the entire fretboard became a little steeper as the fretboard had to maintain its width at the end. The stripped wooden back of the maple/birch neck was stained and varnished with colored varnish.

A replica of the original bridge, fixed with stringpins, was made from the finest rosewood.

This was the second in the batch to receive an X-bracing. I'm still amazed at how slender the braces have to be around the bridge for it to sound good. Braces along the top are extremely strong compared to the ladder bracing's braces across. I made a small variation with a straight brace behind the bridge plate.

Top and bottom were thinned out in the usual order, Levin's top and bottoms are always at least half a mm too thick.

A K&K mic was fitted. Since the kerfing was very thin and the bottom required a binding, I glued on an extra kerfing in soft linden wood.

The bottom was glued without trying to get a perfect fit everywhere, since a binding channel had to be milled out anyway. And it's always good to avoid building tension in the bottom by pressing the sides in until they fit.

After milling for the binding, a white ABS binding was glued with tough number 30 Stewmac superglue.

The neck was glued using my neck gluing jig. I had to re-glue the neck once more as the thin neck moved more than I expected, but in the end it turned out fine.

I used my new method of fretting on the EVO frets, much like you screw bolts onto a car tire - not in an even sequence. I need the measuring stick to know where to put the next fret!

Just like the 1961 Levin, it sounded like a mix between a regular OldGuitar and a modern X-braced guitar. The customer was very satisfied with the narrow neck.

GG192, Levin 1949

You can make a good OldGuitar even from a simple Levin parlor from 1949 with a floating bridge. The only thing that is required is that you convert it to a permanent bridge. There isn't much more to gain in sound quality if you keep the floating bridge and the tailpiece. I've tried several times to keep the floating bridge because they're cool, but only managed to get it marginally better than the original.

One disadvantage of converting from floating bridge is that the shadow of the tailpiece always leaves an impression in the paint on the top. But other than that, and the fact that the top has no stringpin holes or wounds from a reglued bridge, there is no difference in the renovation work. In general, you can perhaps say that the best pieces of wood were not used for the floating bridge guitars. They were cheap for a reason. In any case, this particular one had beautiful flaming birch on the bottom and sides, with flames only on half of the bottom.

It was in good condition and unusually without cracks. Since it was a newer Levin parlor, it had a flat head and the cellulose lacquer of the time. The paint had a slightly more tart orange color than usual, which my camera didn't like. Some of the pictures are flashier in color than the guitar in reality. It also had black celluloid bindings around both the top and bottom. After installing the carbon fiber rod in the neck, thinning the bottom and top and gluing the braces, the situation was as in the pictures. No repairs, except where the joint between the bottom halves had loosened in a few places.

It had been repaired before, unknown what the fault was. On a large note glued on the bottom it was written: "The guitar repaired by Bror Harisson Astrome(?) Vessinge bro". The word with question mark was difficult to read and difficult to interpret.

There is not much to say about the renovation in general. Lid and bottom were thinned out, the lid was about 4 mm thick. A pyramid bridge and a new rosewood fingerboard were made. One detail that is different is that the stable must be measured in the right place and the varnish scraped off before gluing. The wound from the glued floating stall is a good indication of where the stall should sit. Wanting to make it easy for beginners, Levin glued the stand that should actually be adjustable, one of the few benefits of a floating stand.

It also had a K&K mic fitted before gluing the bottom.

Neck and fretboard were glued and fretted with gold colored EVO frets, my new standard. The binding around the bottom was replaced with a new one in black ABS plastic.

To hide open wounds in the paint around the bottom binding, the edge of the fretboard against the neck and other places that need some matching paint, I've been buying up all of Herdin's water based stains and as many spirit stain powders as I can get my hands on. I have all the stain powders in plastic jars in a wooden box. I've also made small spruce sticks where you can see how all the stains look, my fingers were in all the colors of the rainbow when I was done with that job!
 

That box came in handy for this guitar with a slightly different color. Using the sticks, I was able to find a matching color. Otherwise, it is always Herdin's "Carl Johan Brun" that matches the color of an old Levin parlor.

After staining where needed, it was time to put on a coat of spirit varnish after the original varnish had been dulled down with steel wool and vacuumed and dried clean. I use a U-shaped ferrule through the sound hole as a handle. My synthetic fine hair lacquer brush is large and round, it has lasted for almost 10 years. The glossy lacquer is then matted down with steel wool (Trollull 000) and hand-polished with a dry cloth to a suitable gloss. The spirit varnish should dry for about a week before it can be hand-polished in a good way to a semi-gloss, before then the varnish is a little too soft to retain the luster.

The intonation was measured, nut and a segmented saddle were manufactured and adjusted. New tuning screws were fitted. Since the flat heads on later Levin's have modern distances (American measurements) between the posts, it was just a matter of screwing it on.

I took the finished guitar out for photography, but the color of the bottom, side and neck of the guitar didn't like the camera! I've tried color correcting, but the pictures taken indoors were probably more accurate in terms of the color.

Even though it was a simple and newer Levin, it sounded like a OldGuitar should. Possibly, the tone was a little rawer than usual, but you can only hear that if you can make a direct comparison. The difference was not great. A Gator 3/4 case fits well with all Levin parlors.

GG194 Goya/Levin LS 16 1961

Not all OldGuitars are old. If you get more or less free hands to work with a finer and modern X-braced Levin from 1961, you can't say no. The assignment was to make a OldGuitar and, in addition to the usual, change the truss rod to a carbon fiber rod. A little extra *bling* in the form of old-style inlays in the fingerboard was also a request.

When it came in a huge case, I could see that it was in a slightly worn but in good condition. Pictures of this particular guitar can be found online. Maybe it needed a neck replacement and better tuning screws, but otherwise it was in original and playable condition. But it was going to be better than ever!

After loosening the strings, the neck was loosened. It turned out to be easy as the neck is just glued under the fingerboard on the top. The two nuts holding the neck via two bolts through the neck block were easily loosened with my long special screwdriver through the endpin hole. The bridge also came off without a problem, although the modern glue was tough and held well.

Wise from previous experience with soft mahogany and crack-prone and brittle cellulose lacquer, it was time for some ultra-violence in the form of a Japanese saw. The best way is actually to cut the side, kerfing, bottom and neck blocks just below the bottom binding. If you try to loosen the binding to access the glue joint behind it, the cellulose lacquer will crack and chips will come off, there is also a great risk that the soft mahogany in the sides and bottom will crack. What you get with the saw are two puzzle pieces that can be glued together almost invisibly. The only thing you can see afterwards is an extra glue joint in the kerfing through the sound hole.

Once opened I could see that it was well made inside, but as usual with Levin with a little too strong braces. Since a OldGuitar means that the bracing is replaced if it is not as they should be, the next step was to remove all the braces in the top and bottom. As the glue did not react so much to water and heat, the best method was to use pliers and snap the braces and then plan and sand. More ultra violence! It was interesting to see that Levin used a real knot to connect the X-braces, not like Gibson who cuts one of the braces in half and glues them flat together with just a glued linen cloth over the knot. Thin bridge plate too. Very good.

The base and top had good thicknesses. Which was lucky as I couldn't thin the bottom as usual in my drum sander. I made and glued new bottom braces. My latest invention with rollers under the wooden clamps worked great on top of the aluminum cauls. No risk of the braces being pulled askew when tightening the clamps.

The neck was going to get a carbon fiber rod and a 16″ radius fingerboard, but since it was bolted to the truss rod it had to be a special solution. With the fretboard off, I could see how the truss rod was mounted.

Levin had a special solution where the truss rod bends off and continues down the neck foot and is attached with the upper nut on the inside through the neck block. Below it is a second short rod attached to a metal stop for the lower nut. When the truss rod adjustment nut at the top was loosened, the trus rod could be pulled out, the mahogany stick over the truss rod could then be easily removed with a chisel.

In order to mount a carbon fiber rod and retain the attachment of the neck, the truss rod was cut near the end of the neck and the end of it threaded. A stop metal block was made and attached with two nuts under the milled channel for the carbon fiber rod. To make the carbon rod stiffer, a piece of 8 mm round carbon solid fiber rod was glued into the square and hollow carbon fiber rod. The hole for the old truss rod and the empty space behind it were filled in with wood.
 

Since the original fingerboard was in the finest rosewood, but needed to be thicker to be able to get a 16″ radius, I glued in an approx. 2 mm thick rosewood shim under the original board in a "sandwich".

With a thicker fingerboard I could use my jig and give the flat board its radius.

First, the carbon fiber rod was glued with slow curing epoxy glue.

Then the fingerboard was glued. I drill two nails through the fretboard so the fretboard doesn't slide on the glue. I also use different gauge sticks on top of the curved fretboard to be able to use a flat caul, on this one 2,3mm on the sides and 1,7mm in the middle . Nowadays, I always start with a thin hot glue mixture that penetrates deeper into the wood before gluing with regular hot hide glue. I imagine there will be a stronger glue joint that way.

New braces were made for the top. The X-bracing takes longer to manufacture than a ladder bracing. The bridge plate was, of course, made of spruce with dowels and hardwood buttons around the stringpin holes. The double braces under the fretboard were replaced with an A-frame.

Swedish manufacturers in the 1950s had an idea that the bottom block should be small, thin and flimsy. Maybe to make the guitar sound better and be lighter. The problem with that is that you build in the risk that the sides, top and bottom will break when you drop the guitar on the end plug... I've seen several instruments that have been seriously damaged that way. I therefore replaced the small, thin piece of plywood with a normal-sized spruce end block. The pictures also show my new improved internal cauls made from cut down carbon fiber rods.

I made the mistake of peeling off the label before regluing it. The paper is Bible-paper thin and still got thinner when I peeled it off. When I then glued, the thin paper became very dark. Next time the label will be reglued in place, alternatively I will glue a piece of white paper behind the label.

New inlays with extra *bling* were fitted to the fretboard. The pickguard was secured with 3M adhesive tape.

The intonation was measured after frettiing and crowning and installation of new tuners. The hole under the truss rod cover was filled in with a piece of mahogany.


The bottom, side and neck received a coat of spirit varnish, the top only needed to be hand polished with a dry cotton cloth.

Behind the extremely ugly and yellowed lacquer on the bridge was rosewood of the finest variety. So much prettier without varnish! However, the paint stayed on well, it took quite some time to remove the misery with a knife, sandpaper and razor blade. Two of the original galalith string pins broke when I was going to loosen the strings, so I had to use new ones in ebony in the style of the *bling* in the fingerboard.

It was strung up with regular 0.11 strings. I kept the guitar for a few weeks and played it quite a bit. The sound is a mix between a regular OldGuitar with ladder bracing and a modern X-ribbed guitar. I really liked it, but still prefer a ladder braced OldGuitar for the open sound, but that's my personal taste!

GG197 European parlor from around 1920

Another guitar from the waiting room was used for a OldGuitar this summer. A slightly later European parlor from the 1920s. At that time, people began to manufacture more or less imaginative and decorated parlor guitars. Some with a different and odd body shape, this one just had a different bridge and some extra mother of pearl bling around the sound hole.

It was in perfectly OK condition apart from cracks in the top and damage to the top d under the bridge. It is possible that the bridge was not original given the quite a few string pin holes in the top, but I could not see a "shadow" in the paintwork of a previous bridge. I wrote about how I repaired the top under the bridge here a previous post.

When I start a new batch, I initially work in parallel with everyone on repairing cracks, installing carbon fiber rods in the neck and making and gluing new braces. When it's done, and it looks like the pictures below, I finish the guitars one by one.

I took some pictures while I was making and gluing braces, among other things, for this guitar. I have a small stock of fine blanks for braces, partly those I got from my friend Björn and which are made of 60 years old Swedish spruce, and partly blanks bought in from Germany of good quality. The Swedish spruce is the best and I use them in the top, the bottom has to make do with the ones I've bought from Germany.

It all starts with the selection and cutting of suitable spruce blanks for all guitars. They are then shaped to a standard format that fits my triangulation jig with my drum sander, 15 x 8 mm. The next step is to give the braces a radius, the bottom braces a 20' radius and the top braces a 30' radius. The brace blanks are planed and roughly sanded, with my pad with a coarse self-adhesive adhesive sandpaper, to roughly the right shape before I use an LMI jig to sand in a nice bend with a bottom face that is perpendicular to the sides of the brace blank. Nowadays, I also use a scraper to smooth the rough sanded surface under the brace to be glued.


All bottom braces and all but one of the top braces are triangulated in a special jig in a ladder bracing. In an X-braced guitar, you cannot use the jig for the large X-braces, they must be shaped by hand. With the jig, it is quick to get a perfect triangulation of standard blanks with the help of a sharp plane.

The bottom braces are simple and one-dimensional and can be glued using my old method with a caul with the same radius as the underside of the braces. To extend the open time of the hot hide glue, I take the opportunity to use a heat lamp. An advantage is that you can glue several bottoms, as the finished clamp package can be moved away for the next gluing (as long as the number of clamps are enough). The top braces, on the other hand, are always glued in my go-bar to a radius disk to get the right bend on, among other things, the bridge plate in two dimension both along and across the top.

A replica of the original bridge, which was in black painted maple, was produced in rosewood. It was made a little wider and longer to fit the saddle and cover most of the wound in the top under the brold bridged. For some reason, the original bridge was wider below the string pins with too little room for a saddle in front, so I turned it upside down. This meant that more of the wound from the original bridge was visible when the new bridge was glued.

The flat maple board was replaced with a 16″ radius rosewood board. New tuners were fitted.

A working moment that I have started with recently is to adjust the neck angle reasonably correctly before gluing the fingerboard and bottom. When I have the neck angle "right", I can then decide if I need to change the radius of the brace under the fretboard before gluing it to avoid having to make a triangular shim under the fretboard on the top. To get a fair emulation of the neck angle, I use the bottom as a template and make sure the edge of the sides matches the length of the bottom perfectly at the neck and bottom block using an adjustable threaded rod through the endpin hole. With a matching bottom to the sides, the neck block has the angle it then gets when the bottom is glued in place.


With the correct geometry on the neck block, I can fit the neck angle with a loose fingerboard so that a straightedge laid on top of two 0,5 mm blade gauges hits the top of the bridge. The frets are 1 mm high, but I want a bit more height on the saddle to compensate for any bending of the neck, hence the 0,5 mm. It almost always works... The brace under the fingerboard is clamped at the ends when testing so that the top is pushed up by the radius bend of the brace.

The "wings" on the neck foot are sanded and adjusted with a sharp chisel to the correct neck angle. When adjusted, shims must be glued into the neck pocket to make the attachment tight. I have made maple shims in various thicknesses, 0,3 to 0,6 mm, with my drum sander. One or more shims are glued in with superglue (to speed up the process) and the neck is used as a caul with some household plastic wrap as a release agent. Finally, I will find both the right angle and have a tight attachment of the neck.

Now the brace under the fingerboard can be given the correct radius to avoid a triangular shim under the fingerboard on the top and is glued in place.

With all the ribs glued, a final sanding of the inside and fitting of a K&K mic is done before bottom gluing. Assembling a K&K with an open bottom takes no more than 10 minutes.

With the bottom glued, first the fingerboard and then the neck is glued. A final adjustment of the neck angle is usually needed if you're not lucky, but most of the rough work is already done.

The frets were assembled and crowned. The guitar was measured for intonation and an intoned saddle was made. I took some pictures of how I mill the ditch for the saddle using the measurements from the intonation. The intonation points are marked on a piece of tape, and where the saddle bone ditch is to be milled is marked. With a razor blade, I cut out the position of the saddle ditch in the tape. The contrast makes it easy to see where to mill.

I give the saddle a slight back angle by shimming up my Stewmac jig on one end. Two angle hooks, one on the top and the other on the jig, allow me to set the right angle. I also check that the jig is level across with a ruler so that the saddle ditch don't get an uneven bottom. I have a bunch of thin aluminum plates that I can pad up the sides of the jig if it's not flat.

A segmented saddle was fabricated, adjusted and intoned. The guitar received a coat of new spirit varnish and was vibrated in for three days before it was completely finished. The last steps are always to mount the side dots, the label inside and a guitar strap button on the neck.

Russian Krasnoshokov guitar from 1873

I received a small package with a guitar. Small because the neck was loose and the guitar body unusually small. Not so surprising since it is a Russian seven-string guitar from 1873 with an adjustable Stauffer neck that is not glued to the body. I have a hard time turning down interesting projects like this. Got these pictures of it, and it didn't look too difficult.

I had no idea how bad the condition really was. The bottom was already loose, so inspecting it internally was no problem. All the bottom braces were missing, the ones in the top were still there. It had been refurbished in the past and converted to 6 strings, and not in a good way. It is almost impossible to describe how bad the condition was on the sides, here are some pictures of the misery.

It took a while to understand what had happened. The original sides were probably made of very thin mahogany, about 1 mm. It had, of course, cracked and one or more repairmen had patched up the inside with various patches and cleats. I even think that some patch was in birch fists! Then they had leveled the outside and sanded down the original sides, still thinner, and stained both the inside and the outside.

When I carefully peeled off all the glued patches, most of which were stuck with dry and crumbly old hot hide glue, the sides were thinner in places than a 0.6 mm thick veneer! One of the sides was also completely broken off in one place. Some holes in the sides had glued in repairs that came off with the patch on the inside when it was detached.

The neck block was also in bad shape. It had cracked and been patched up. Part of the old Stauffer mechanism, in the form of a rectangular piece of metal, had been repositioned at a 45-degree angle across the crack, leaving a hole in the neck block where it was originally fitted.

The missing bottom braces had pushed out the sides and left holes at the top of the sides along the edge. The top had also received repairs and a thick piece of maple glued in as a bridge plate.

The neck, on the other hand, was in OK condition. There was life in the old brass bar frets. The last free part of the fingerboard had bent up a bit, and the neck itself was also bent. The hole for the seventh tuning screw in the head was plugged. When I received the guitar it had no tuning screws (and no saddle), they were to be replaced with 7 new Wittner screws. The fretboard itself had a crazy radius as it often does on these, would guess around 3-4″, a Telecaster has 7,25″ and the curvature is greater the smaller the number. The worst bend I can work with in my fret press is 6″, so it's not exactly easy to work with.

The bottom was also in good shape, just a small crack in the center joint at the top in addition to the missing braces.

The black painted maple bridge was original, but converted to 6 pin holes with a shim glued on top.

Someone who had previously renovated the guitar had stained both the bottom and the sides inside in a dark red-brown color. At first I thought it was original and tried to mimic the color on the inside of the new patches I glued in, but realized after a while that it was added later as the label had some of that color around the edges. In some of the pictures you can see the staining I did with the help of potassium permanganate, but it was easily washed off later with oxalic acid and some sandpaper.

The first thing that had to be fixed was the extremely thin sides. The only solution, apart from completely new sides, is to glue on new and better patches on the inside. For that, I used a 0.6 mm thick maple veneer. Strips of veneer with the grain across the grain in the sides were glued in six rounds. First a wide patch between the two thin kerfings, then two narrower strips to tie the kerfing to the rest of the sides. There were cracks along the edge of the kerfing that could not be glued together otherwise.

I have already made cauls for the inside lined with pieces of rubber yoga mat that allow you to get pressure on the entire surface of the glued veneer. The cauls mad of board had sawn out notches to be more flexible. On the outside I use equally flexible birch with standing grain, intended for manufacturing sweeping baskets, as a counterweight. It works very well on a curved surface, and you get a tight gluing of the veneer with hot hide glue. Plastic wrapping is used on both sides to avoid gluing cauls to veneer or the sides.

A piece of kerfing was also missing against the top.

The many string holes in the top were replaced with a sawed-out hole in the middle and a piece of spruce which partially filled the hole in the top and which also acted as a bridge plate. At the same time, one of the top braces was replaced as the original was bent the wrong way and also cracked when it was removed for re-gluing (it had a run-out). It is a departure from the original, which completely lacked a bridge plate, but the top needed to be strengthened in any case. One of the sides was also attached to the end block with a few layers of veneer, as the side was cracked right at the edge of the end block.

A replica of the bridge was made and glued in place. My OCD couldn't handle the original being misplaced, so it was glued straight and not in the exact same place as the original. Later, a saddle ditch was milled for a saddle instead of the brass fret.

When it came time to glue the bottom back on, there was very little to glue the bottom to. I glued on an extra kerfing in the form of sticks in soft and light linden wood. I made a temporary tool with adhesive sandpaper to smooth the original kerfing for gluing the new one. I also added some extra thin reinforcements in spruce in the top as well, in the open area in front of the bridge plate and on both sides of the sound hole. An old cracked top needs a little help to hold, especially for seven strings.

Before the bottom could be glued, I needed to work with the neck block and the Stauffer mechanism. A new mechanism had been purchased as half of the original was missing. To reinforce the neck block, I glued a 4 mm thick maple plate into the bottom of the neck pocket with my jig. The hole left by the old mechanism was filled in with spruce, and 4 mm was milled out and replaced with the maple plate. With the help of the plexiglass sheet and the screws, the jig can be adjusted so that the milling takes place in the same plane as the bottom of the neck pocket. The maple plate is sawn and fitted with the help of a little tape for the right measurements.

The neck was heated straighter in a few passes, first the overhang and then the neck itself was bent back.

One of the frets was lower than it should be, but with bar frets it's fairly easy to pull the fret up with a pair of pliers. Practically! The bottom frets were lower, probably ground down due to the "uphill" in the fretboard overhang. A few bindings at the neck attachment needed to be glued back using long clamps and a soft metal sheet.

All cracks in the top received cleats. The bridge plate was given small rounds of maple as reinforcement around the peg holes, and the bottom was cleaned from the ugly red-brown stain. The bottom was shrunk, and instead of trying to force it into place, the best solution was to mill for a binding around it once the bottom was glued. I used birch in the binding, which was then stained to the same color as the bottom and side. Some pictures from the bottom gluing.

The seven new Wittner screws with built-in mechanics were easily mounted with a drill and broach and did not need to be glued, I think they are very good. The guitar was strung with its special strings and tuning and measured for intonation. It is incredibly nice to have an adjustable neck, otherwise gluing the neck is the most difficult part to get right. In order to move the saddle forward on the replica bridge in the finest rosewood, I glued in an approx. 2 mm thick piece of bone at the top of the neck pocket. I imagine having a hard material in contact with the neck is good. The saddle and nut were made of camel bone, only the saddle was intoned. A Gator 3/4 case fit well.

Got a short feedback when it arrived: “I got the guitar today. Great! What a great job you have done!” 🙂

GG196 European parlor ca 1920

A GammelGura that was finished this summer was one of my "Waiting Room" objects. An European parlor from about 1920.

It had maple in the bottom, side, bridge and neck, spruce in the top. The fingerboard was also in black painted maple. The size was a little larger than usual, which indicates a slightly later year.

The top was completely uncracked, but it had still shrunk and loosened around the edge at the bottom instead of cracking. It turned out that it was not possible to glue the top back edge-to-edge with the sides, I have to add a little extra spruce at the rim. At some point I bought about ten replaced parlor tops on the German eBay, I used the edge of one of them as material to get the same grain as the top. First the top was glued to the sides, then the two fitting pieces, with hot hide glue.

With potassium permanganate and some natural ebony stain, the white spruce could be stained to match the rest of the top. This is what it looked like when all the bracing and the carbon fiber rod in the neck were glued in place.

The surface under the bridge was a little torn and some wood had come off with the bridge during a previous regluing. In order to get an even glue surface for the bridge, a few holes were milled in the top where the damage was and fitting patches of spruce were glued in. Nowadays, I always use a thicker spruce blank, both as the brodgeplate and to fill in the holes. The bridgeplate is thinned down around the holes, leaving fitting pieces to fill in the holes in the top. This makes the repair stronger, as you do not need to have an extra glue joint under the bridge. In this one, the holes were still filled in with smaller patches of spruce that were glued to the bridgeplate. Since it wasn't the entire area under the bridge that needed to be fixed, it should last.

A replica bridge in rosewood was made using the original as a template. Since a saddle takes up more space than the long brass band in the original bridge, I always make the replica wider and also a bit longer to accommodate the saddle and cover the wound in the top from the old bridge. The bridge is always glued with a new, fresh batch of hot hide glue.

A new 16′ radius rosewood fingerboard was made.

When the neck was glued back with my neck gluing jig, it was a guitar again!

New tuners were fitted, and the guitar was measured for intonation. A segmented saddle, new bridge pins, K&K pickup and a guitar strap knob on the neck completed the guitar.

As far as I remember (my memory is bad!) it sounded as good as expected. Since it was a while since it was delivered, I have received a feedback from the customer;

"Just wanted to write and tell you that I am so incredibly happy with the guitar! It is absolutely wonderful!!!!!! As good as it gets. I love it. Finally bought a thin black leather strap, which works well. Has premiered the show, and uses the guitar in one of the songs there. Have also already had many gigs when I played on it. It really is fantastic."

I think it found its home 🙂