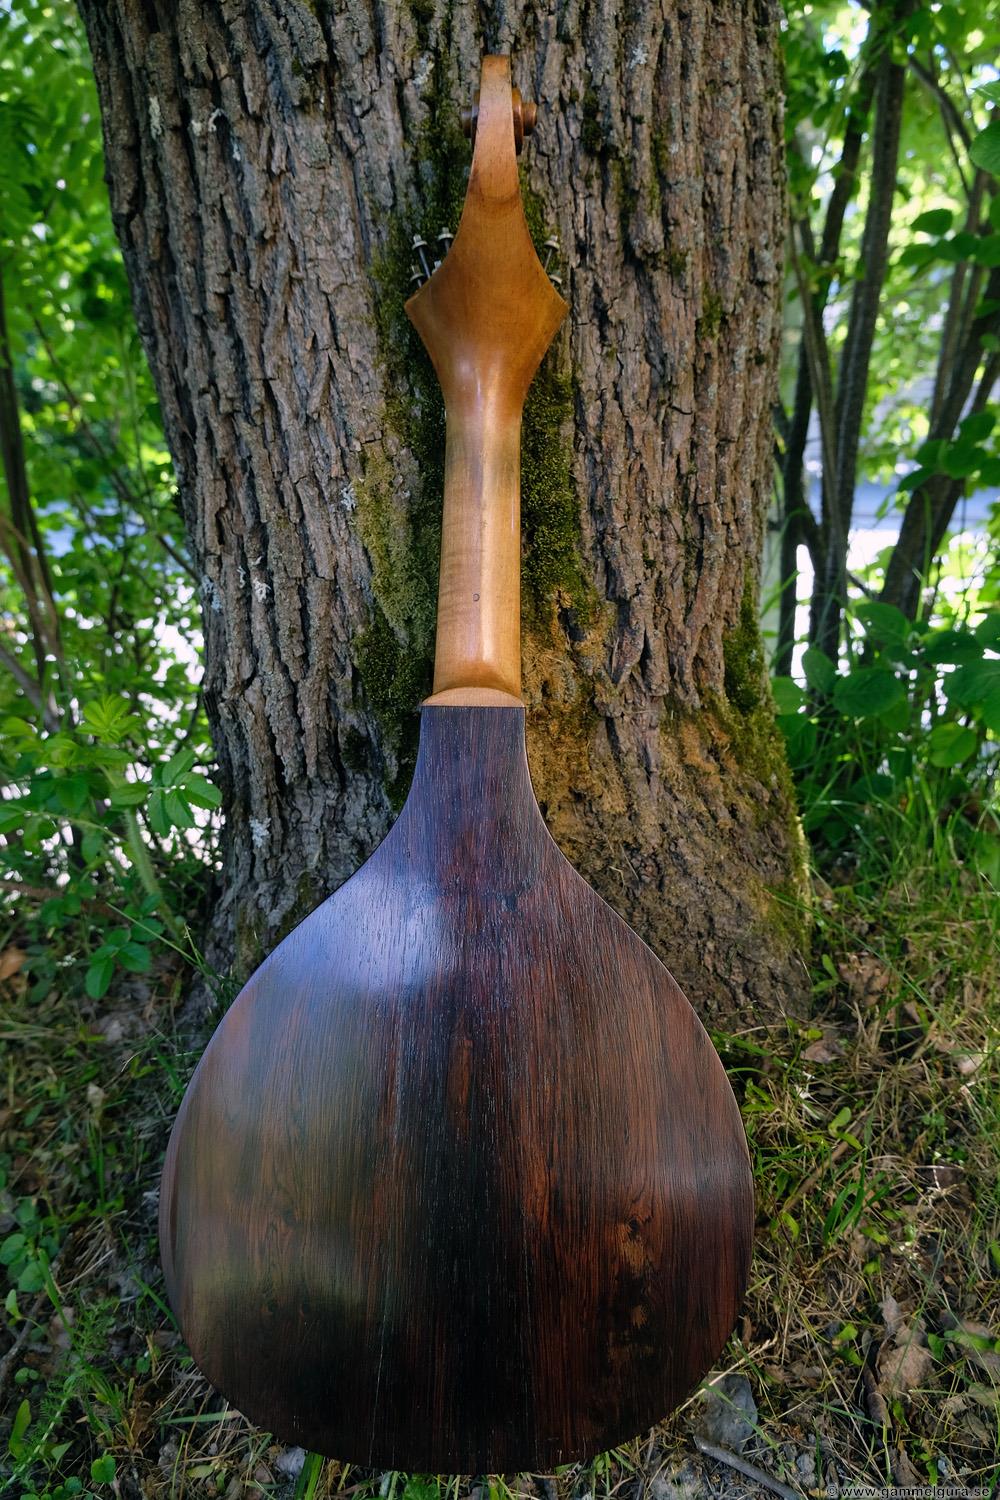
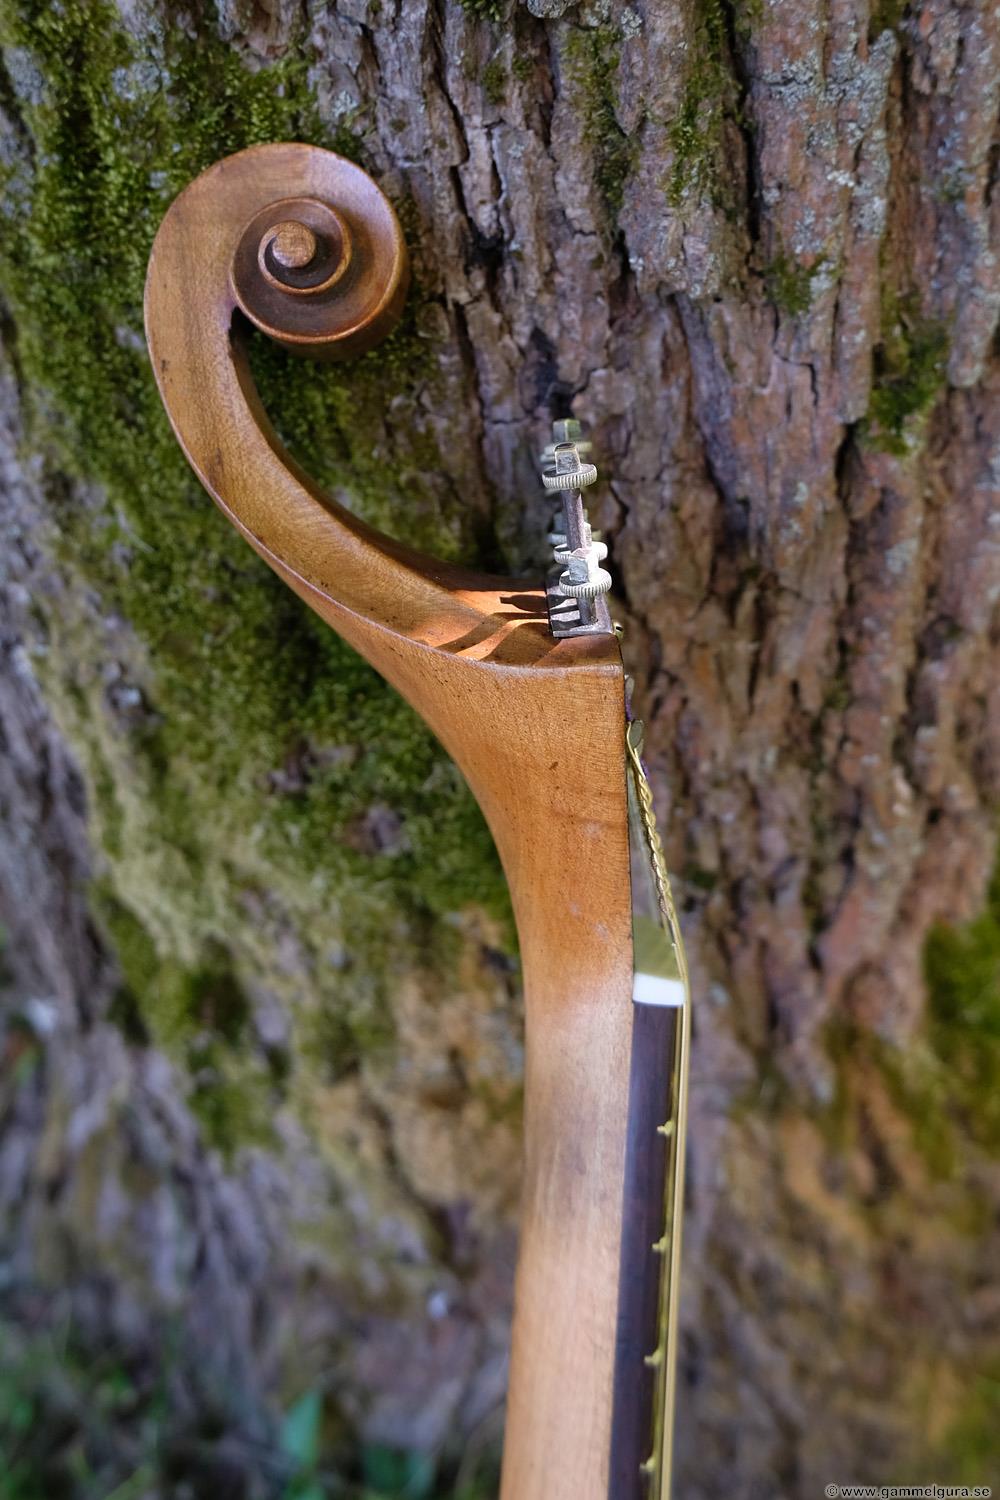
An advanced repair that I could not refuse was a very special Guitarra, a Portuguese instrument with 12 strings with tuning screws that resembles a medieval torture instrument. I had seen these in the picture and was curious about how and why they work.
It came in a coffin case that was large enough for the instrument, but which was not in the best condition. Fortunately, the guitarra itself was in better condition than the case. After an inspection, I could see that one of the 12 tuning screws did not work. They had tried to fix it, but put a short tuning screw instead of a long one, which meant that three tuning screws could not be used, the wrong short tuning screw was removed. The bottom had two solid cracks in the fine rosewood wood. The top also had a crack, but it was repaired in a perfectly OK way. The rim and neck were whole. The bar frets were not in the best condition. The nut had been tampered with, there were 20 (!) string notches. The bridge, which is probably original, however, had 12 string notches in four pairs, if I remember correctly. The "saddle", in the form of a long bar fret in brass, may have been replaced. The biggest problem in addition to cracks and loose braces, however, was that the top had sunk in at the sound hole and the thick fingerboard in fine rosewood dipped down on the top.

The guitar had a large label inside with the text:
João Miguel Andrade
Corda Instrument Manufacture and Armazem
Guitars, Brilliant Violas, Cavacos
Lisbon
Rua nova de Trinidade
Sole Agents for Great Britain and Colonies
Alban Voigt & Co.,
14, Edmund Place, LONDON, EC
"Fabrica e Armazem de Instrumentos de Corda" means factory (or manufacturer) of instruments and strings. "Guitarras, Violas braguezas, Cavacos" are Portuguese guitars in the style of Braga and probably cavaquinhos. "Rua da Trinidade" is Trinidad Street.
In addition, there were some notes on the label, probably made by the previous renovator.
Online I found a similar one but more lavish guitar with the text:


“I believe this guitarra is from the 1890's because of the book, A Complete Method for Portuguese Guitarra by Havelock Mason, which was supposedly published in 1892 or 1895. This method book was published by the importer of this guitarra, Alban Voigt & Company, at a time when the Portuguese guitar was popular in Britain. The tuning used in this book (gG, bB, dD, gg, bb, dd) was called the natural tuning in 19th century Portugal – as opposd to the fado tuning (dD, aA, bB, ee, aa, bb). It is a tuning which adapted the 10-string 6-course English Guitar tuning to the 12-string 6-course Portuguese guitarra. This method is a basic instruction book which also contains a few fados as well as a polka, a bolero and a romanza. ”
One can assume that this one is also made in the 1890s, bare frets is a tell that it is old. Virtually all manufacturers, except Martin, who used bar frets into the 1930s, switched to the T frets in the years before 1900. The T frets (T stands for "tang") with "barbs" were patented per se by Clinton F Smith first in 1929 in the US, but I have only seen bar frets on 1800th century guitars.
The tricky tuning screws are actually an invention that was originally used on English citterns. They are called, among other things Preston Tuners. There is evidence for similar tuning screws as early as 1766, they have also been used on the German waldcitter, but are now only used on the Portuguese fado instruments. You can still buy similar instruments and tuning screws, including on FolkReps site. One thing you need is a special tool to make loops at both ends of the strings. Luckily I already had one that I bought many years ago from FolkReps. You can also buy new Preston tuning screws of the same type. I also modified a clock key to save my fingertips and ease the tuning.
Well. This is not a regular GammelGura renovation, it would just be playable again. The customer wants to test a different tuning with five double strings tuned GCGCG, which meant that there were enough tuning screws for the 10 strings.
The bottom came loose without problems. All braces at the bottom were more or less loose, the hot hide glue does not adhere as well to rosewood as to spruce. In the top, the bracing were fixed as they should be. When the bottom braces were completely loosened, the bottom was in two parts, one of which had an almost continuous crack. The cracks were cleaned and glued together with a long spruce cleat on top. For once, I antiquated the new wood with potassium permanganate, which quickly oxidizes wood and makes the spruce darker and orange-yellow, which matched the center stick. All bottom braces were re-glued with hort hide glue.
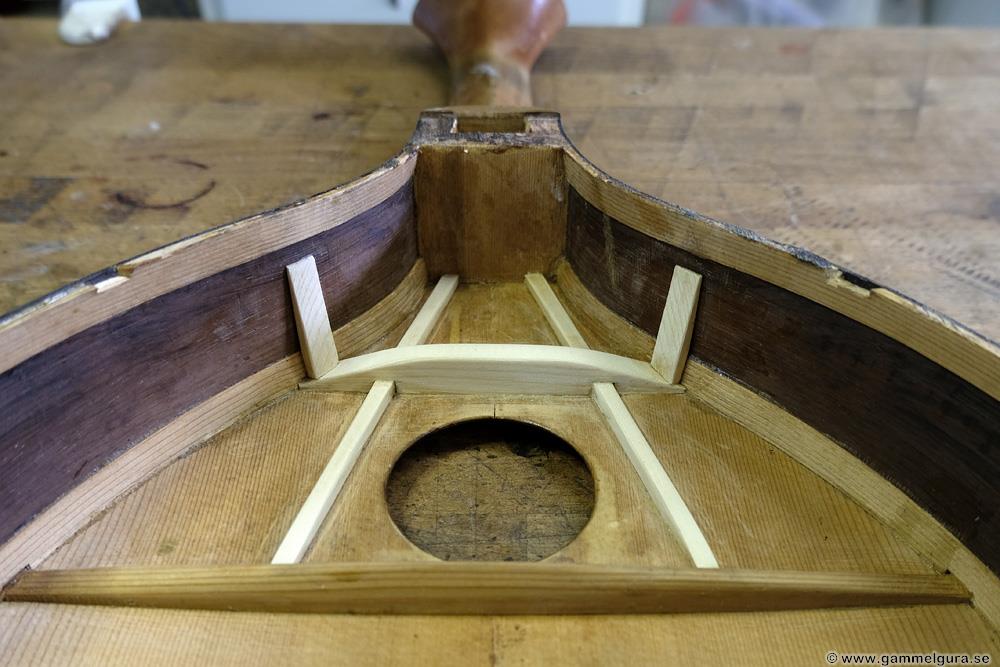

All the braces in the top were firmly glued. But the top brace was loosened so that I could wet the top and put the top plus fretboard in pressure for XNUMX hours. It worked well, after pressing the top, it was not as sunken and the fretboard straight. To keep the top in trim, made a new and stronger brace with a curved underside, the tips of that brace were secured with two abutments that were glued to the inside of the rim. In addition, I made an A frame to reinforce the area around the sound hole.


The bar fret was not in good condition, but luckily they were thin. My old Dunlop brass frets, with a little thicker tang, fitted perfectly in the fret grooves. I also checked the location of the frets, and they were in just the right place. The very thick fretboard had an impressive radius. My tool for bending frets to a radius maxed out at about 6″ radius, but the fretboard had about 3″ radius! With a few feeler gauges, I was able to adjust the fretbender so that I got a circular fret string with almost two full circles at 15 cm in diameter, which corresponded to the radius of the board.


The tuning screws were oiled and the bottom was glued back without any problems. With a straight fretboard, the geometry towards the bridge was perfectly OK. I had to shim up the feets of the bridge a couple of mm to adjust the string height correctly. The top also had a radius, it took a few hours to shape the bridge feet against the top. A new bone nut was made, a brass fret notched for five double strings replaced the original saddle fret.

A charming detail was the 11 mini-string pins in bone that sat on the rim at the back as a bracket for the strings' loop. All of them were more or less loose, and I glued them with hot hide glue. The missing "string pin" was made of a piece of bone with the help of my little cordless drill that had to act as a lathe. It took at least an hour to do it. At one point, before I glued them down, I discovered that another one was missing. Unlikely enough, I could find it on the floor, even though I had used with the vacuum cleaner before…

As usual, small pieces of frets were temporarily mounted along the middle of the fretboard and the guitarra was strung up. It was a bit new that each string had to be made before you could string it on. The tool for making loops was not directly of the highest quality, but it was possible to use it. The problem was the thickest spun strings, if I made the loop too tight the string broke. I also managed to cut off the wrong side of the string at the last loop, the string itself and not the abundance! I found another string with the same thickness and was able to string up all 10 strings. The neck was allowed to settle in a couple of days during the vibration session.

With my new Stewmac jig, the guitar was fixed in the position it has with tensioned strings, the temporary band pieces along the middle were loosened and the fretboard was leveled and given a little relief. The board was then banded with Dunlop brass tape. I could not use my usual belt press as I did not have a suitable 3 ″ bracket, I had to work with hammers, super glue and clamps. It went perfectly OK even some of the bands had to be redone as they did not sit properly as they should. The guitar got another pass in the Stewmac jig for crowning and polishing the bands.


The “interesting tuning” made it difficult for me to play it, but my violinist Björn Sohlin was fascinated by it and improvised medieval melodies that matched the appearance of the tuning screws!
The tuning screws worked well, of course it takes a while before the two loops stretch out and the tuning becomes stable. The clock key made the tuning easier, but it was also possible to tune with the fingertips, even if it was harder to do.
The whole instrument, as big as a larger mandolin, was given a couple of rounds of spirit varnish which was then matted down with steel wool. The small format puts a limit to the bass tone, but with this tuning it had a good timbre and long sustain.