
I rarely take pictures of regular renovations, but this one was unusual. It is a German lute guitar from about the mid-1920s. Imaginatively shaped and carved guitars in an old style was probably well suited for the troubadours and music of the time.
This one had a round mandolin bottom, renaissance frets on the top, bar frets and a scalloped fretboard as well as a violin-like carved head with separate tuners. And not least an ornamented sound hole cut directly in the spruce of the top. It was unplayable with about 5 mm string height, the top was not completely flat with two solid cracks behind the bridge and a bridge that was well on its way to being torn by the nylon strings. The bridge had also been re-glued and the surrounding area had been beaten badly. A challenge!
Since there was no soundhole to work through and no bottom to pick off, there was only one thing to do. To remove the top. The top had a wide decorative binding all around. From the inside, a 1 mm wide white celluloid strip followed by a 1 mm wide rosewood strip and an outer 2 mm wide white celluloid strip. It turned out that the height of the strips (which had been milled in after the top had been glued in place) was almost as thick as the spruce top itself. It was possible to loosen the two white celluloid strips with a razor blade and a slashing knife, but the rosewood strip in the middle had to be scrapped.
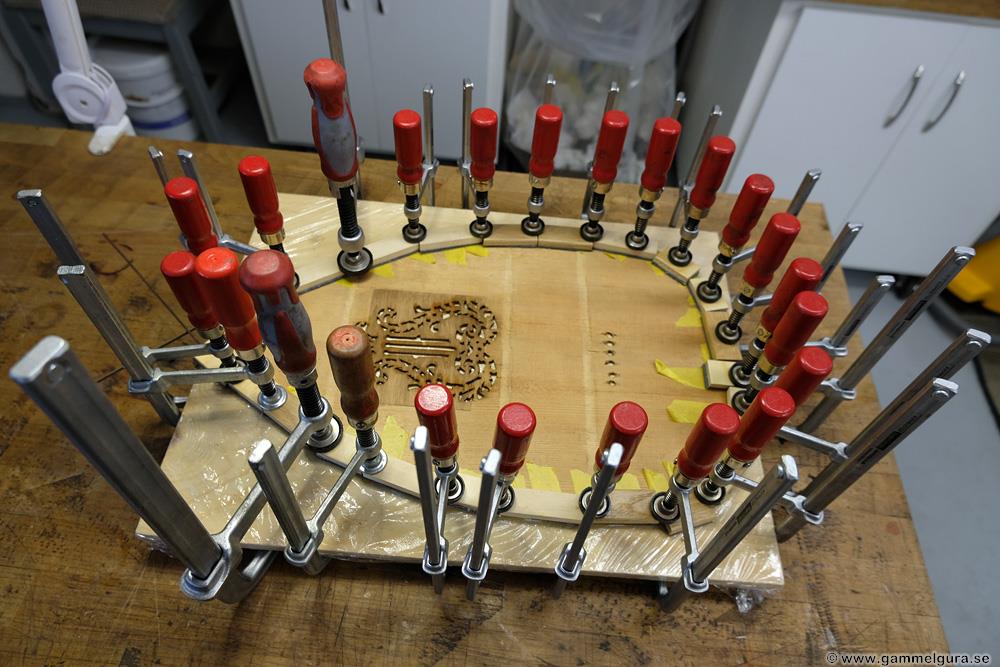
With the top off, I could see that the bowl itself was solid, I did not need to repair anything in the body. The top, on the other hand, needed new braces and a bridge plate that was lacking. The cracks were glued together first. After some thought, I realized that it was best to glue the binding around the top and not wait for the top to be glued in place. With all the bindings in place, it will be easy to fit the top against the rim of the bowl. This is something I have not done before, and I had to come up with a solution.
What I did was glue the three strips in rounds, the roswood strip had to be 1,5 mm to make the shrunken top a bit wider. To protect the varnish on the top, I first taped on a thin low-adhesive plastic tape on the top. This tape comes off very easily when heated with a heat gun and not even the most sensitive varnish comes with it. I was then able to attach tape on top of the low-adhesive tape to be able to tighten and glue the bindings without damaging the paint. The top got a bunch of tapes mounted, the top was then turned over and placed on a plate. The bindings were glued with a waterproof universal glue. To ensure that the strips came down level with the surface of the top, clamps and cauls with soft rubber were used.
The innermost white celluloid strip is glued.


The rosewood strip is glued in the second pass.

Finally, the outermost celluloid strip is glued.


It turned out that the neck continued in a pin into the neck block. To straighten and reset the neck, the pin was loosened from glue and a wedge was inserted under it to force the neck to a better position with a smaller angle to the top. It went well, even if you could see a small crack on the other side where the neck was attached to the body. The top got three new ladder braces in the same place as the originals, but I also added an A-frame around the sound hole and my "patented" spruce bridge plate in spruce to make the top stronger.


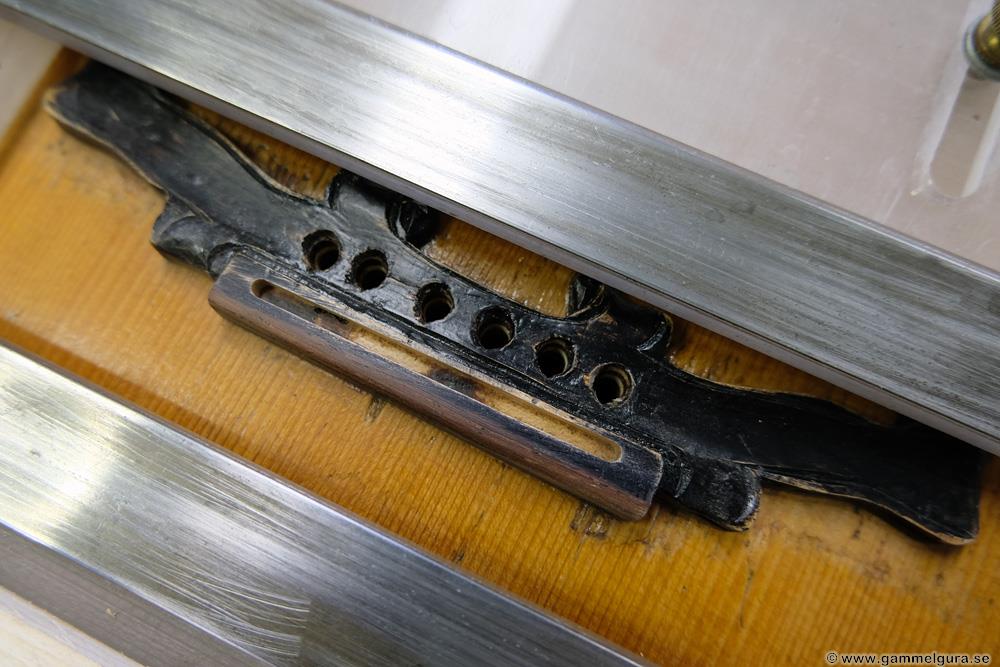
The bridge was extremely incorrectly designed, it was less than 2 mm thick around the string pin holes! The front and thicker part with a trench for a saddle was bent. Making a replica would have been a lot of work as it was carved like everything else on the guitar, instead I glued on a 3 mm thick rosewood plate under the bridge. In addition, I extended the bridge on the front with another piece of rosewood that was glued with hot hide glue to the bottom plate and the front of the original bridge. Stewmac's practical fixing screws made it easy to glue the bridge in the right place. The area around the bridge was cleared of dirt and "Karlsson's glue", but there was still permanent damage from previous repairs.


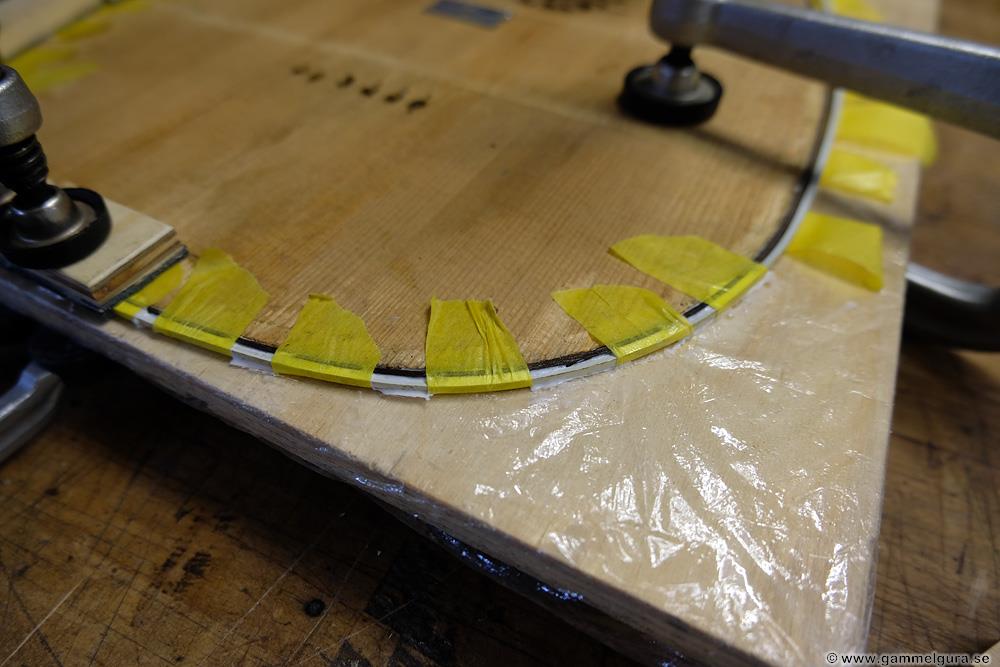
The next problem was to glue the top to a round bottom, no clamps could be used as usual. After some thought and testing, it became a jig with the help of tape and a strap. In the same way as before, the varnish was protected with low-adhesive tape, doubled and stronger tapes were used to fasten the top, which was glued with fish glue with long set time. The bowl also needed to be pressed together lengthwise, but it went well with the strap. The 1 mm wider top with the help of the wider rosewood strip fit well.


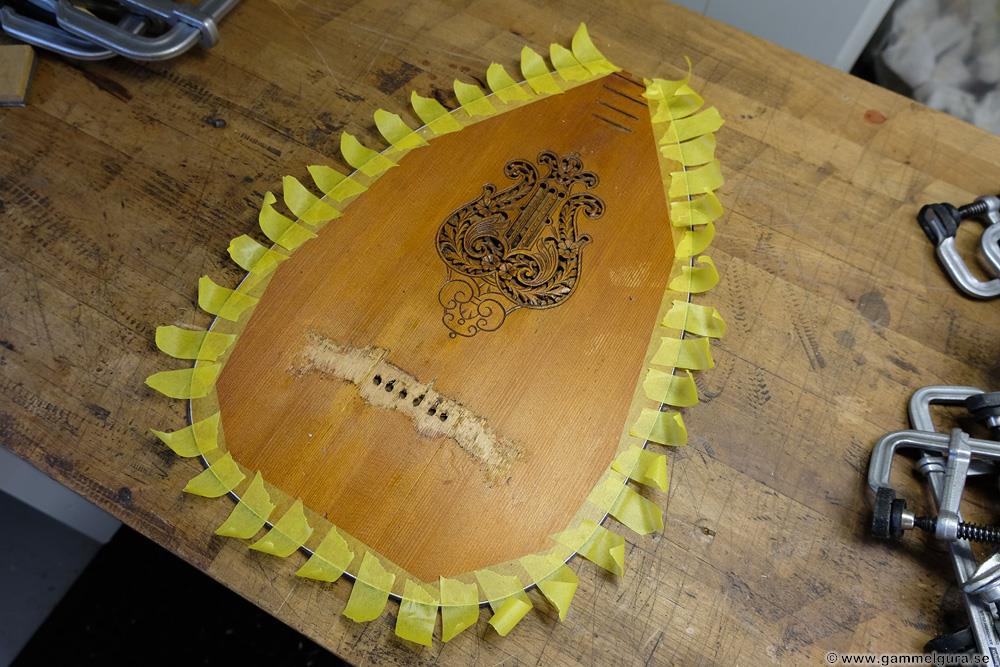
The heat gun and "razor blade" in plastic made it easy to loosen all the tape. The thin yellow low-adhesive tape does not adhere at all when heated properly.

But that was not the end of the problems with the round bottom and the lack of sound holes. Another jig had to be invented when the ditch for the saddle was to be milled. Here, too, I used tape and a strap to hold the milling jig.


At the bottom of the milled ditch, wormholes appeared that were filled with rosewood dust and super glue. Only now did I discover that the string hole for the b string was very misplaced! When I stringed up with solid string pins, I sawed the notch for the string as close to the hole of the G-string as I could. It worked.
I was a bit lucky with the neck angle and I got saddle height left to adjust with the right string height. The intonation was tricky as only the 9 frets in the neck could be trusted, the frets that sat on the top were lower than those in the neck. The neck was fretted with rectangular bar frets and the fretboard scalloped between the frets. The neck was straight, bar frets make the neck very stiff, and they work as well as or better than a truss rod. An old technology that works.

The whole guitar was given a coat of clear spirit varnish, the varnish on the top was also given a little color to dampen the damage around the bridge. The tuners were cleaned and lubricated, and nylon strings were strung on. After vibrating for three days, it sounds really good, but I will never like the round bottom. The guitar is slippery as a soap!


A wonderful renovation!
I bought a tilt on the block in 2014. Looked nice in the picture but could hardly be played on when it came home so it was hanging as a decoration. this spring (2021) I at least made an attempt and sent it to Roger. My Danish son-in-law took it out sometimes and a little for his sake I tried and said it was not in a hurry. After a while I regretted it and realized that there is probably nothing to do because some parts were so itchy. Called, but then he was done and had managed to renovate it both in appearance and instrumentally so I who normally dislike plastic-stringed instruments now enjoy to the fullest…
Good job Roger !!
What fun that it turned out well, and thank you for writing a few lines as well. Yes, it was extra awkward with its round shape and a sound hole that can not be worked through. There were a lot of new problems to solve, but it's always interesting for a repairman like me. It was possible to get it in order again 🙂