
Come to think of the team lists I use to secure the cracks in old guitars.
Team patches are otherwise the usual method and it fits well when you, like me, have not opened up the guitar. But why not secure the whole crack if you have the opportunity? One thing I have not thought of before is that the edge of an entire team list can be an indication point for a new crack if the edge of the team list ends up right along one and the same grain. The risk itself is not great as I always thin out the team strips on the edges so that the strip is a triangle in cross section, but still. Another thing that annoyed me is that it is so difficult to carve down the edges nicely when they are glued in a lid with frames around. It also takes an unnecessary amount of time each time and there is a lot of sanding dust.
One last thought that motivated the construction of a jig is that nowadays I always start by gluing cracks in a separate workout with only skin glue and then I make sure that the lid / bottom on both sides of the crack is level with each other with clamps. There is no reason to use the clamps when I then glue a layer strip over the crack, instead you can let the skin glue do the job as it sucks the layer strip together with the lid / bottom when the glue dries.
My new method uses ready-made middle moldings for bottom halves that can be purchased from China just as before. They are 2 cm wide, 2 mm thick and 47 cm long. Will maybe make my own 1 cm wide moldings when I get started with my little band saw.

In the first of two jigs I split it in the middle. The jig has an open gap in the middle where the saw blade fits, following with the wooden block as I saw so that the strip does not go off. Uses a sharp Japanese saw, has tried different ways to split but this works best.


In the second jig, I triangulate the team list using coarse sandpaper. Have tried to shape it with sharp planer, knife and chisel, but the molding is so weak that it does not hold together. Only when it is glued in place does a sharp knife work (but I don't want to do that anymore).
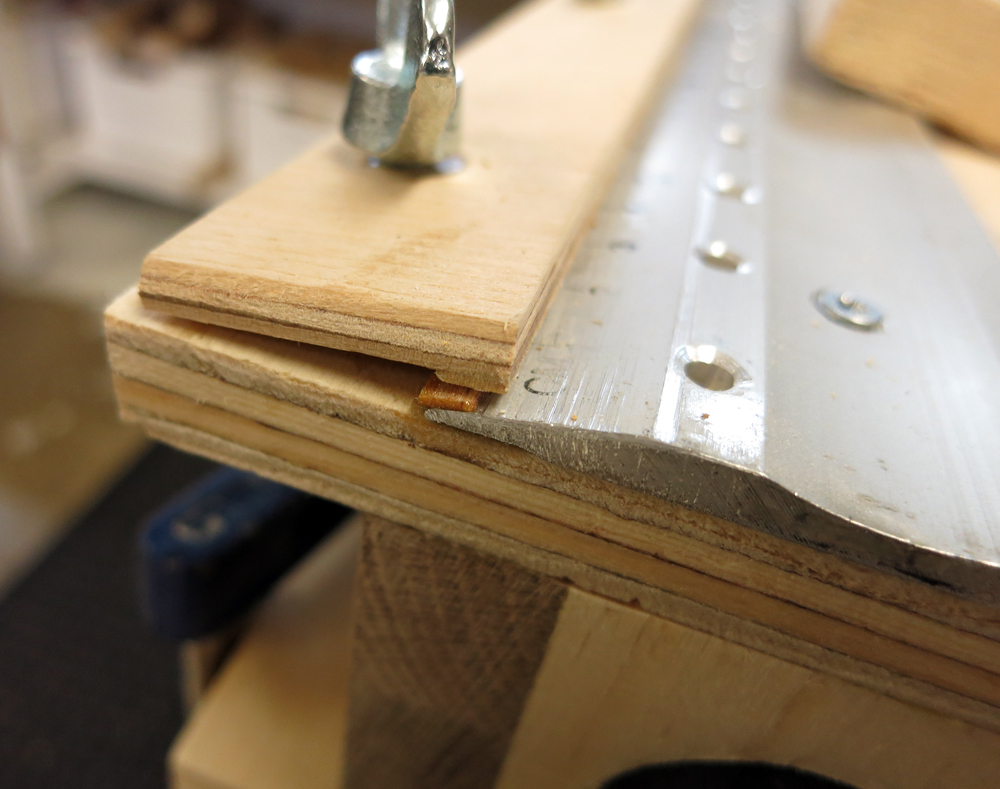
The jig has been made using a 50 cm piece of a Jula ruler (my old worn out!). The slope where the scale sits fit well, also nice with aluminum. Not difficult to drill the holes either, all dimensions were already in place! To clamp the strip while sanding, a piece of birch plywood and a number of wing nuts were used. It gets a lot of dust from the grinding, so did a suction box under the ruler where I plug in the vacuum cleaner. A bunch of air holes suck out the dust as I grind.

A sanding block with a strip of self-adhesive sandpaper along one edge does the job.

In order for the team strip to be sanded to end properly, a 1 mm thick wooden strip was glued in the right place on the ruler. The opposing team was given a matching list to be able to grab the team list when it should be triangulated on the other side.
The "suction table" works extremely well, not a hint of dust while I grind. The sanding block also attaches a little grand as it covers several holes, just need to move the block back and forth.


One side triangulated. The conical vacuum cleaner nozzle is easily pushed into the hole.

The other side is also triangulated in the same way.

The finished team list is ready to be cut up and used for the next repair. The strip becomes about 1,7 mm in the middle and very thin on the edge. Completely smooth and symmetrical and does not require any on-site finishing 🙂


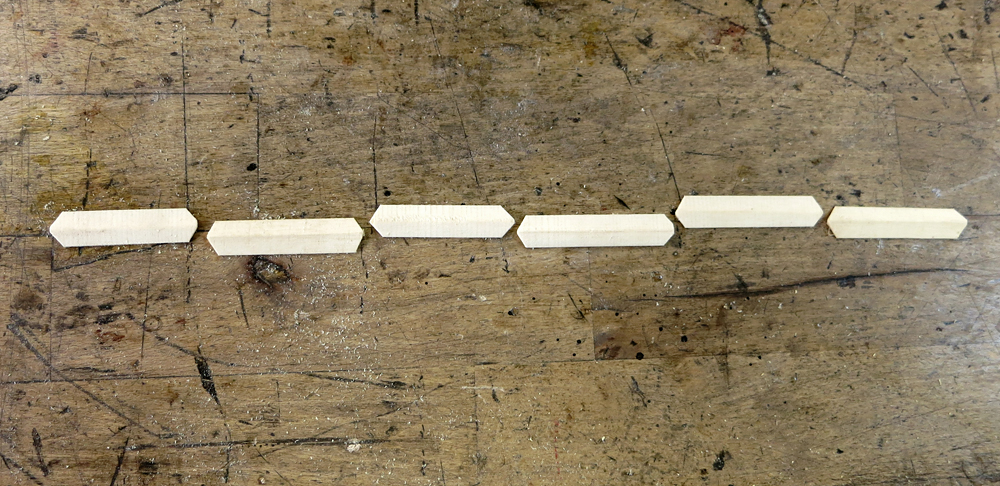
My idea is to cut into long pieces and cut the ends to a tip with a sharp pliers. The mounting will be done so that each piece of molding covers the crack but does not end on the same vein in the lid. A little space between the pieces too, always good to let the lid get its freedom to move. Lay out some broken pieces over a supposed crack. Will be fun to glue cracks in the next guitar!
It looks like my GG is not included
In the ongoing batch !? Can it really sue ??
/ of
Hmmm interesting!
This means that you make team lists with the vein across the lid. If I understood it correctly, you have previously put the vein along with the old one. It probably means a stronger repair. But on the other hand, there will be some laminate pieces on the whole. Would it be fun to hear how you think it affects the sound? But given that you now get very thin and narrow lists, it may be negligible
The "team lists" have always had the grain across the cracks. It does not work to repair a crack with a team patch with the grain along the grain in the lid. The job to be performed is to secure the crack and then the grain should be 45-90 degrees across. The weight of the moldings is almost negligible compared to the lid as they are thin.
A larger patch I made on a thin lid with the vein along with the vein vein actually got a drying crack right through both the lid and the patch. Next time I will make one or two strips with the vein across into a similar patch.
Sure, you can compare a bit with a laminate (although it really does resist!) And that is why I will cut the moldings into smaller pieces, partly not to give an edge to the next crack and partly to give the lid a little more freedom. Hardly noticeable improvement but feels more right.
The repair of crack with team strip or team tag always gives new slides to the sound. It can only get better! The weight of the thin strips in a guitar cover is negligible. On a smaller instrument such as a violin or a mandolin, you can probably think of making smaller team notes, but on a guitar the sound is not noticeably affected by a team list.