I have to go through the Swedish text and correct the translation manually. This is now done with all the recent and new blog posts. The auto translate don't understand guitar lingo!
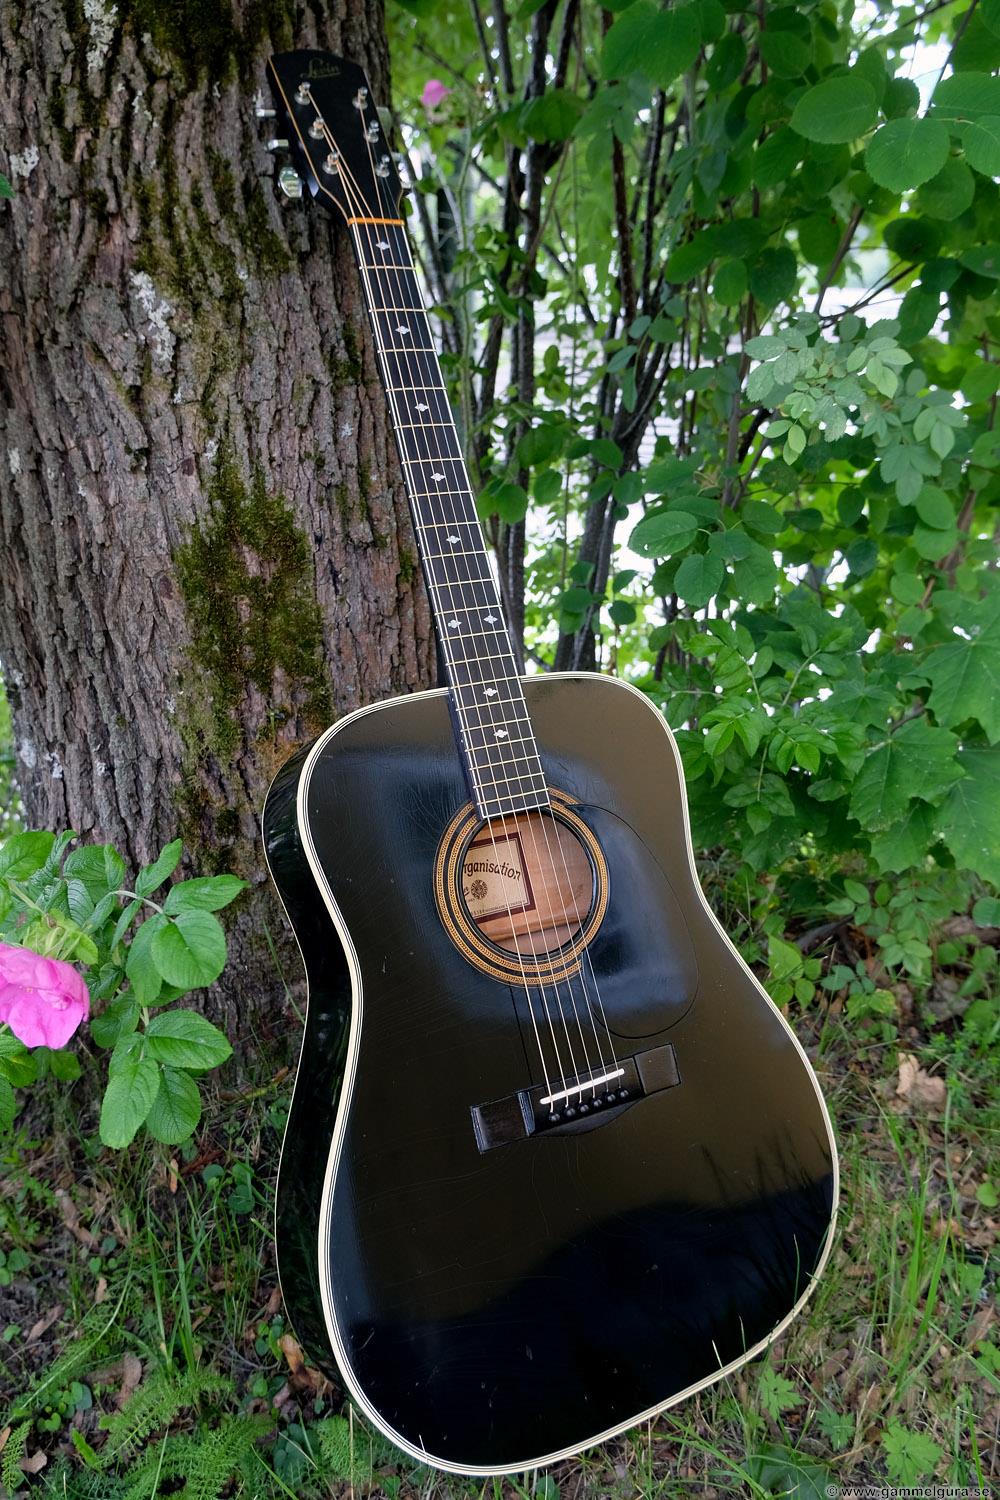
GG207 Bjärton 1964
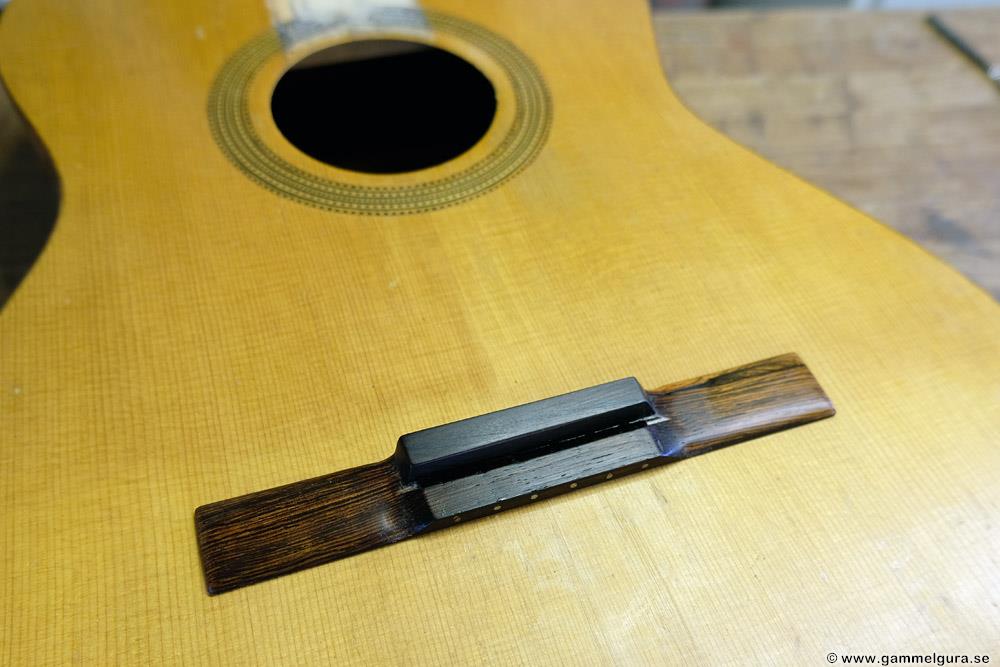
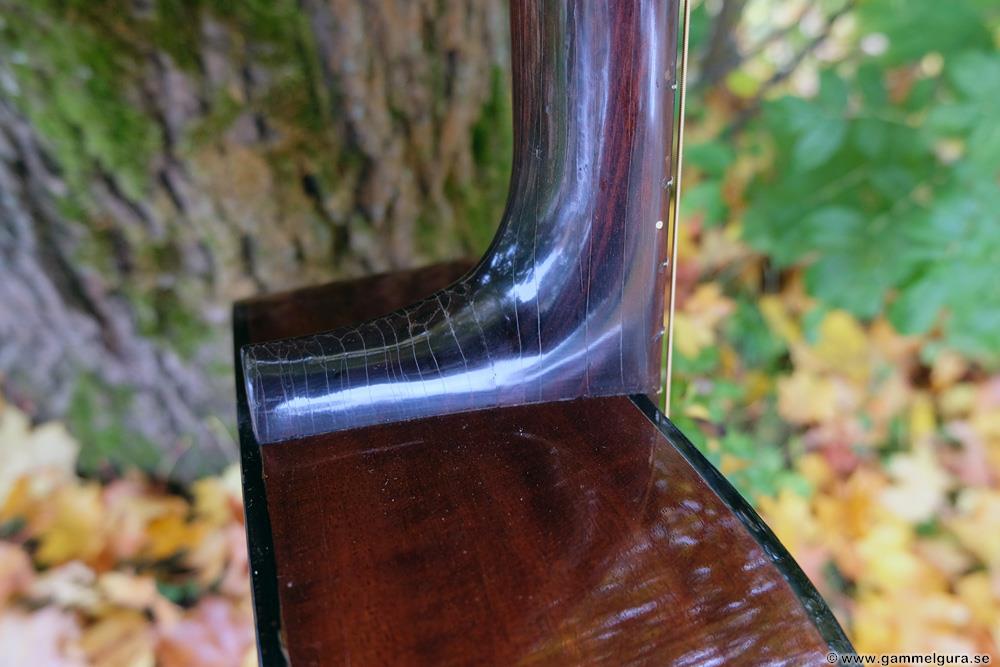
Sometimes you get different objects for a GammelGura, this time a modern and full-size Hagström from 1964, made by Bjärton and exported to Canada, then imported back to Sweden. Unlike similar Bjärtons with screwed necks, tail piece and a floating adjustable bridge (what monsters they are!), this one had a very nice fixed bridge and a standard dovetail neck attachment. So much better. It was worn, but largely complete.
The tuners were in good condition, the fingerboard well played and worn, the neck needed resetting and the pick guard needed regluing. The frets were low and worn, and the celluloid inlays in the fingerboard had shrunk and were about to come off. The cover washer for the truss rod was missing, I later discovered that the truss rod was broken, or at least not working. The top of these is in solid spruce, while the sides and bottom are in three layers of plywood with mahogany in the outermost layers. There were no cracks in either the top, bottom or sides.


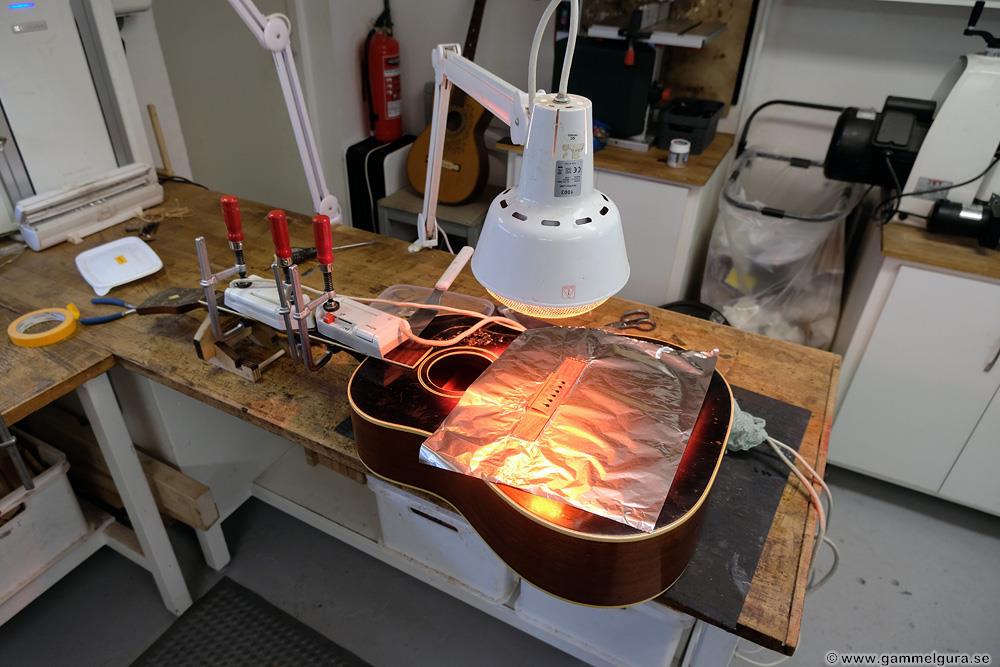


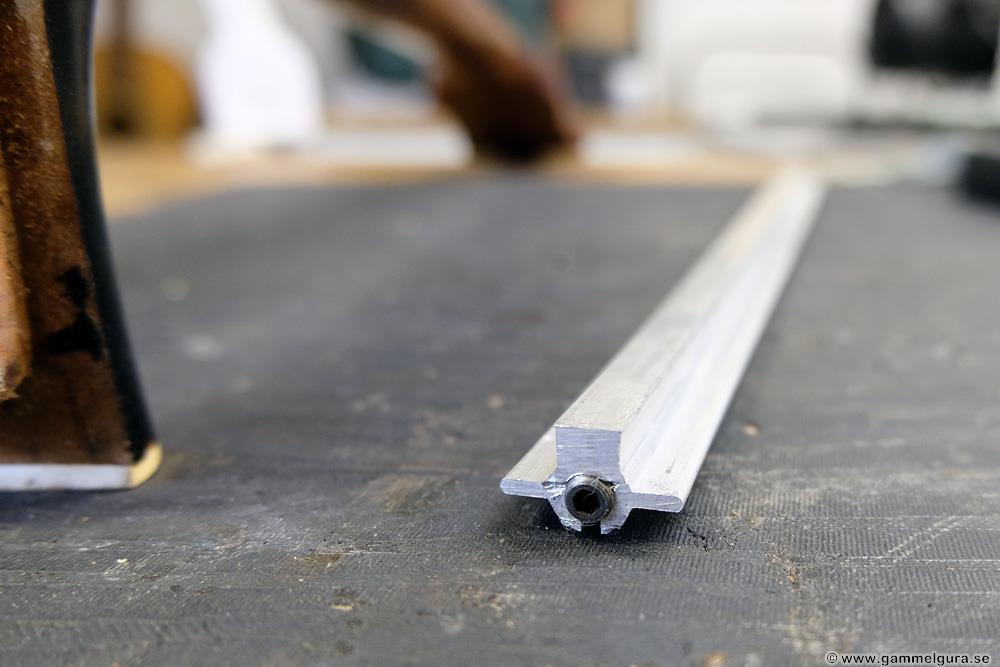
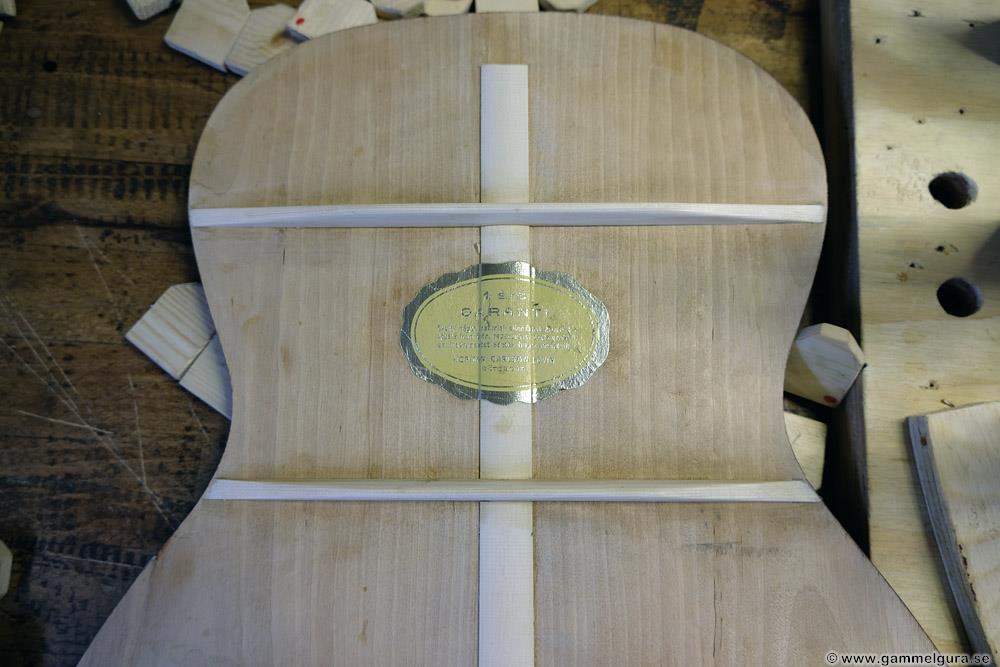
The neck and fingerboard were easy to get loose as they were glued with hot hide glue. The fretboard was heated with small Braun travel irons and the saddle with my heat lamp. The neck was steamed loose. The truss rod was very special, and it looked like it would be difficult to pull loose. But it was easy to knock out as it was not glued. The wings of the special profile in the neck first had to be filled in with a thin strip of rosewood. Next, I milled the channel as usual for a hollow carbon rod to replace the truss rod. This time the hole in the carbon rod was filled with a solid round 8mm carbon rod for some extra stiffness.


The celluloid bottom binding could not be saved when the bottom came off, also, the thin binding on the edge of the fingerboard was broken. A problem with plywood when the bottom is to be removed is that you cannot avoid following a wrong glue joint. Although I was careful with the knife, there was some loss of the inner mahogany layer around the edge of the bottom and the white center layer came through. Before gluing the bottom back on, I spliced in small pieces of mahogany veneer where it was missing.
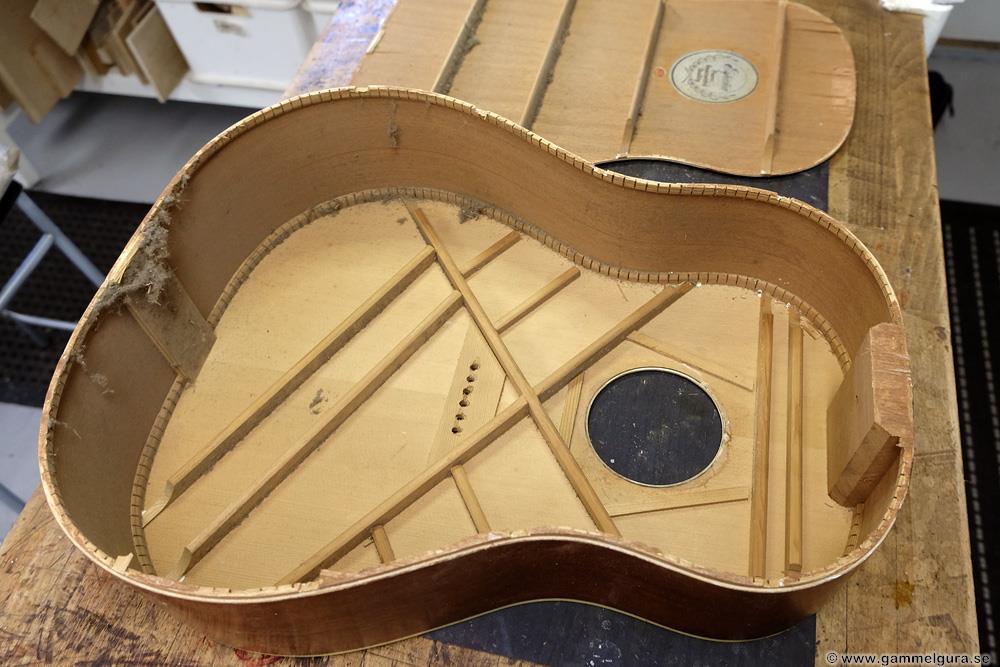
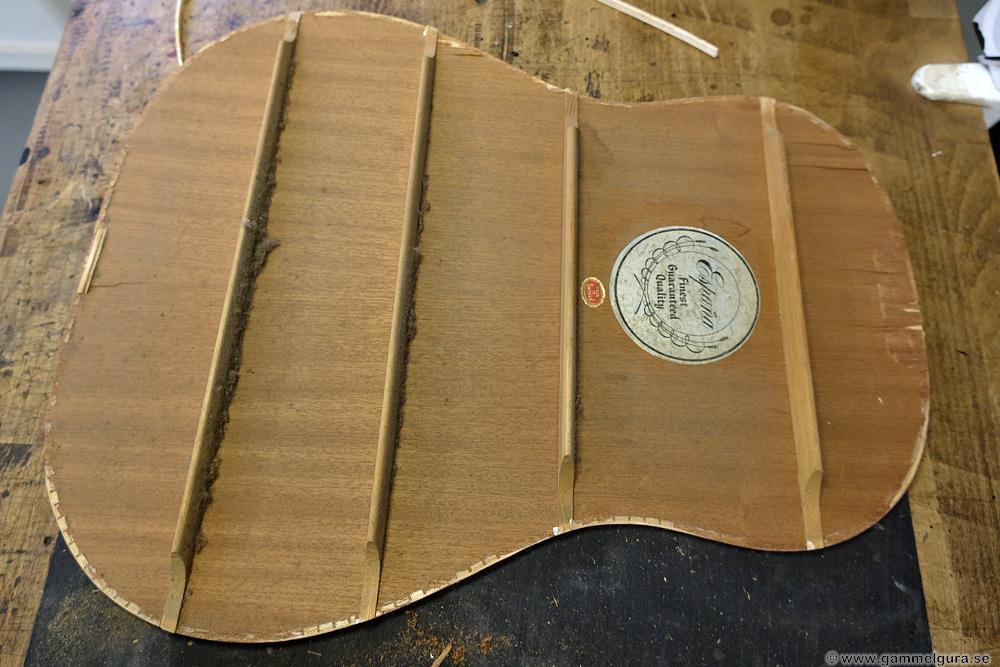
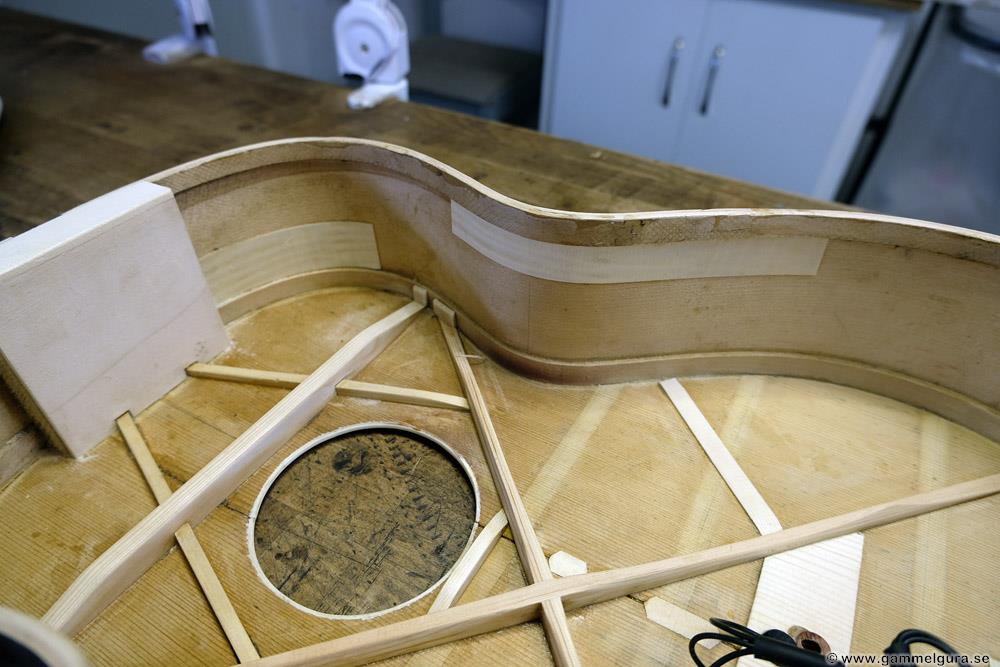
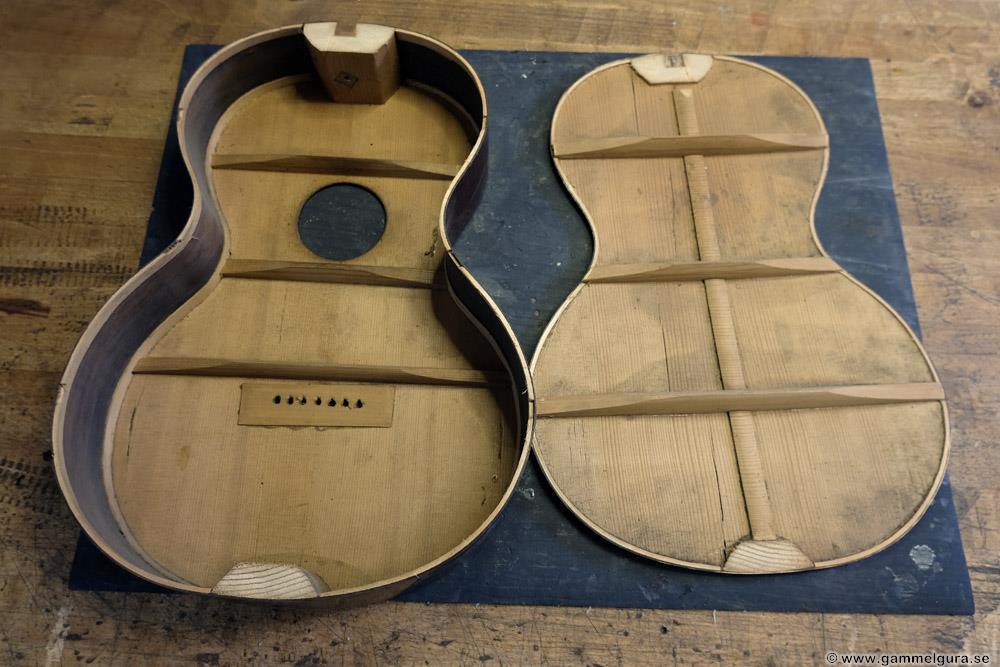
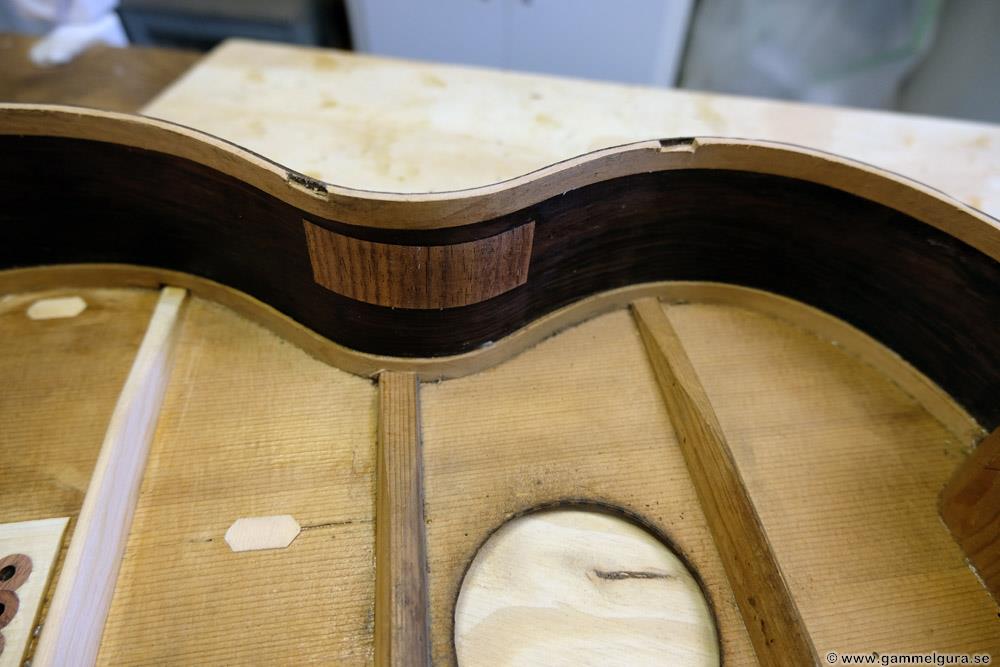
With the bottom off, I could see that the bracing in the top followed a standard Martin. The detail work in the top's braces wasn't the best, but the cross itself was done right. The braces were quickly made in the factory with the same shape and a very abrupt tapering of the ends. Interestingly enough, the bridge plate was made of spruce, which I like, however reinforcements had not been put in around the stringpin holes where the balls ends had worn the bridge plate. The neck block was solid, while the end block was far too flimsy, as if made to break if you drop the guitar on the end knob.

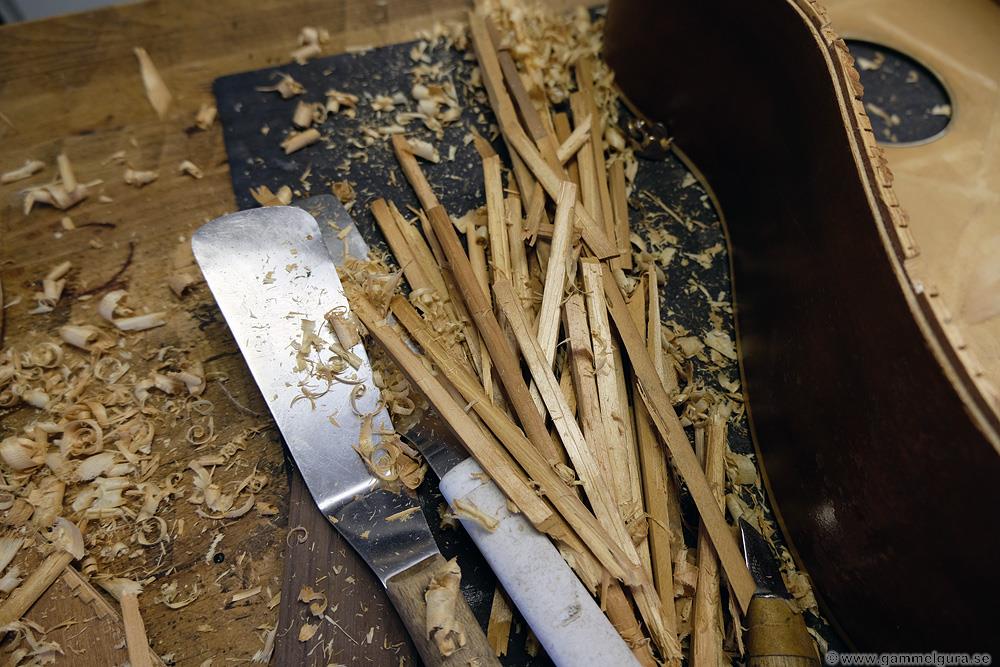
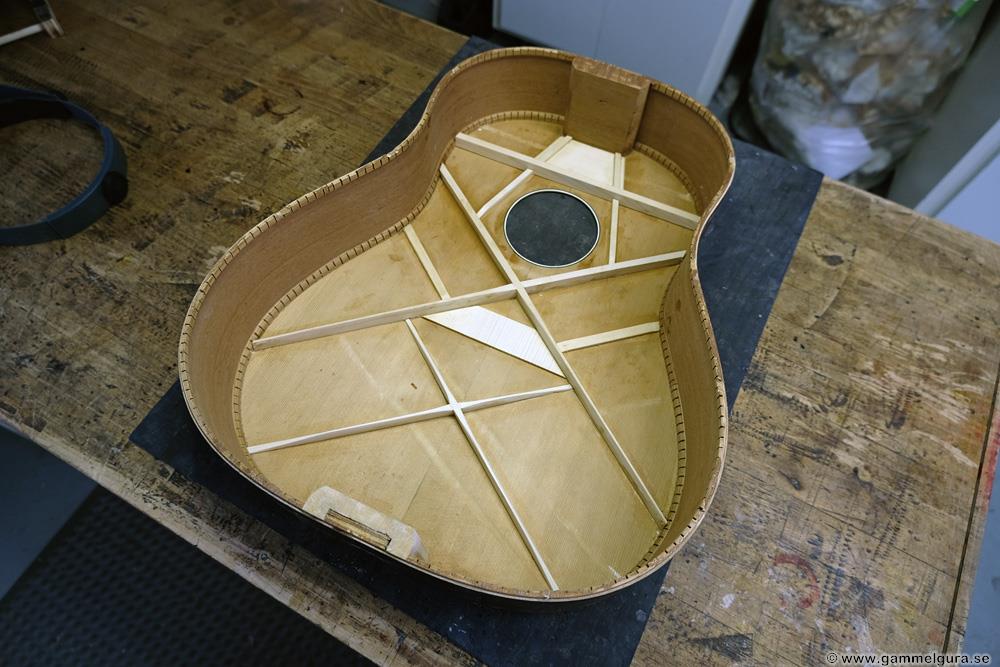
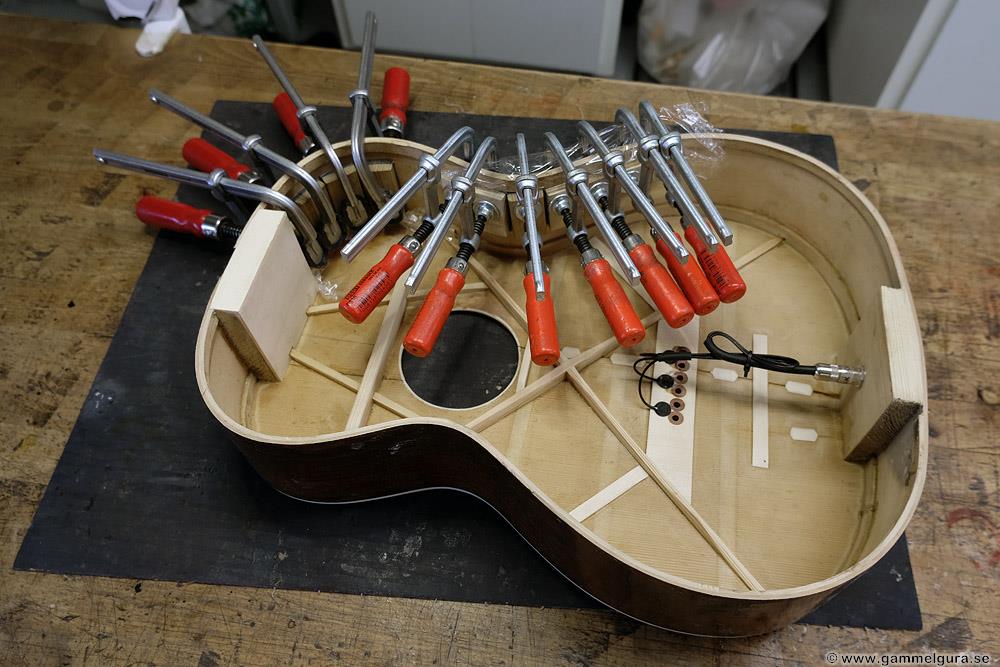
The braces in the top were glued with modern glue, to get them loose without damaging the top, I used chisels, knives and a sharp plane. The endblock was reinforced with a thicker spruce block. The bracing pattern became a double X, which I think is a very good solution that got an undeserved bad reputation after Gibson made those with far too thick braces and a huge rosewood saddle plate...


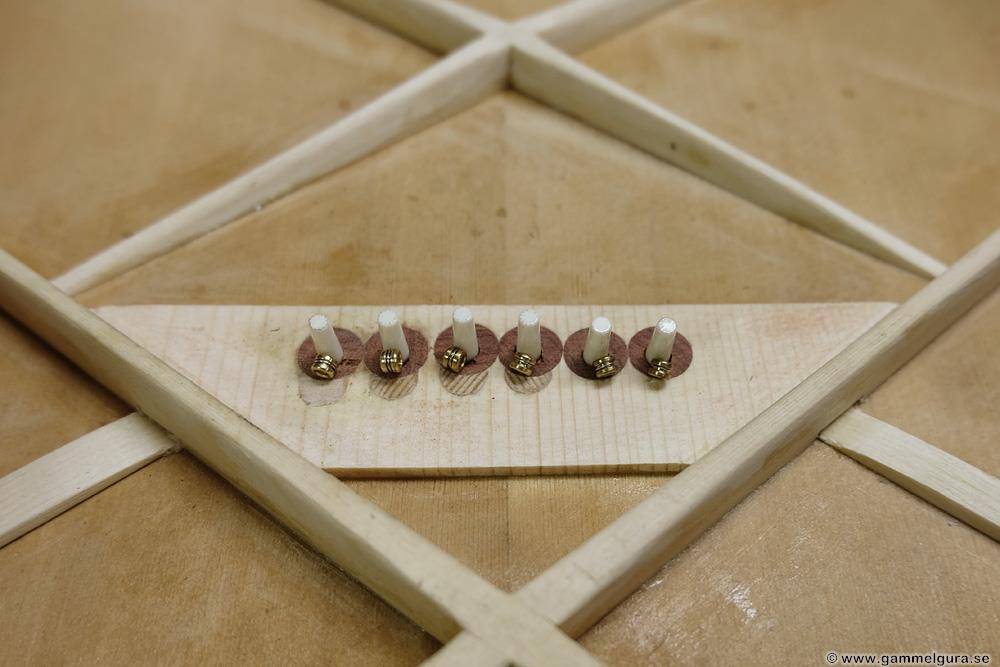


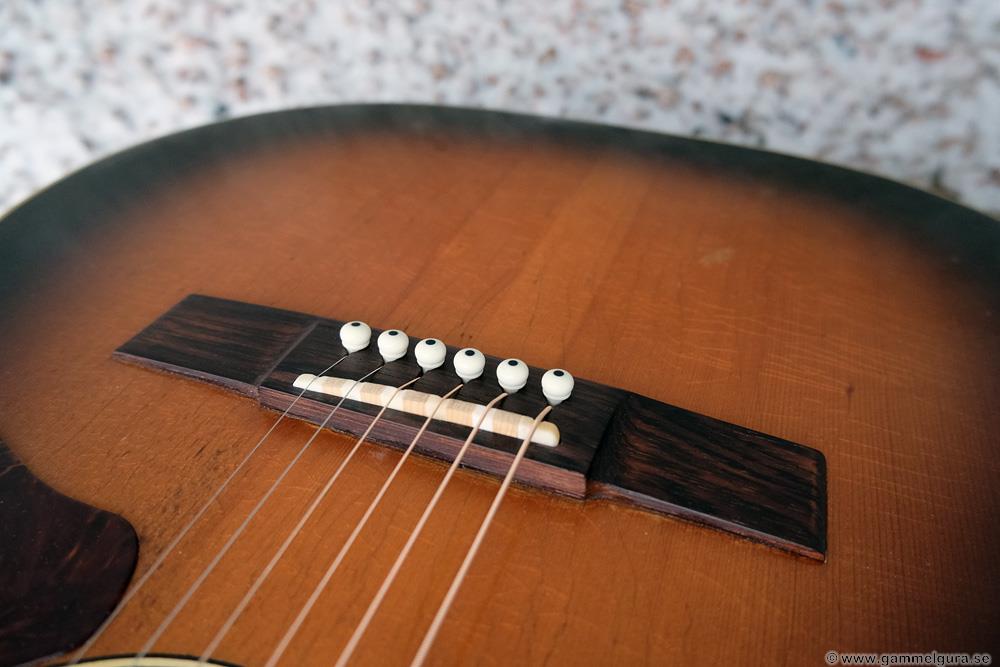
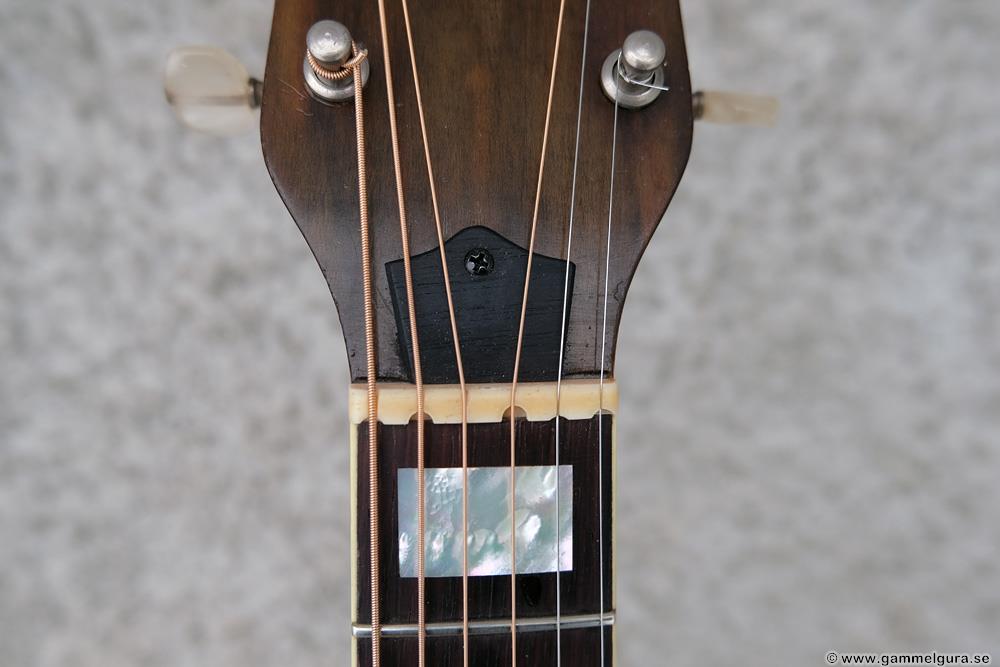
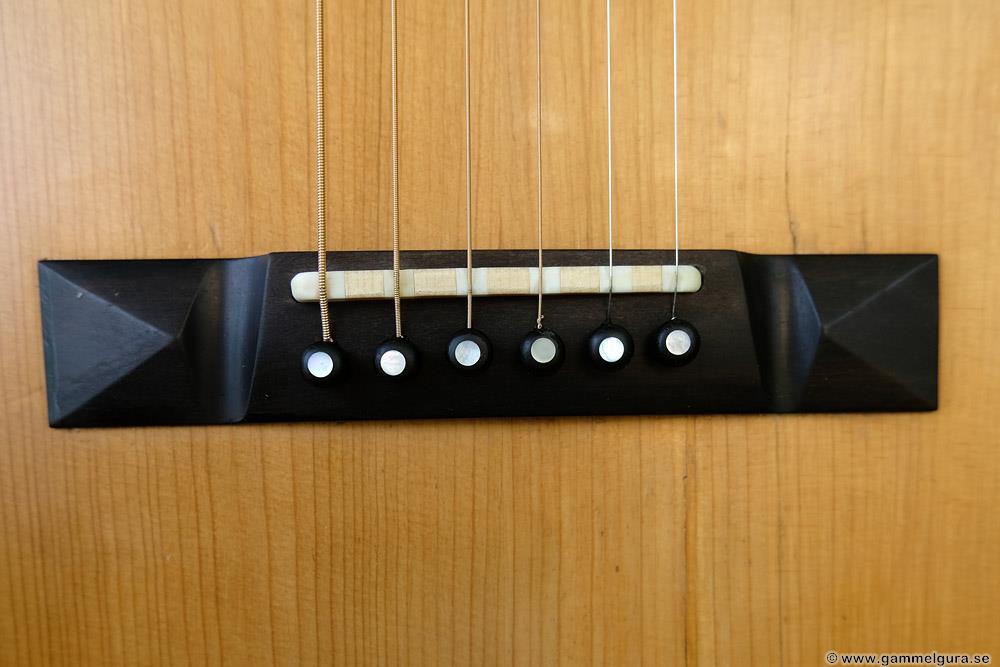
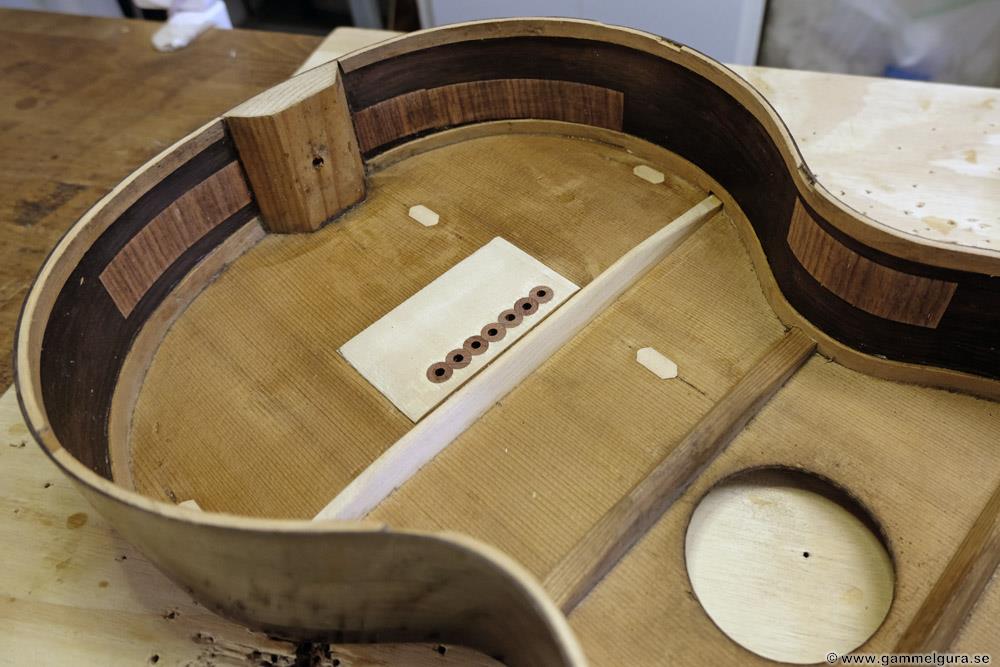
Plugs through the bridge plate and top as well as reinforcements around the stringpin holes were installed. The slot for the saddle in the bridge was filled in, and the bridge was glued in place. Before gluing the bottom, a groove was ground for the string in each stringpin hole, I use some cut up old strings and a needle file rasp to make the groove tight but deep enough for each string. The old frets and celluloid inlays were loosened. The fretboard was sanded to a 16″ radius and genuine mother-of-pearl replaced the shrunken plastic inlays. Fingerboard and bridge were made of the finest rosewood, which smelled very good when sanding.

With a specially made caul, the scrathpad could be glued using a water-based plastic glue, Casco Universal Aqua.


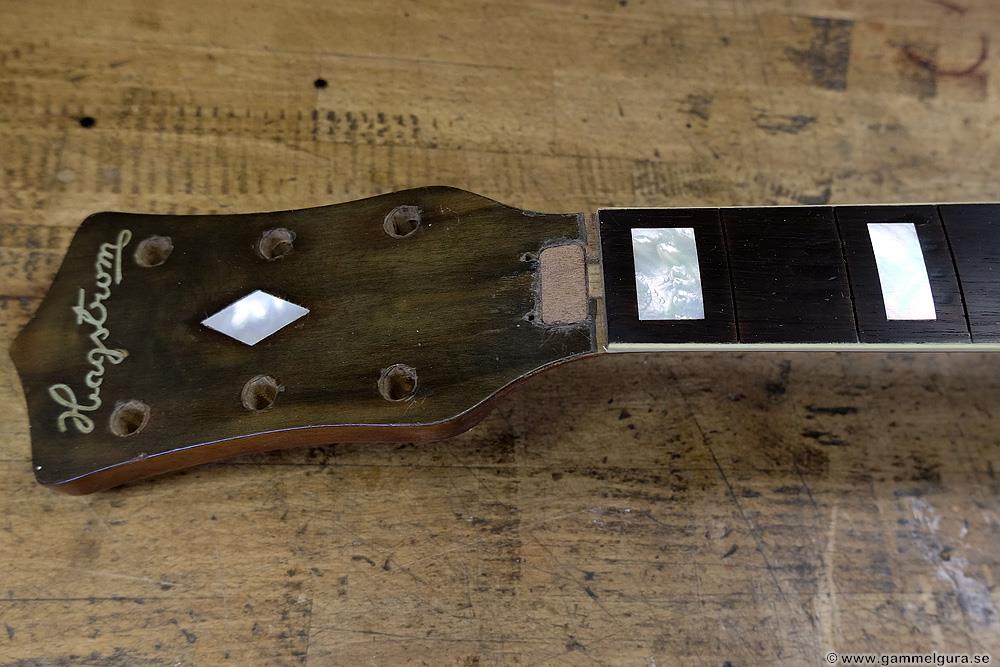
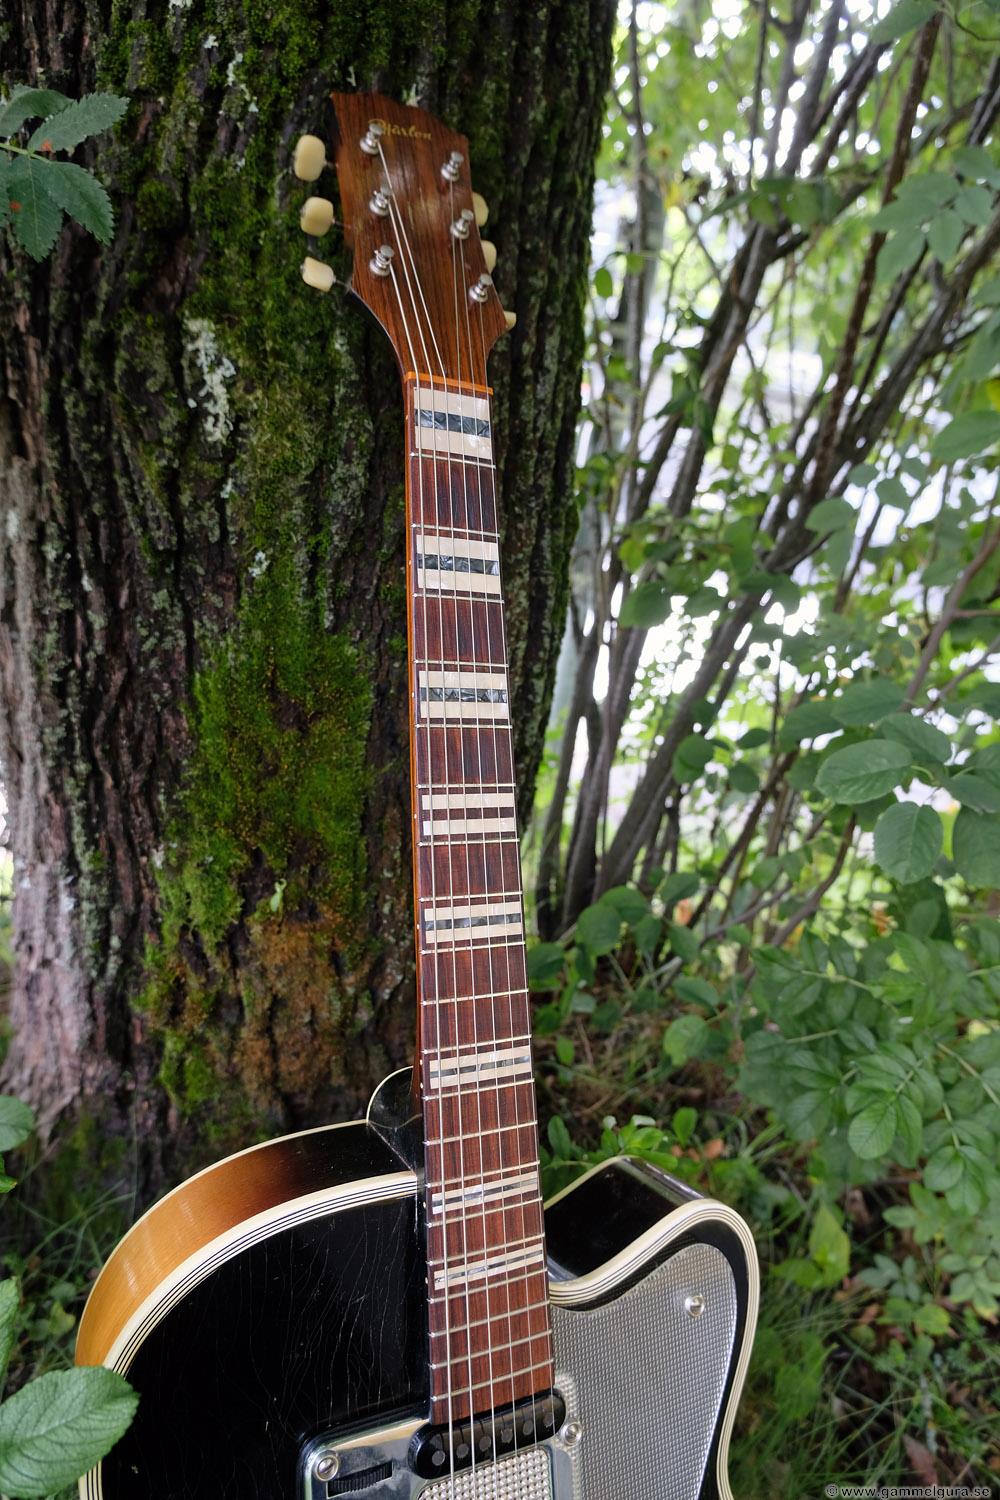
The top mother-of-pearl inlay in the fretboard was very beautiful!


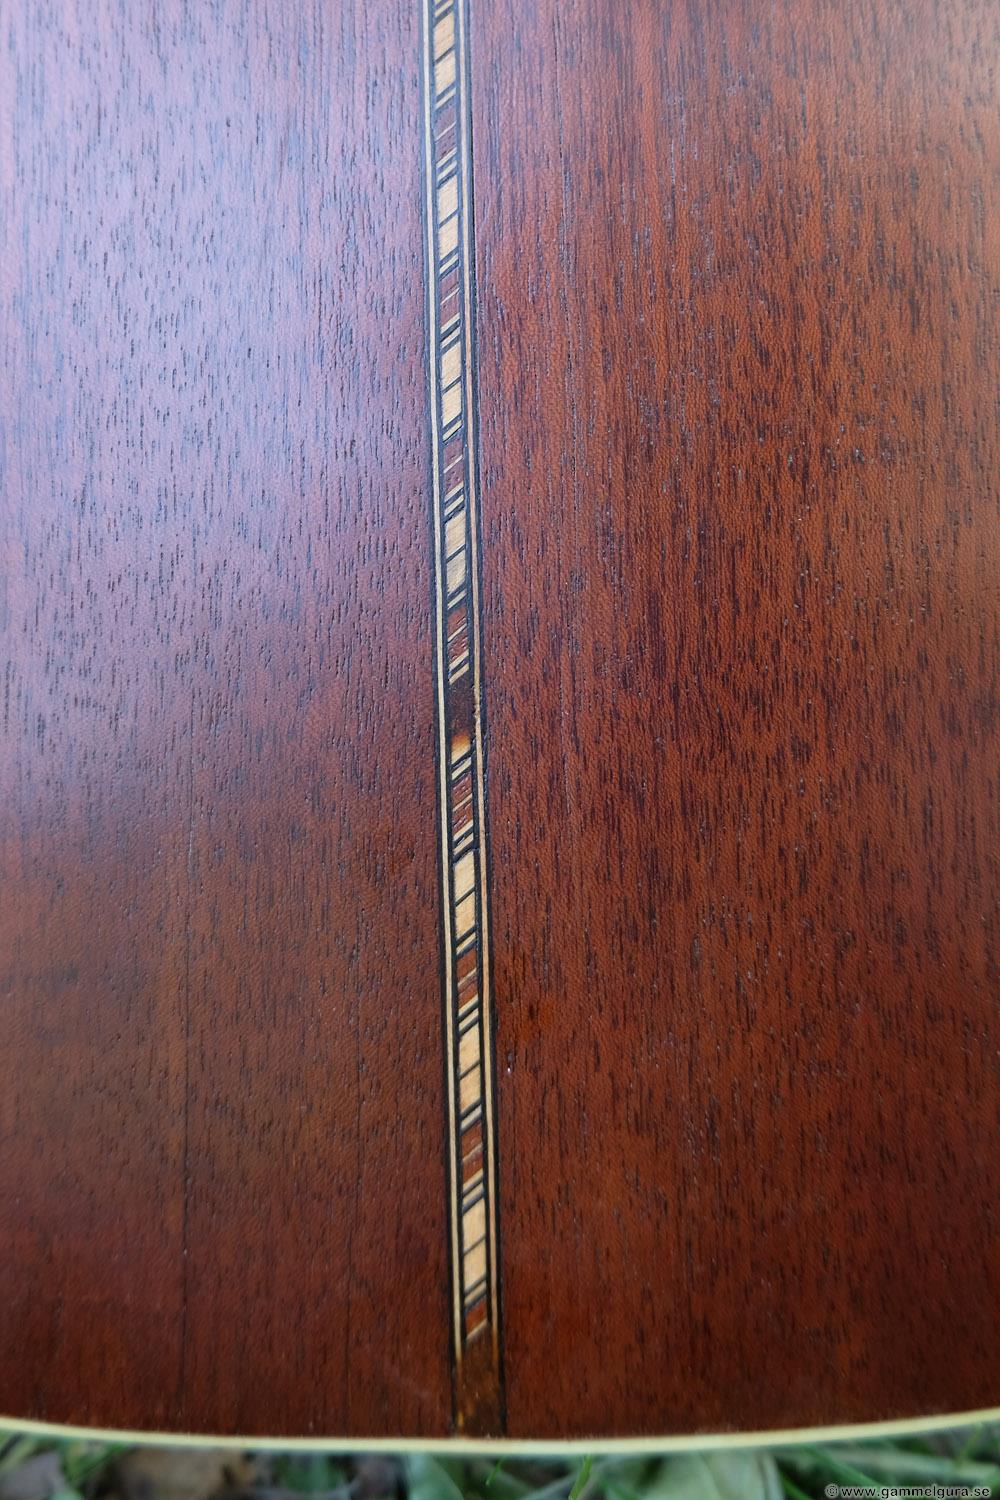
When I was going to mill for a new bottom binding in ABS plastic around the bottom, I failed to tighten the mill properly and the trench became 2 mm too deep... luckily it was the same depth all around. To save the whole thing, I glued in a 2 mm high rosewood strip at the bottom of the trench. It actually turned out really nice!

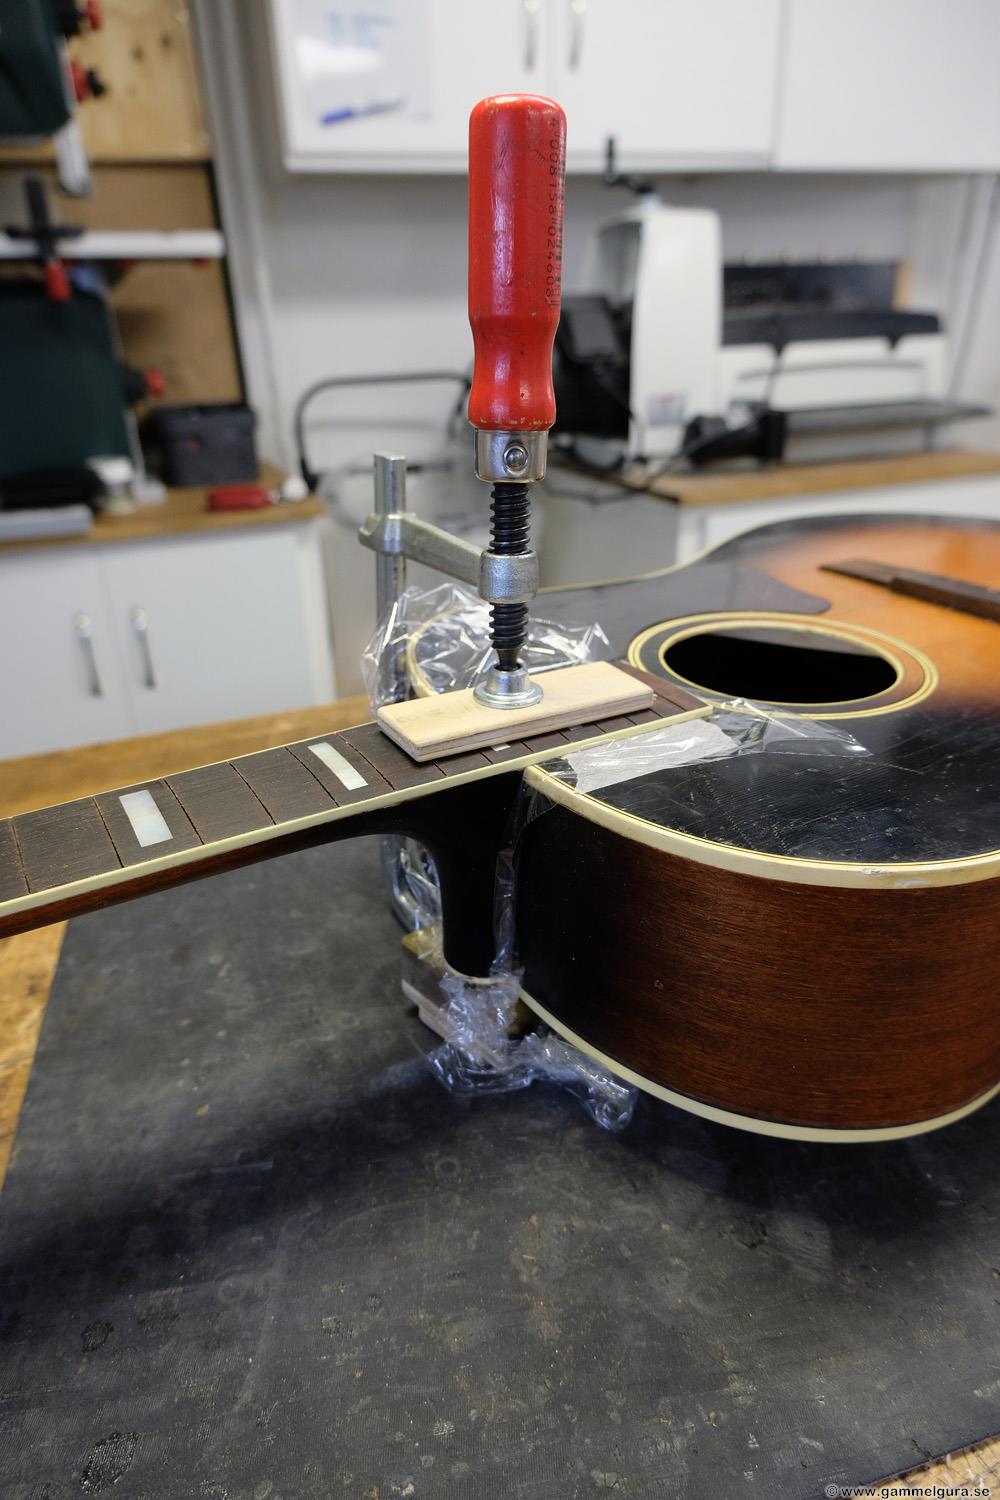
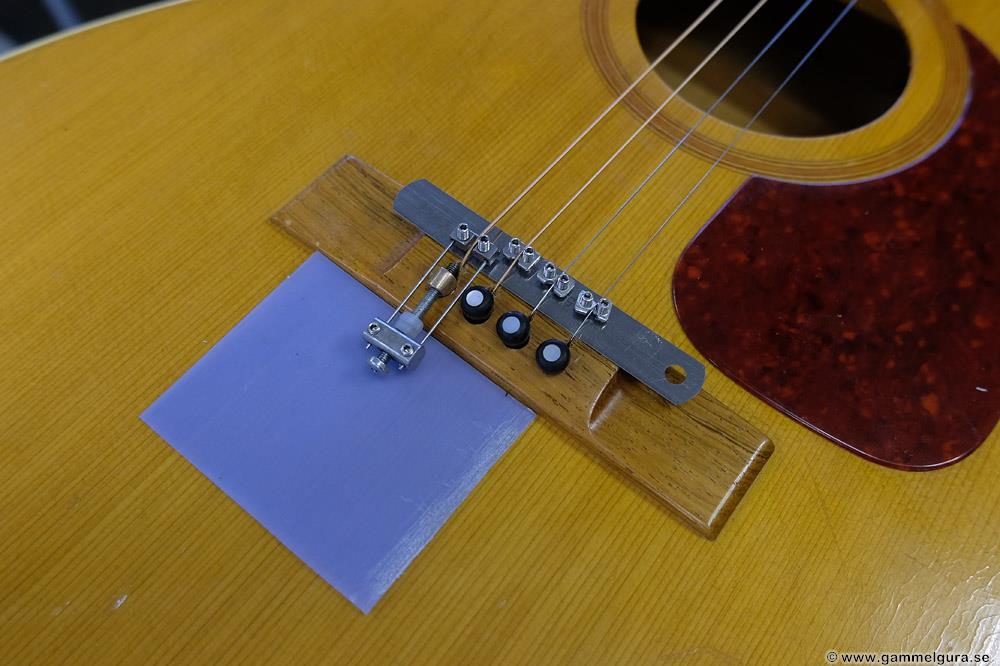
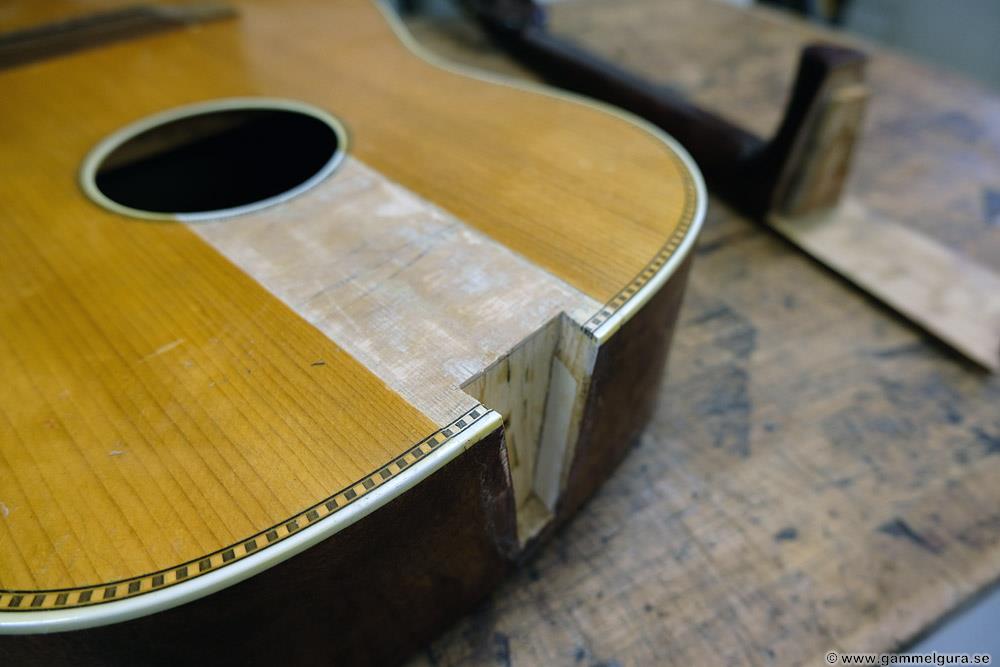
A work step that is both important and time-consuming is to file the wings on the base of the neck so that the neck gets the right angle to the saddle. This one needed a lot of work, and then you have to glue shims into the sides of the neck pocket to tighten the dovetail. I use superglue for the shims and use the neck as a caul. In order not to glue the neck to the shims and the superglue, it is easy to put a piece of household plastic in between. It works every time, as long as you are careful when you press down on the neck so that the plastic does not break.

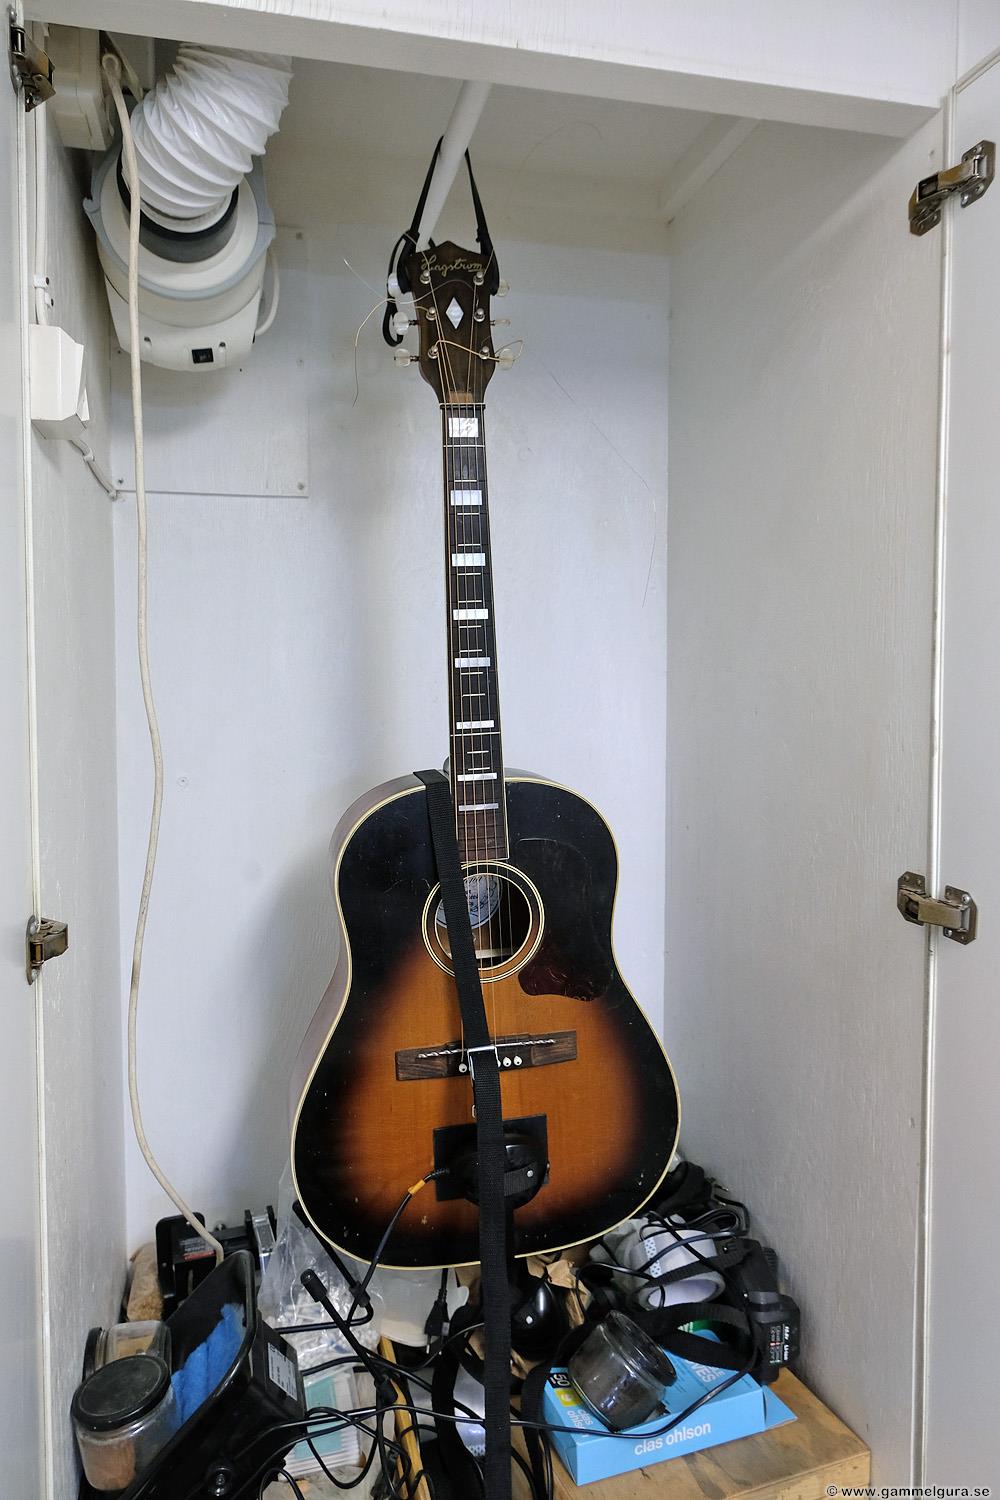
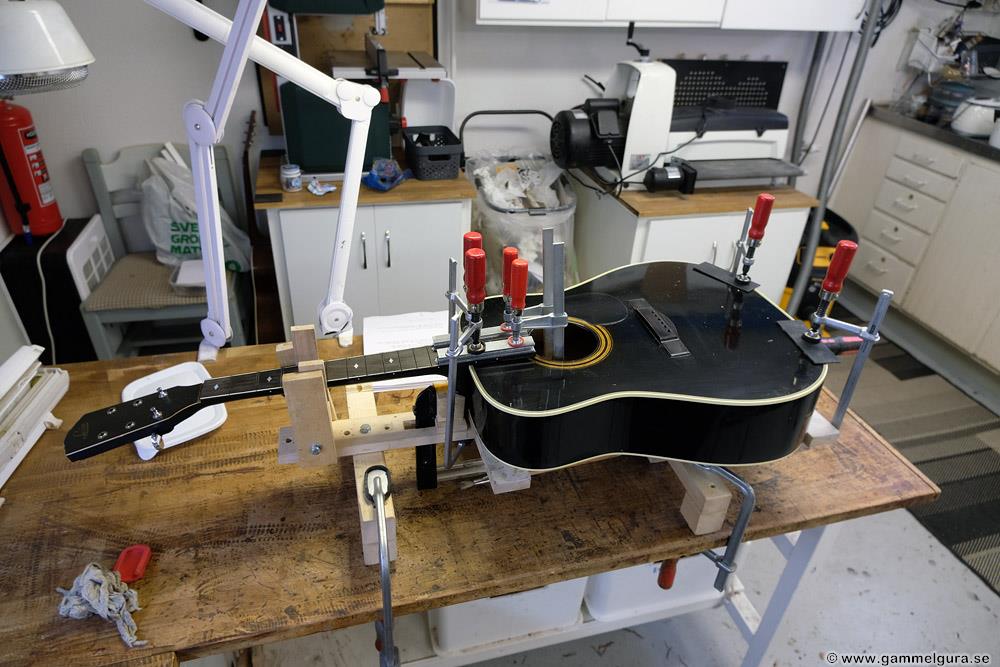
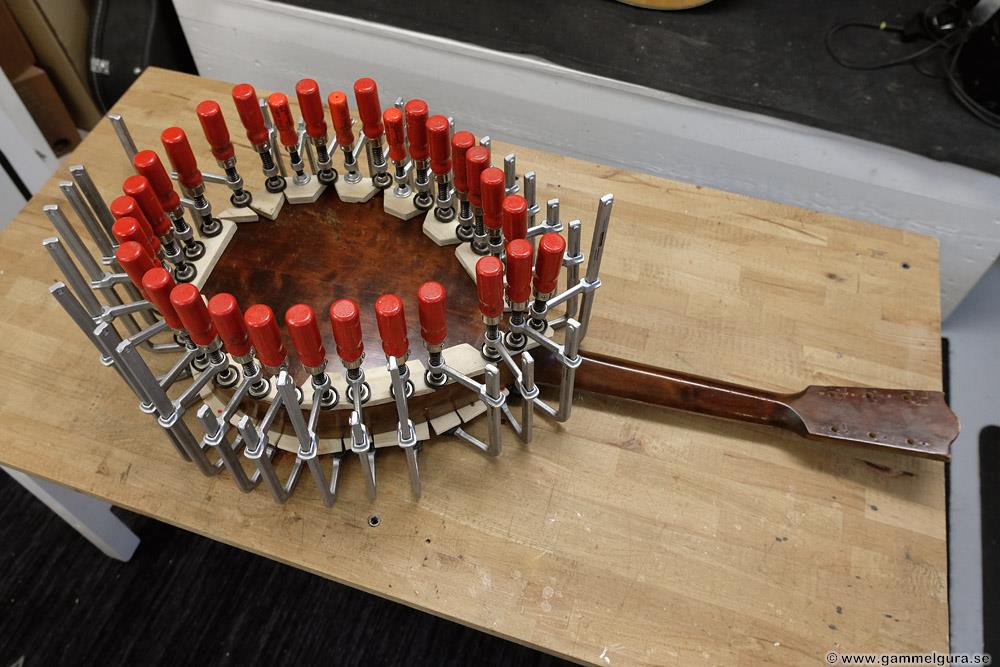
The neck was glued in my neck jig and the guitar was vibrated over a weekend.
The pit where the old truss rod was adjusted was filled back with mahogany, and a nice cover plate (with the same shape as the top of the headstock) was made from ebony. Standard nickel frets were mounted and crowned. The guitar was measured up for a nut&saddle intonation, a new nut was made, a segmented saddle made, and the bridge saddle ditch milled in the right spot. The entire guitar was given a coat of spirit varnish on top of the old worn varnish, the varnish was dulled down with 000 steel wool and hand polished to shine with a dry cloth. On this one, it felt just right with white Gallalith solid string pins. The guitar strap knob was moved from the tip of the neck foot to the side of the neck foot.
It was a very nice player. A little big, of course, but it certainly sounds like a GammelGura despite the plywood in the sides and bottom 🙂


GG201 Levin 1938
I have in a short time made GammelGura from two Levin guitars from 1938. I have difficulty distinguishing which pictures I took, they were basically the same guitar. The one I bought myself at an auction, which was the first to be completed, I have already written about here. Common to both was that they had fretboards made of the finest rosewood with incorrectly placed frets. The first got the usual ladder bracing, the second got an X-ribbing at the customer's request.
This guitar was found in a junk room, and it was in really bad shape with a huge crack in the top.


Once the fretboard was loose, the top was soaked in water overnight before the large crack could be filled back up with a stick and hot hide glue.


The neck block was badly cracked and reinforcements were glued to the top and back edge. A larger crack in the sides was also glued. This simplified X bracing is my first one with scalloped braces in the X.


The third brace in the bottom were made flat, both the top and the bottom were too thick and were thinned to just under 3 mm.

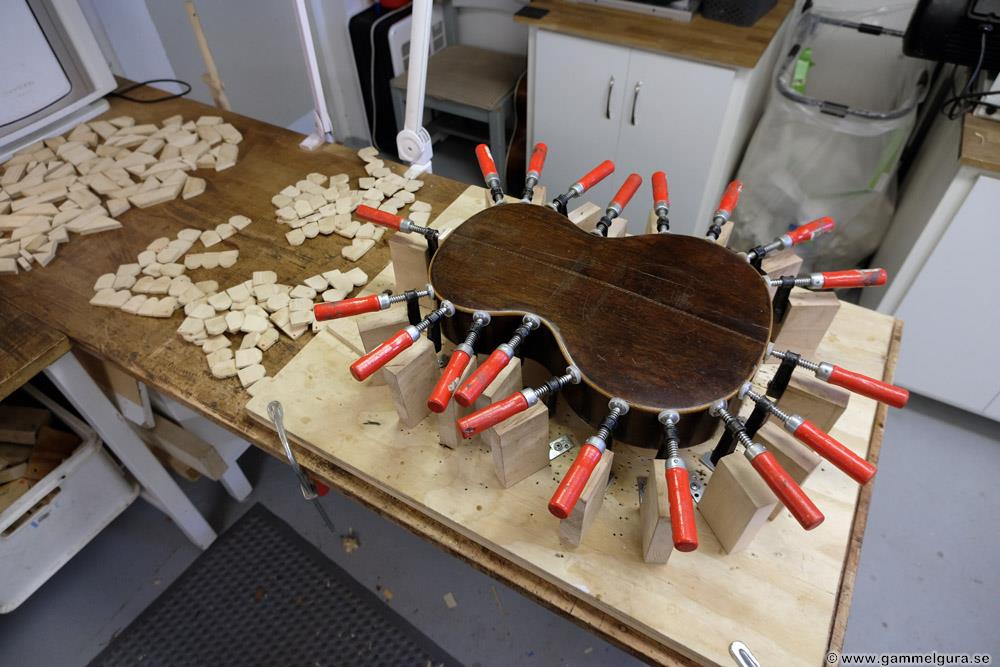
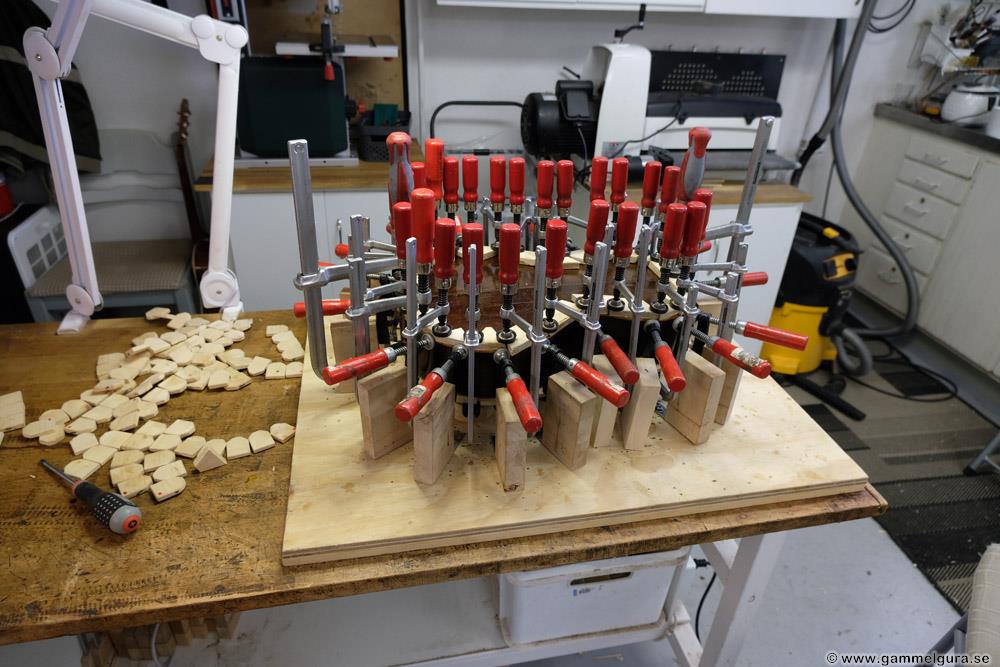
The bottom was glued on as usual in my jig. It is always difficult to loosen the label intact, but it is possible with patience, heat, water and a sharp razor blade.

I never took pictures of the finished guitar, but it looked like the first one. Both turned out very well! For my personal taste, I liked the one with ladder bracing slightly better.
GG156 Carlstedt
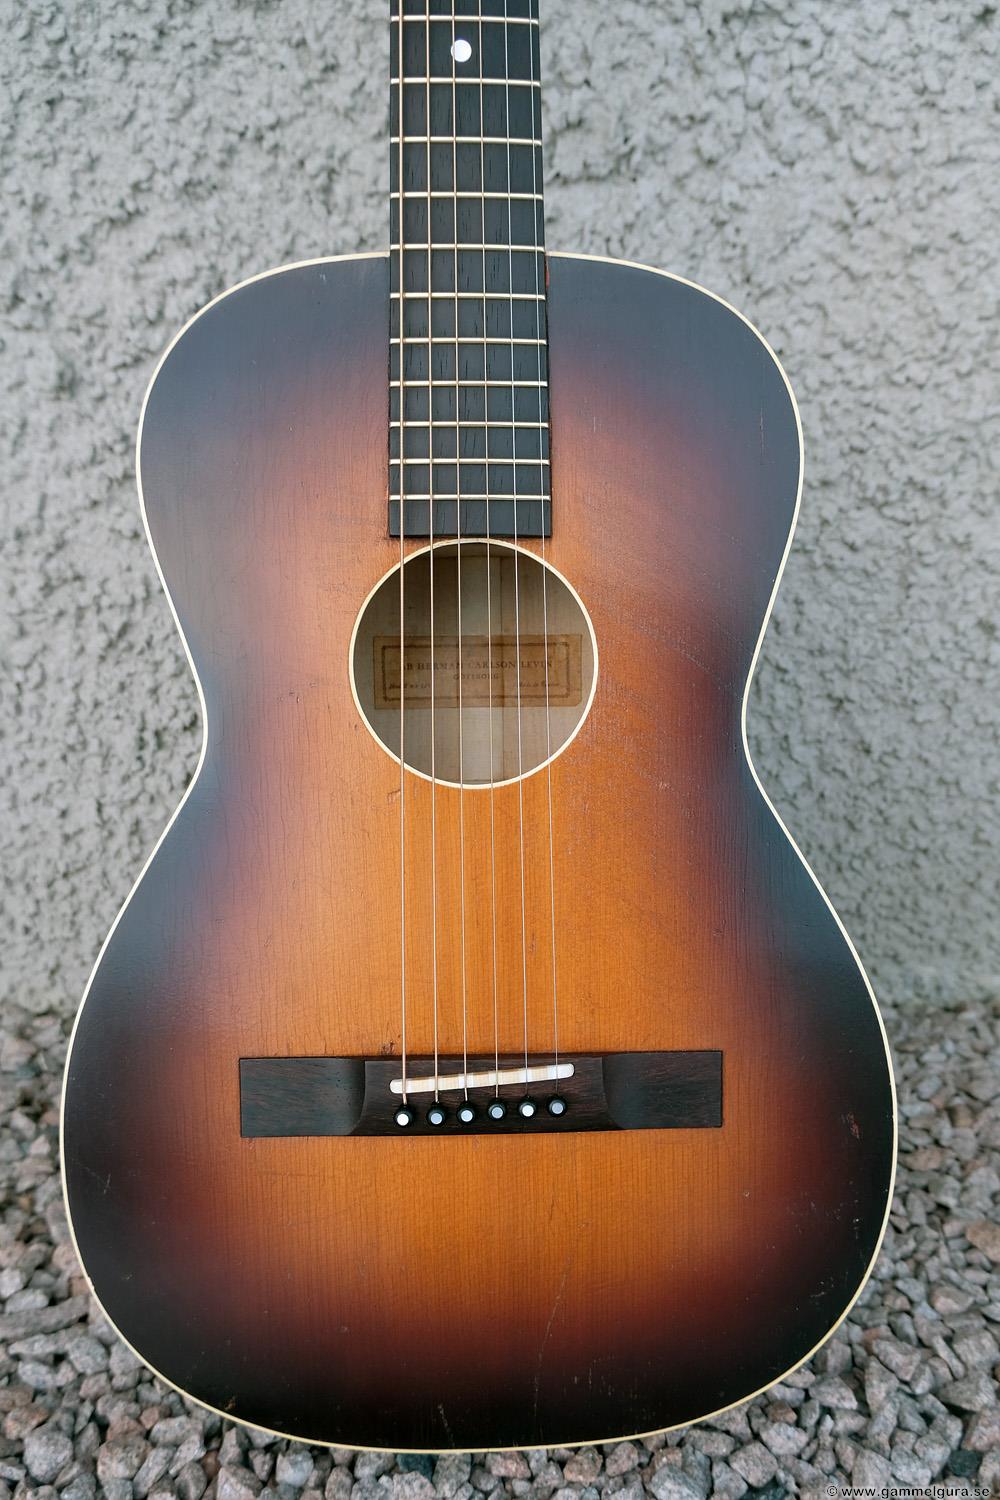
An old bad conscience from 2019 was completed and delivered to its owner in the USA in 2023. Among other things, Covid got in the way. This is a very nice Carlstedt made in the USA by the Swedish immigrant. I've had some Carlstedts in the shop before, but in better condition. I have written about the other two here and here.
One thing that stands out about this one is that it had "CF Martin" engraved on the back of the head! An obvious and clumsy attempt at forgery. This is how it looked like when it arrived.

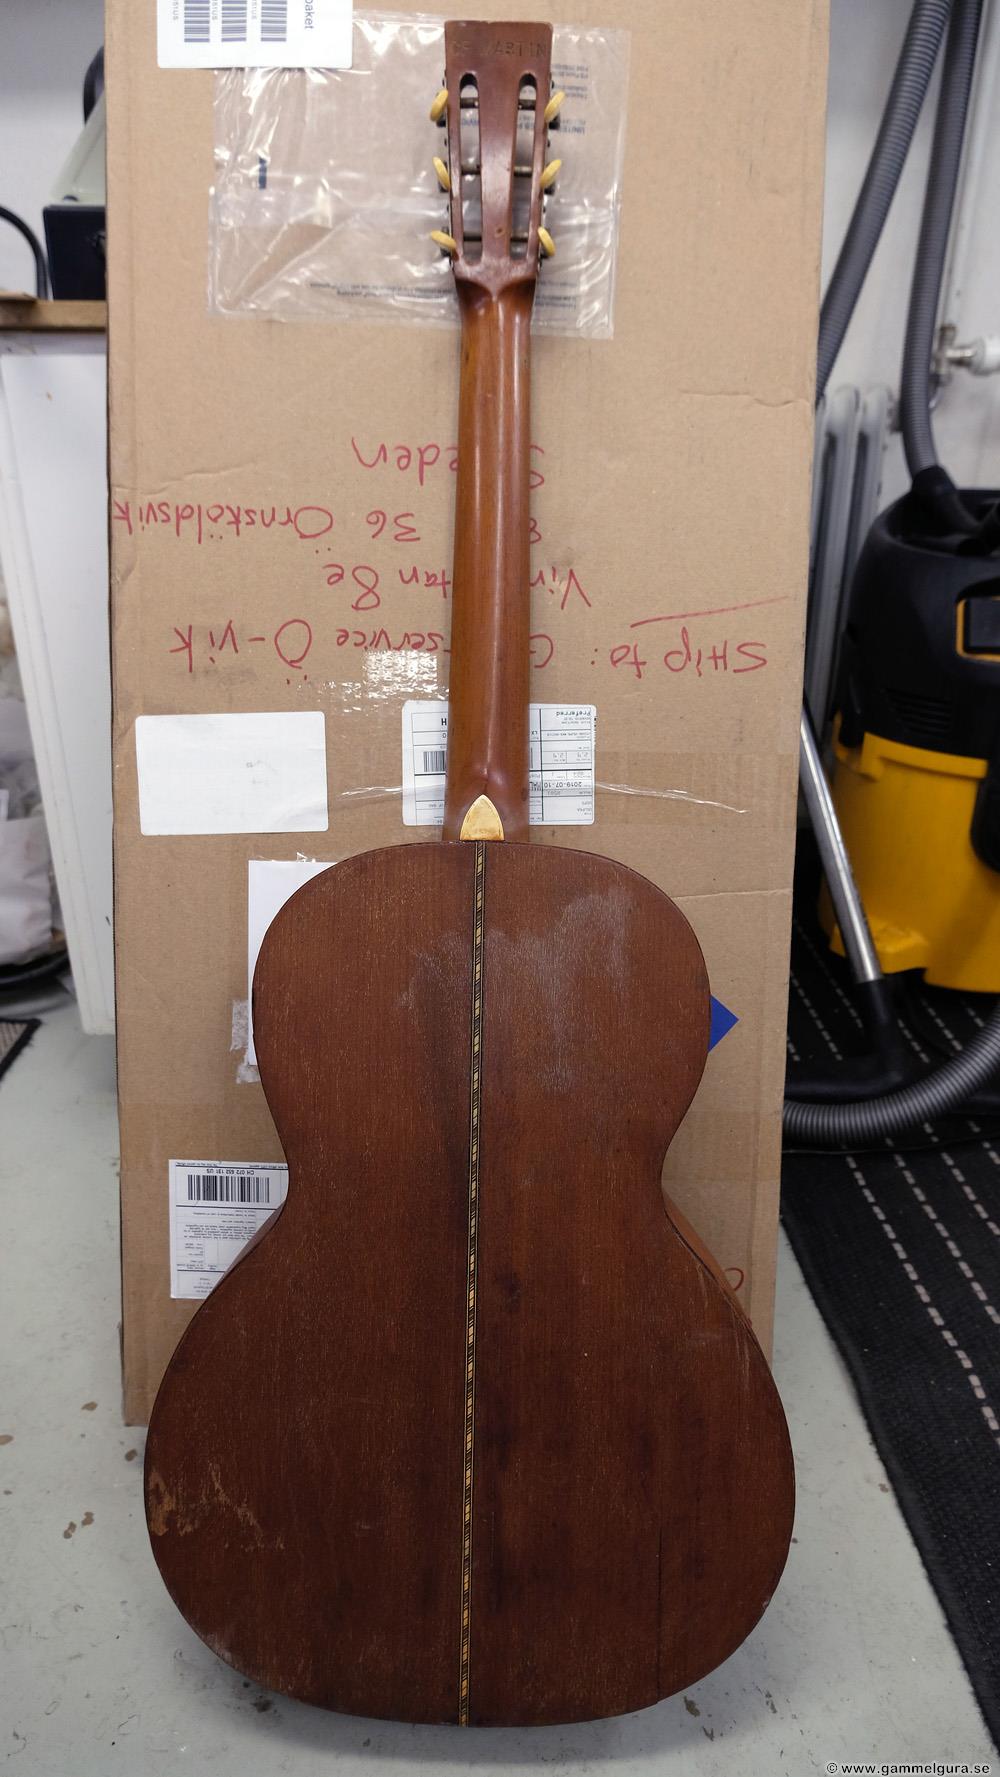

The top was in poor condition with discoloration and cracks. The bridge was missing. The bottom, side and neck were made of red-stained mahogany.
The fretboard was in ebonized wood with the same texture as dry hard bread. The only thing you can do with those is to split it into a thousand pieces with sharp chisels and knives! A new ebony fingerboard was made and the inlays from the original board were moved over. A new bridge was made in the finest rosewood using old photos of other Carlstedt's. The binding around the bottom was also missing and had to be replaced with plastic ABS binding. The tuners were not original and was replaced with Stewmac's Golden Age tuniners. The top had to be cleaned from varnish and colored with a weak yellow-orange stain, the one I make by allowing the color in teak shavings to be drawn out in alcohol. The whole guitar got a coat of spirit varnish, the top a few coats extra.
I had done half of the work before Covid, so it was quite quick to finish it. The finished guitar was really nice to play, a little "bigger" sound than on a regular small parlor. The customer in the USA came to visit Sweden and was able to collect it here and also GG151, a Supertone guitar, which it had also not been able to deliver. Back home in the US, he wrote in an email
“FWIW, the Carlstedt and larger-size airplane Lindbergh remain an absolute REVELATION to me, and I haven't touched any of my other beloved guitars since. You have ruined me as a collector!! They are my holy grail!!”
You can probably say that he is more than happy with the two of them!


New methods in 2023
As soon as a problem appears, I come up with a solution or improvement. Here are some new ones in 2023.
New methods
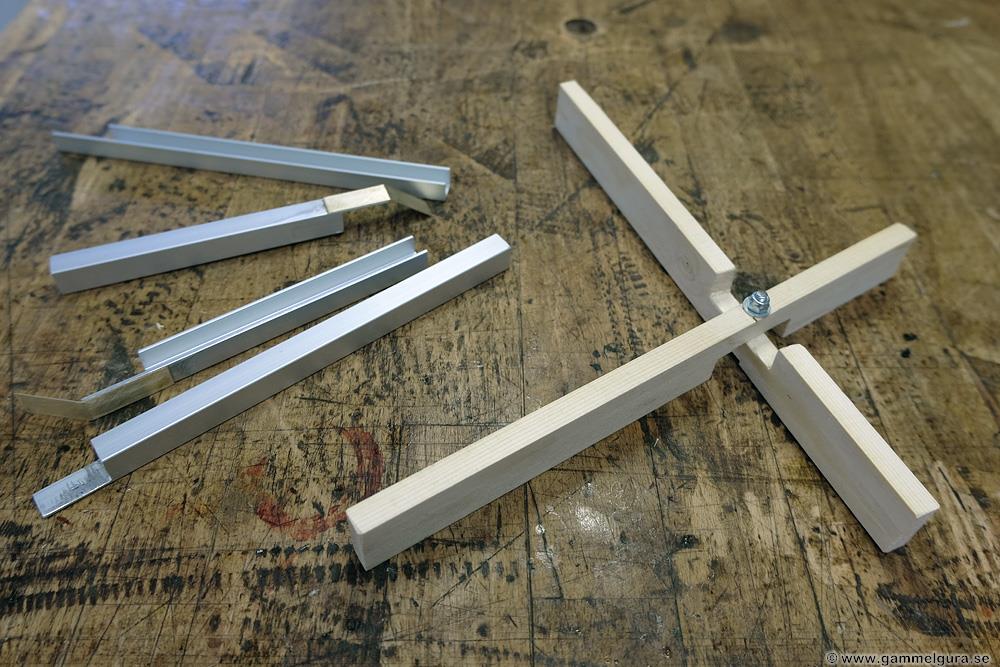
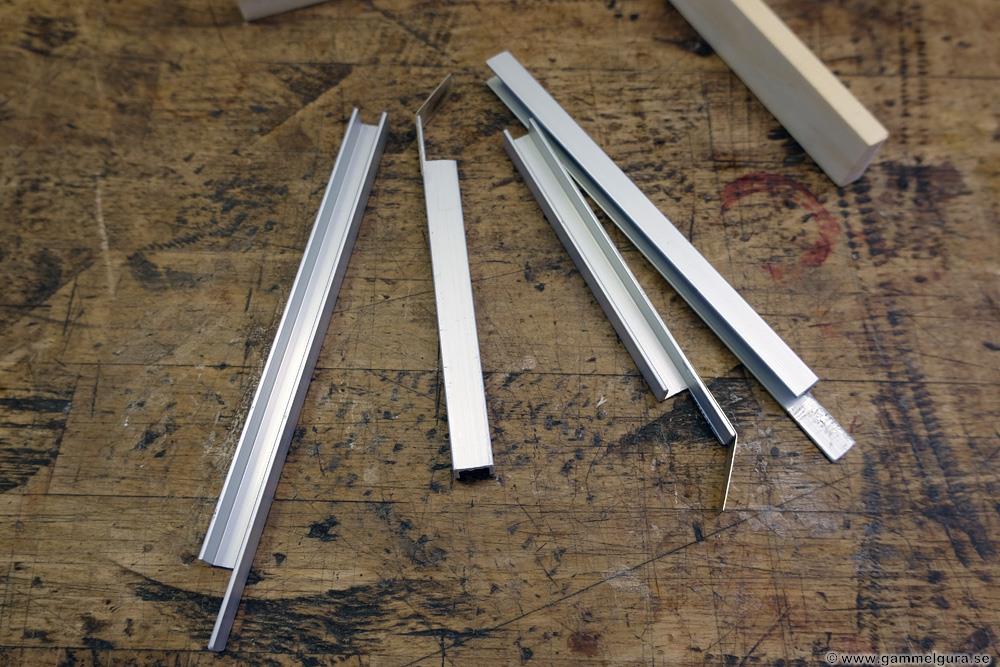
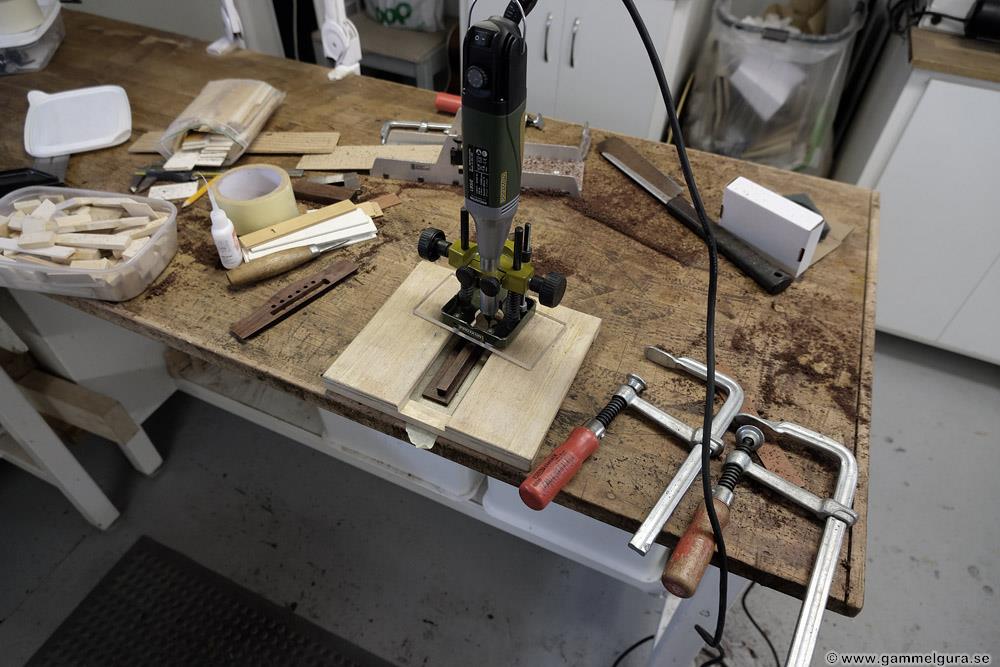
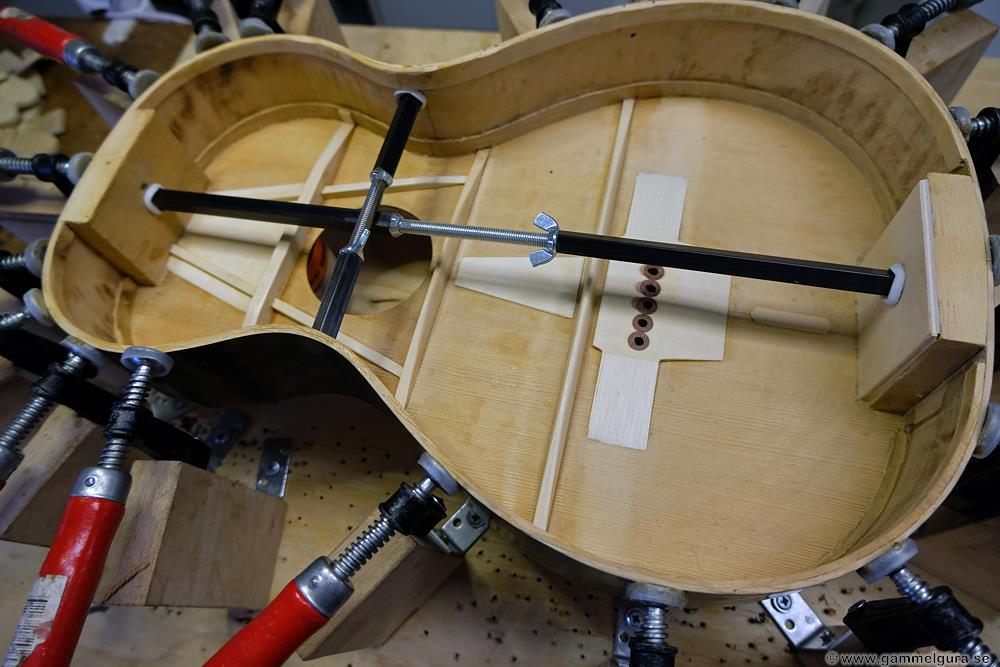
Since I've started doing some X-bracing, I needed a method to fit the X into a top with the sides already glued. It is a jig in the shape of an adjustable X with aluminum profiles at the ends that can adjust the length of the four ends. In addition, a flexible metal plate on the two top ends to be able to easily cut the X-braces to the right angle to the sides/kerfing. The profiles have a snap fit against the bracing in the adjustable X. With the jig in the correct position in the guitar, I can then carefully lift the jig without disturbing it and use it as a template to cut the braces and cut the knot in the X.

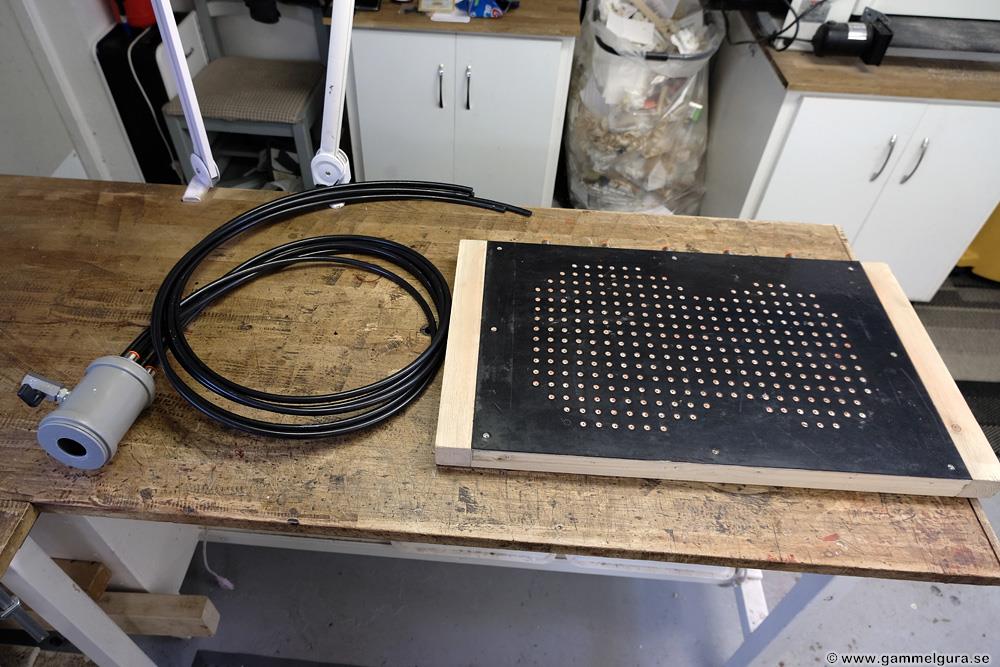
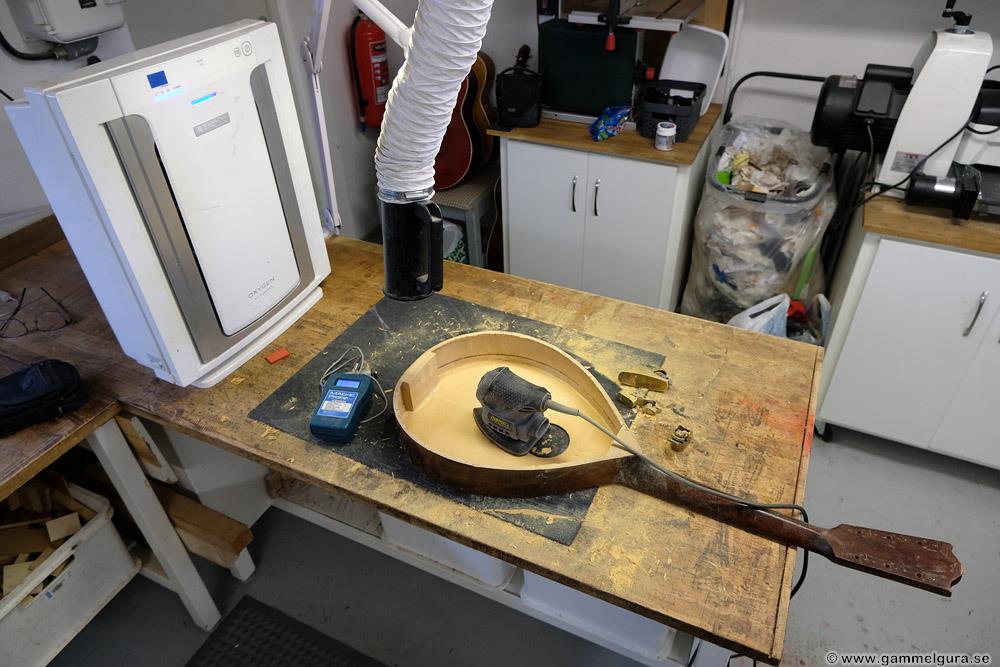
My suction table for thin bottoms in the drum sander was extended at both short ends to reduce snipe from the rollers in the drum sander pressing down on the bottom and suction table. I also fitted an air valve to reduce suction and load on the vacuum cleaner.
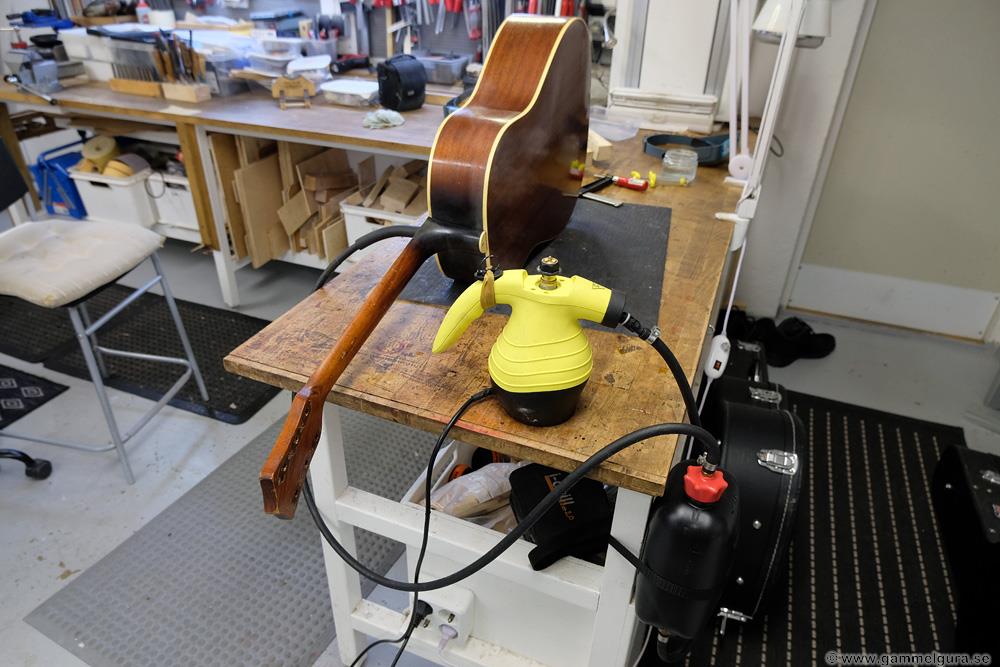
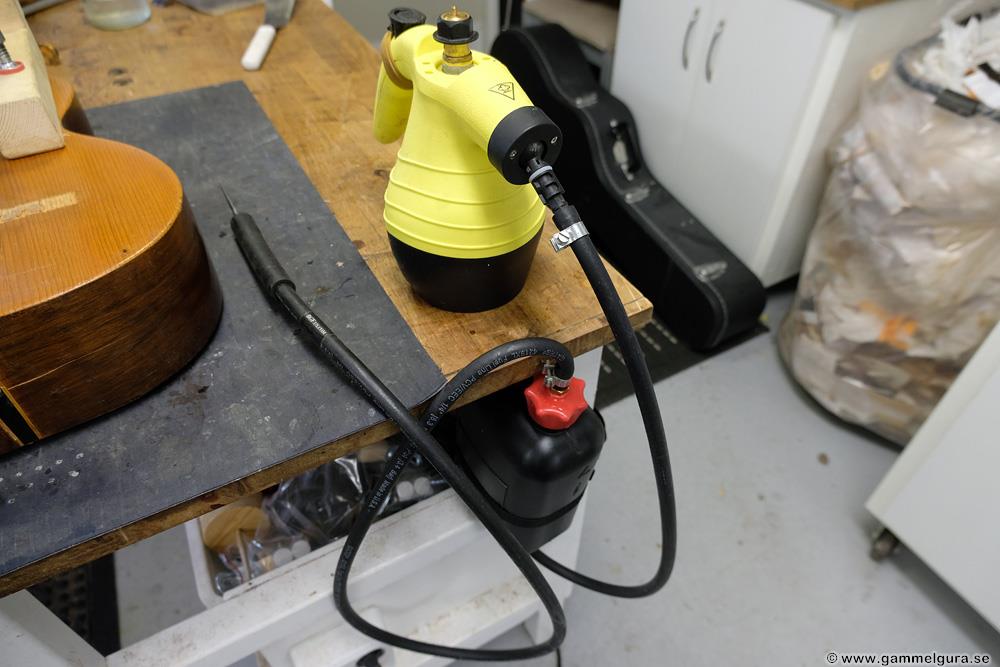
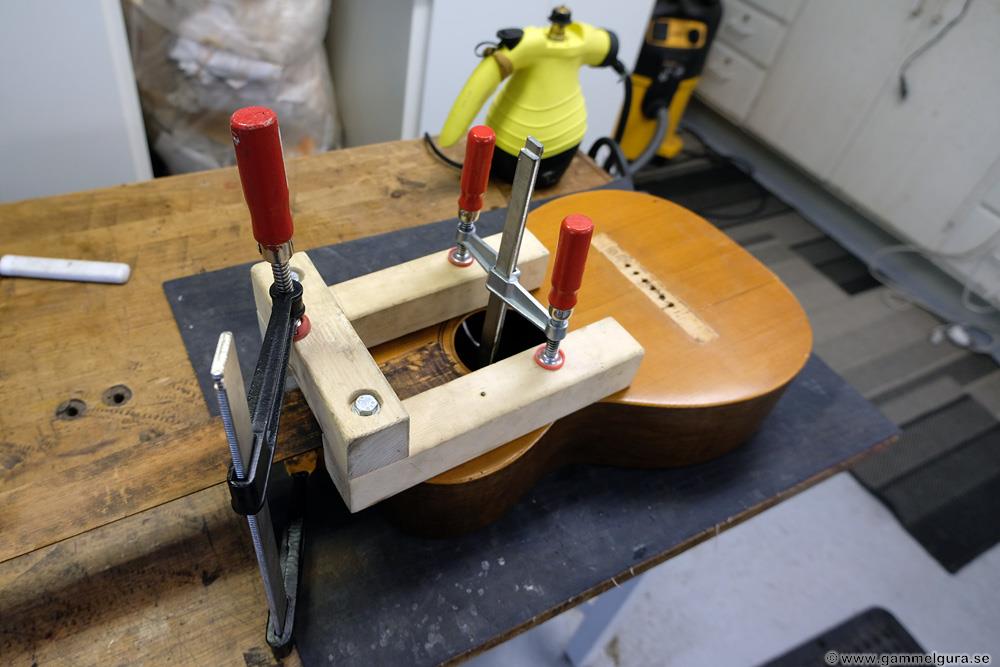
The steam cleaner from Jula to loosen the neck got a new longer hose and nipple from Stewmac, also a smaller plastic petrol tank to collect condensation water.


In order not to wear the sanding belt in my drum sander unevenly (and mostly in the middle), I make sure to spread the sanding with the help of a marker in the form of a small super magnet on a strip of sheet metal.


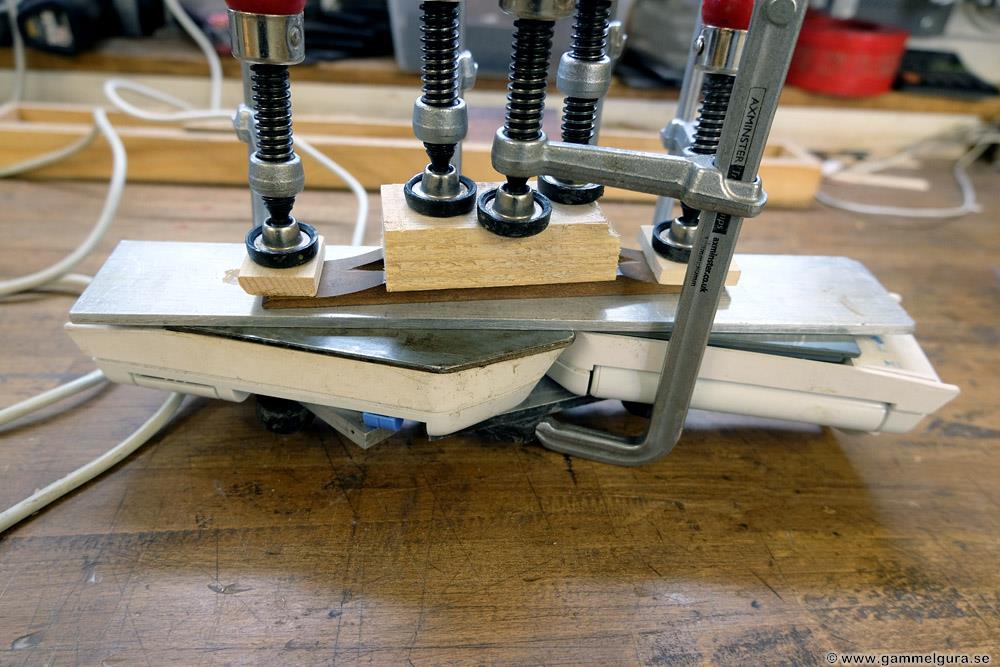
My "roller tool" for sanding down the height of the saddle dulled the sandpaper with its hard metal wheels. I put on "rubber tires" with the help of sufficiently wide shrink tubing. Now the sandpapers are sharp even after a sanding.


Changing tires with the heat gun and sanding the underside of the saddle


Repairs in 2023
It's been a long time since I posted on the blog. The interest in writing about the job has had a dip, however, the work has continued in my premises and several GammelGura have passed and many normal repairs and fixes have been done. In the meantime, I've taken quite a few pictures, here are some pictures of some but not all the repairs in 2023. I can't remember exactly what I did on all of these, probably more than I'm writing.
Repairs & adjustments
A Gibson Hummingbird had its neck reset, cracks glued, a loose brace glued and a coat of spirit varnish matted down. The saddle ditch was remilled for better intonation, the pickguard was reglued. A wedge under the fretboard was fitted. Finally, a standard intonation filing the saddle for each string was done.


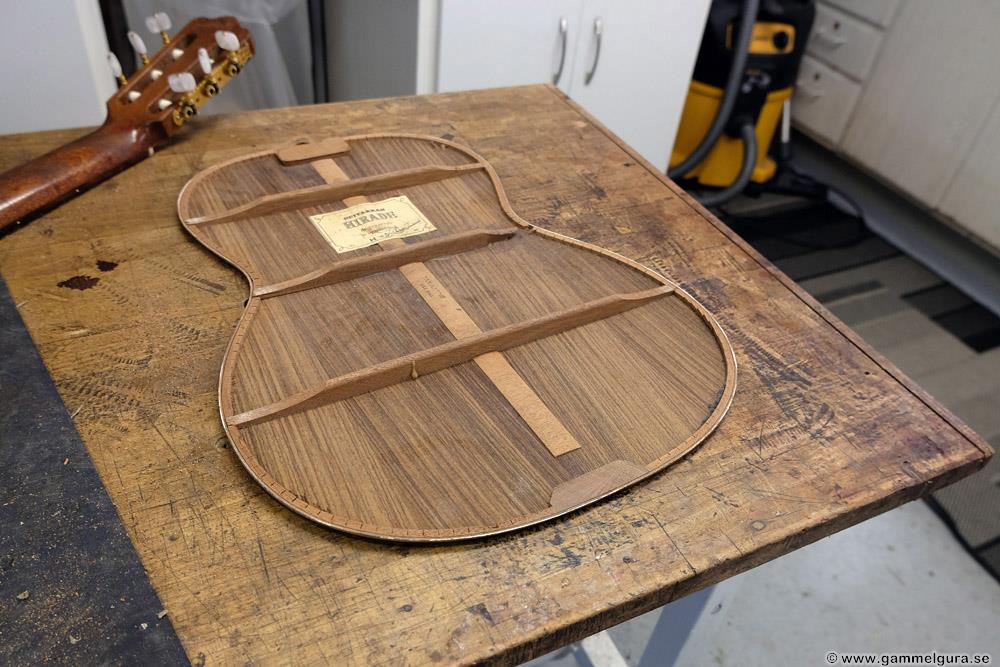
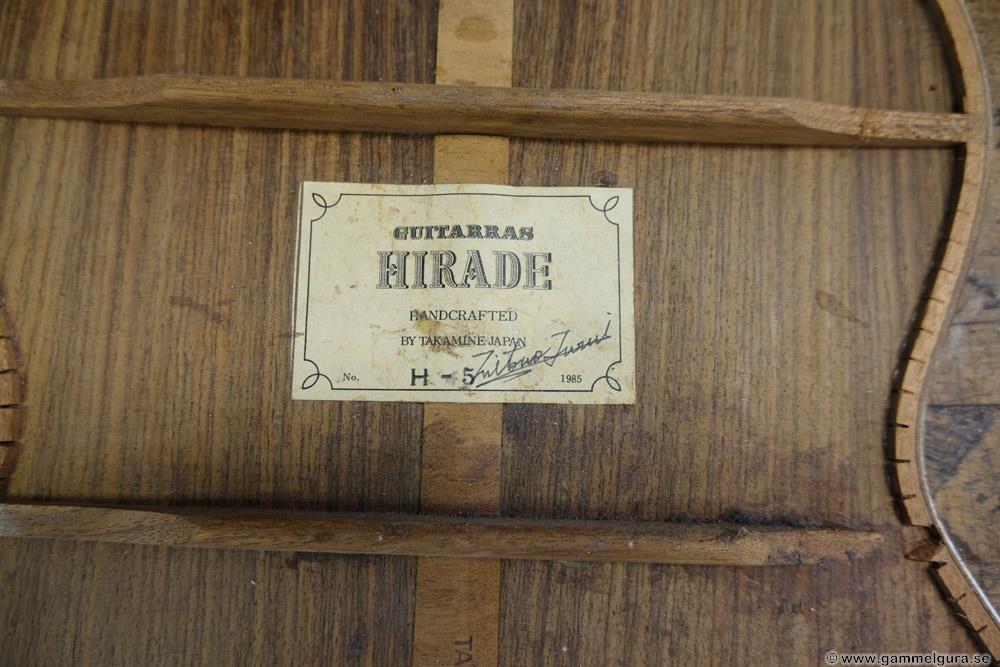
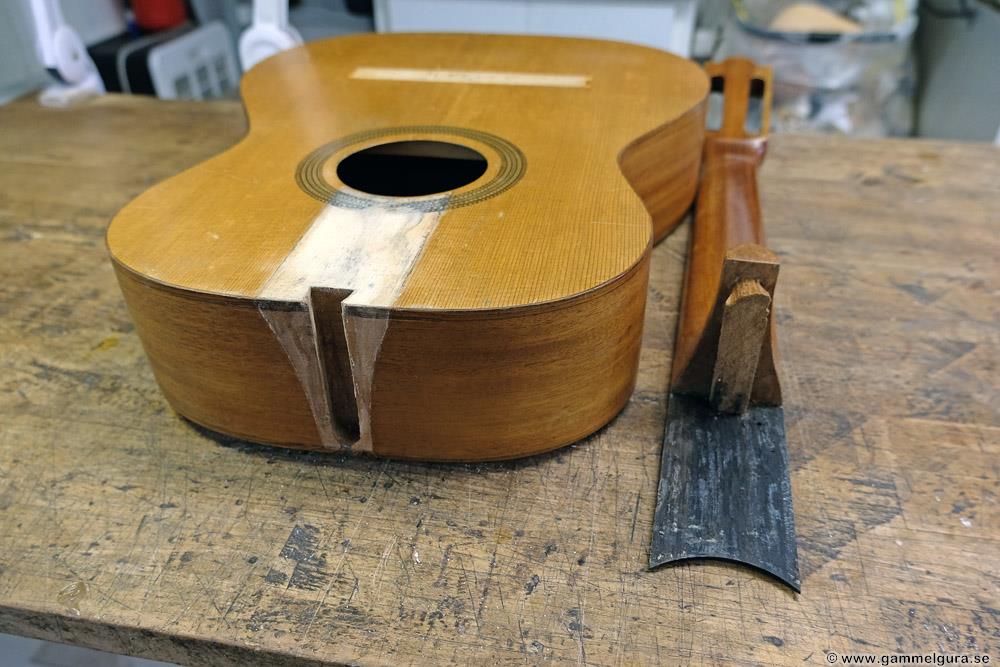
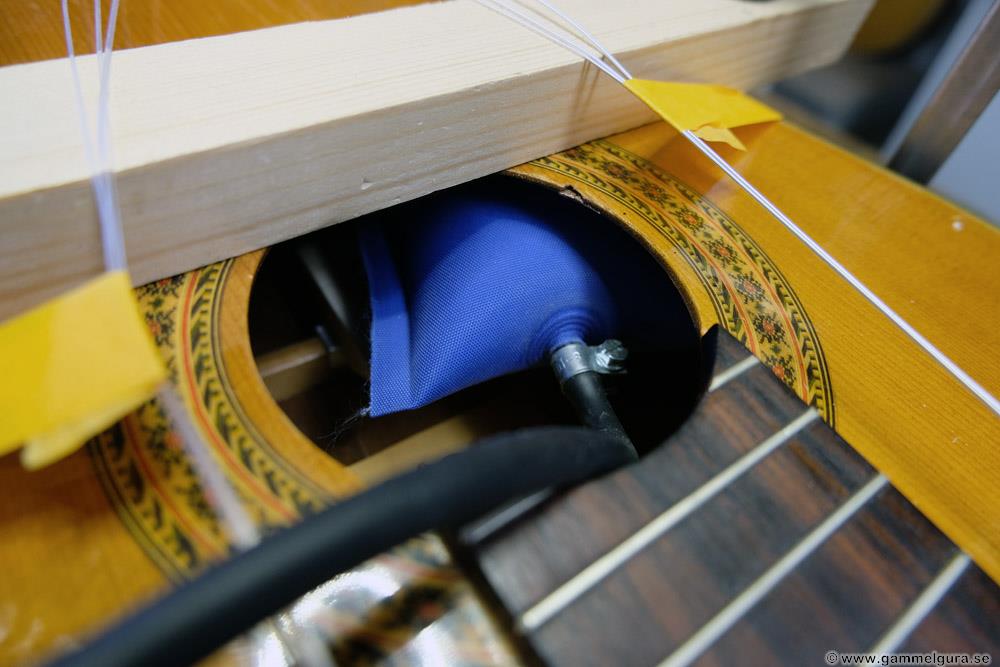
A badly abused nylon strung Hirade with K&K mic had the bottom cut off, and a broken top glued with some new braces. The bridge was also reglued. A built-in fault that was likely one of the causes of the crashed top was a chamfer on the top of the end block. A wedge was glued in.


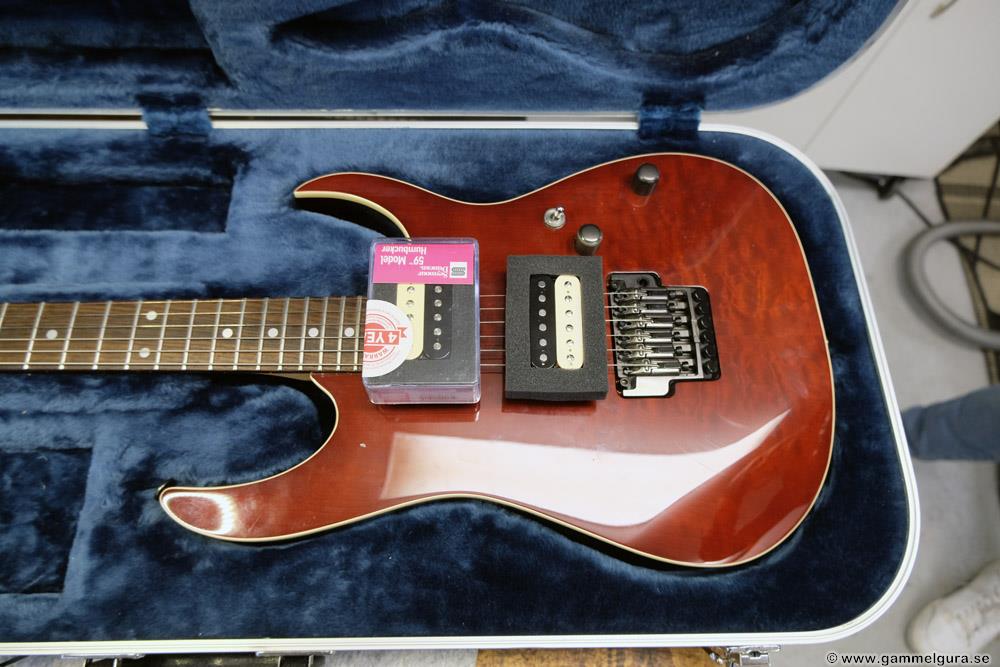
An electric guitar had its pickups replaced.
A nylon strung Granström had its neck replaced and a planed bridge fixed with new wood and saddle. New frets were mounted. A fitting piece for a slot made in the bridge was milled for best durability.


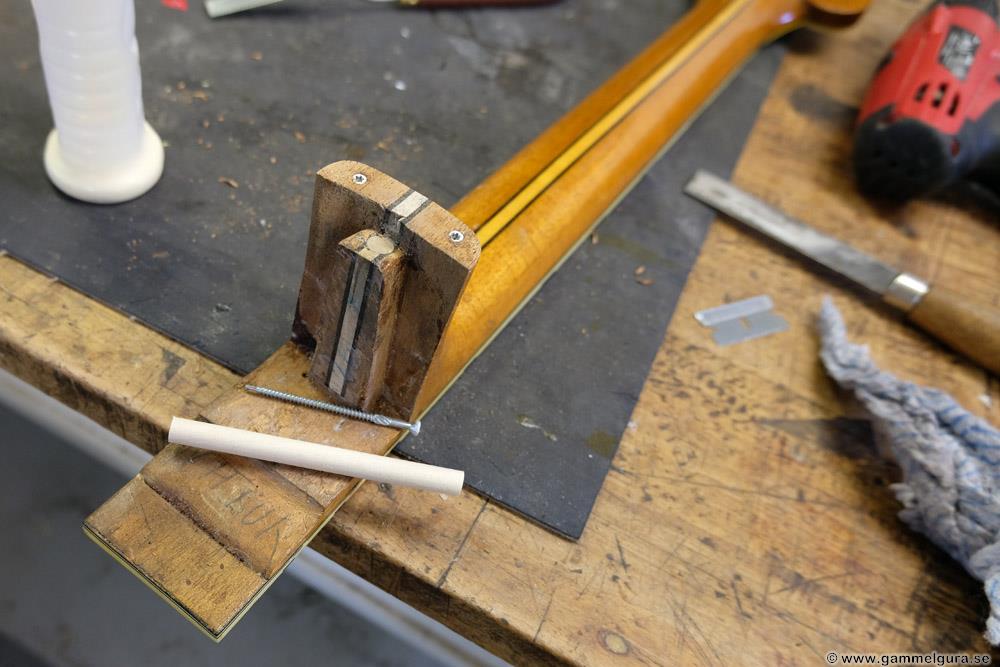
A Levin DeLux with a cracked neck had its neck reset. The foot of the neck was splinted with two long screws and a round birch rod. New Waverly tuners and new frets were mounted. The head received a coat of spirit varnish. The celluloid inlays in the neck were reglued after painting with white on the back.


Two newer and nice Levins from the 35s got neck reset and new frets. The bridge on the W35, which was planed down, was in rosewood painted in black, got a new piece of wood fitted on top. Nowadays, I mount on the odd frets first, then the even ones. Both had a genuine dovetail. The the tenor guitar got a nut intonation. Almost all repairs end with some vibration.


A cheap, but first guitar, had the neck and bridge reglued. The deformed bridge was heated and forced flat.


A cool drop-shaped Levin in terz size from about 1929, that was to be repaired to playable, became a complete GammelGura in the end. Among other things, the completely wrong-angled neck was almost sawed off to give the neck the right angle for a fixed bridge!


A cool Bjärton was spruced up and adjusted.


A nylon stringer had a cracked brace that I glued using my inflatable door adjuster and backstop.

A Levin W18 received a neck reset, re-fretting and adjustment. A cracked neck foot was glued and split with a round birch rod.


An old seven-string Russian guitar with an adjustable neck had the bottom cut off, all cracks repaired, the bridge re-glued, a new fretboard and bridge, carbon fiber in the neck and new frets. A somewhat faithful renovation, but I added a spruce bridgeplate. The frets above the 12th fret were attached with a poor eye gauge!


A nice Levin Archtop got new frets and was adjusted.


A flashy Furch got new frets.

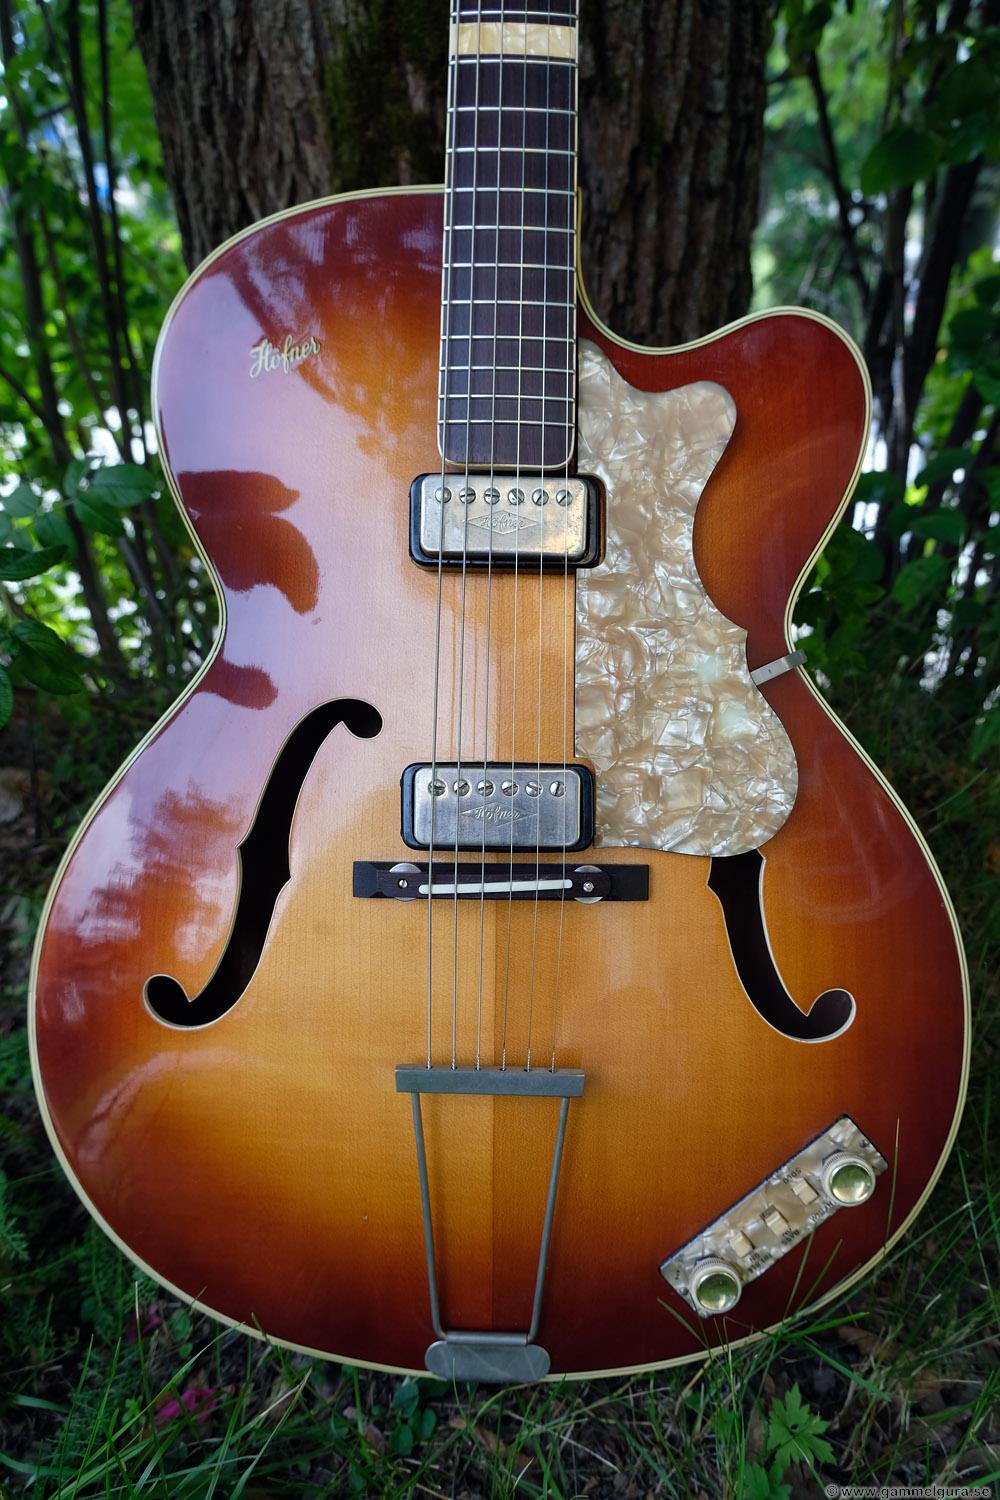
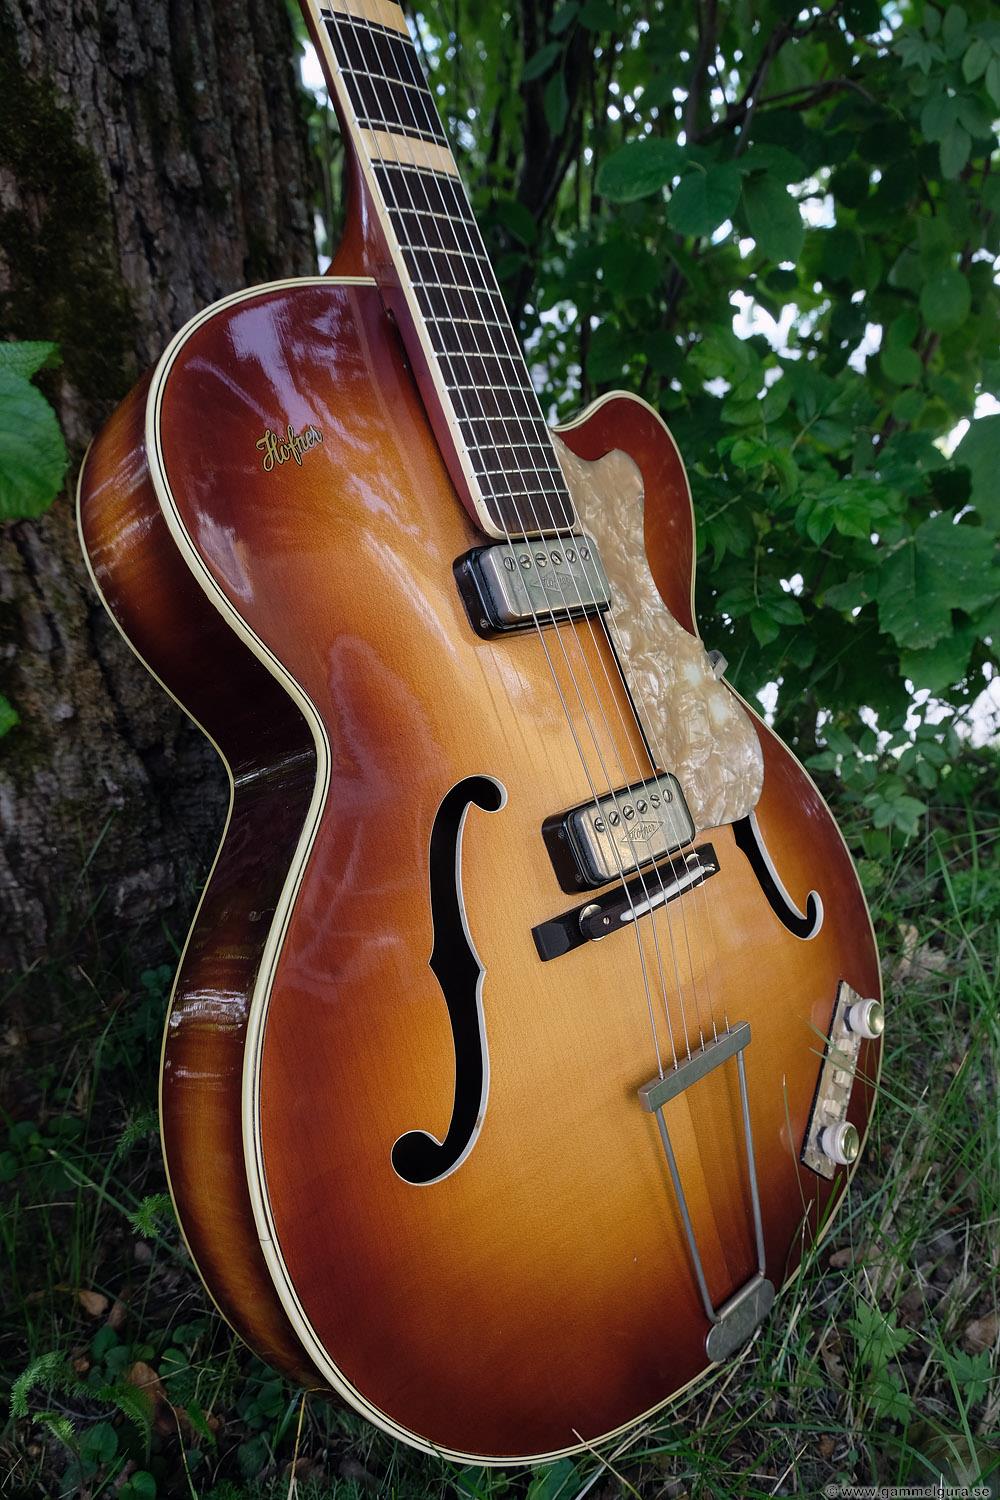
A cool Höfner got a neck reset, new frets and a new bridge instead of the old plastic one.


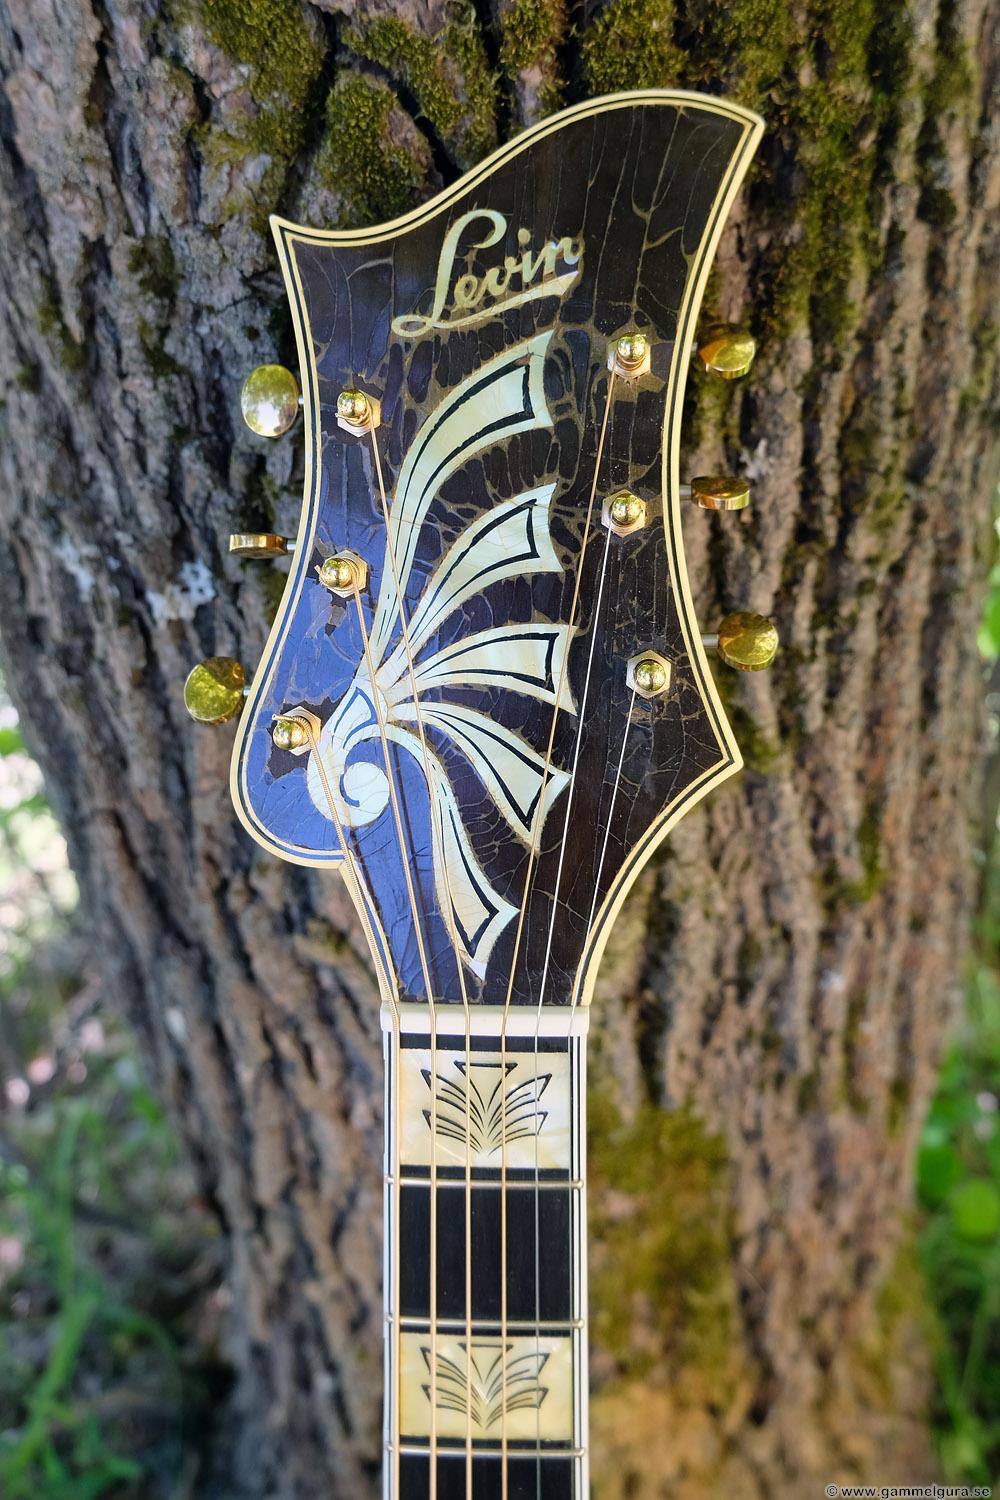
GG205 Levin 1915
Lately, I've been busy with a new project, recording demos of most of my approx 400 (!) songs over the years. My home studio is now almost complete, but I also have to assemble a new computer as the old one is not compatible with the new sound card. I've been working as usual in the shop, but haven't taken the time to write about the finished GammelGura's. I have done four that I have not reported yet. There has also been a lot of repair and tuning work done on all sorts of newer and older guitars.

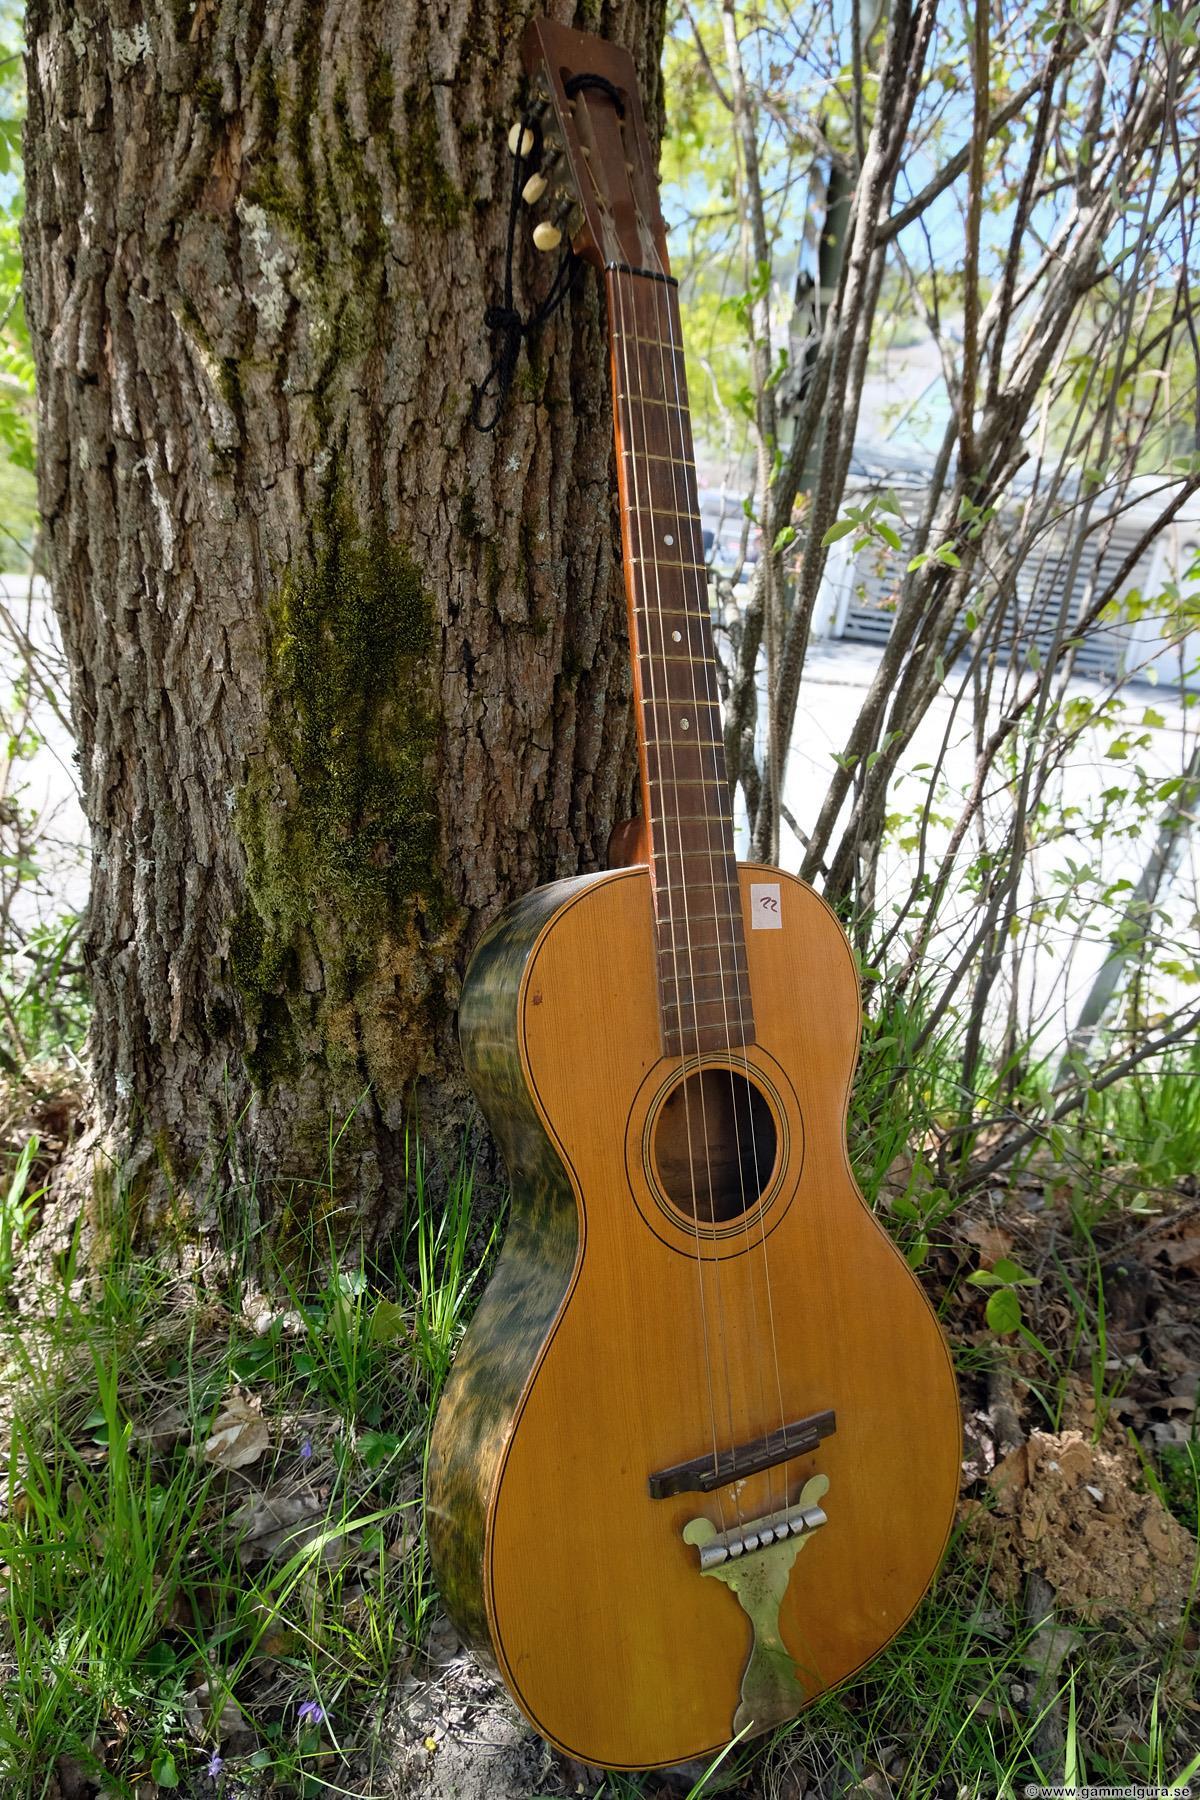
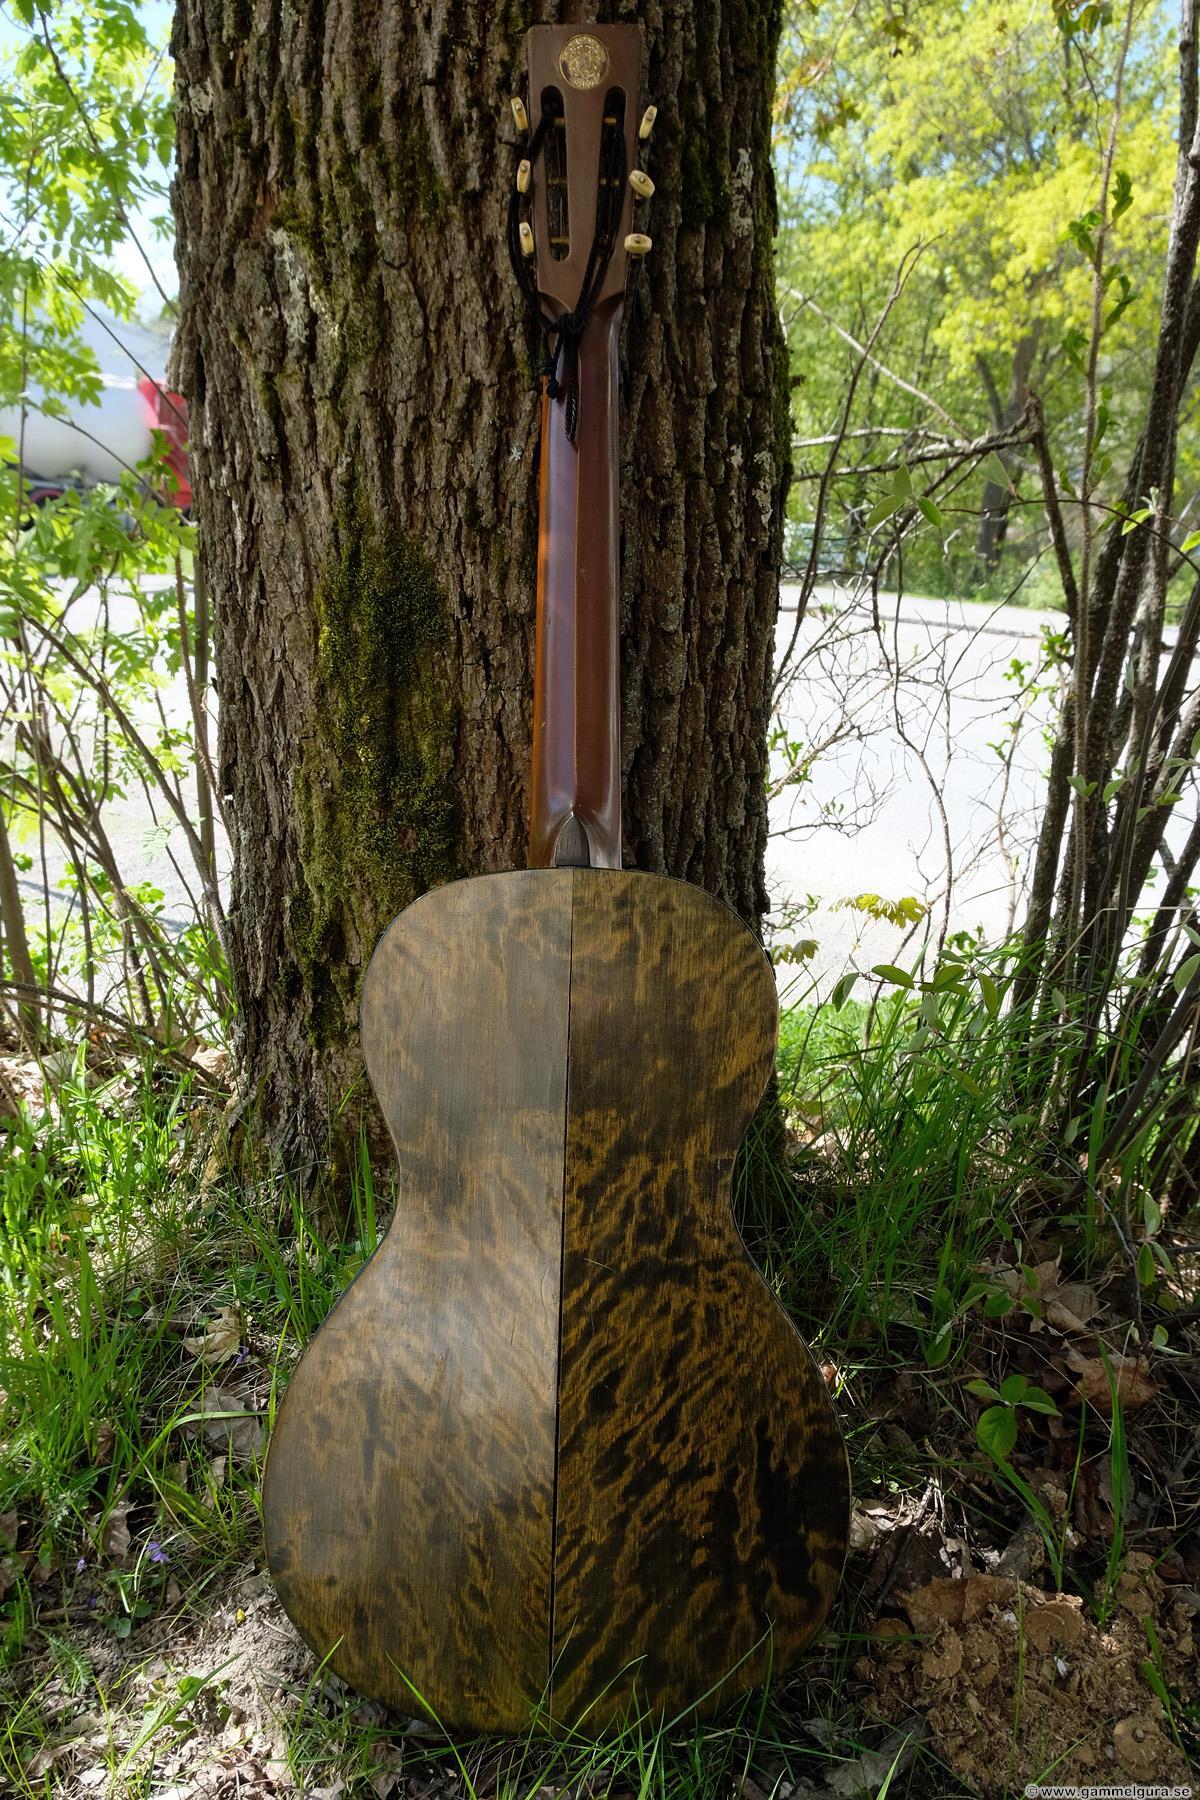
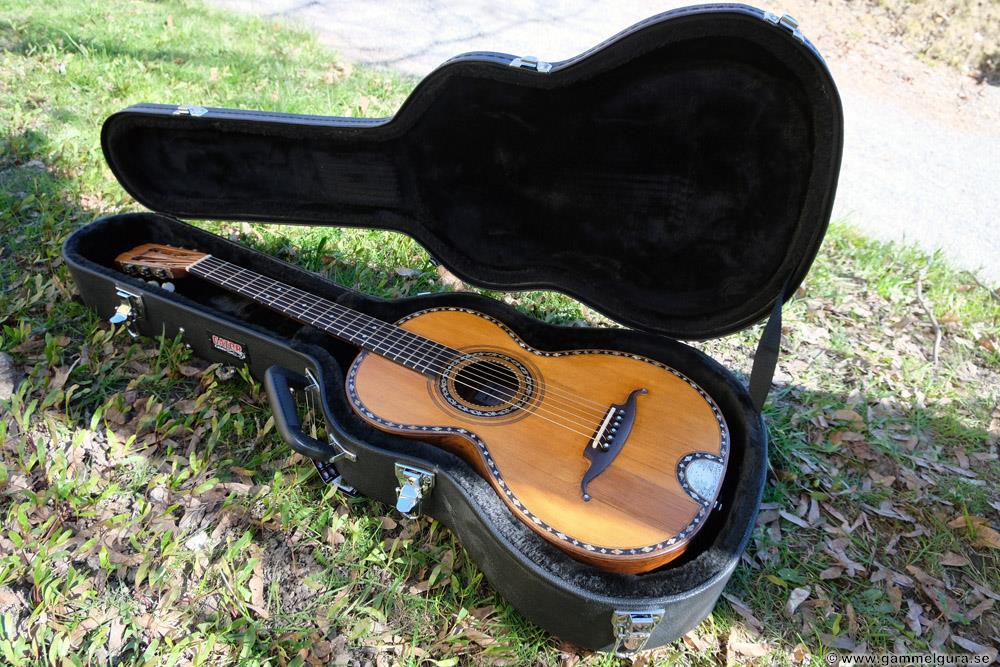
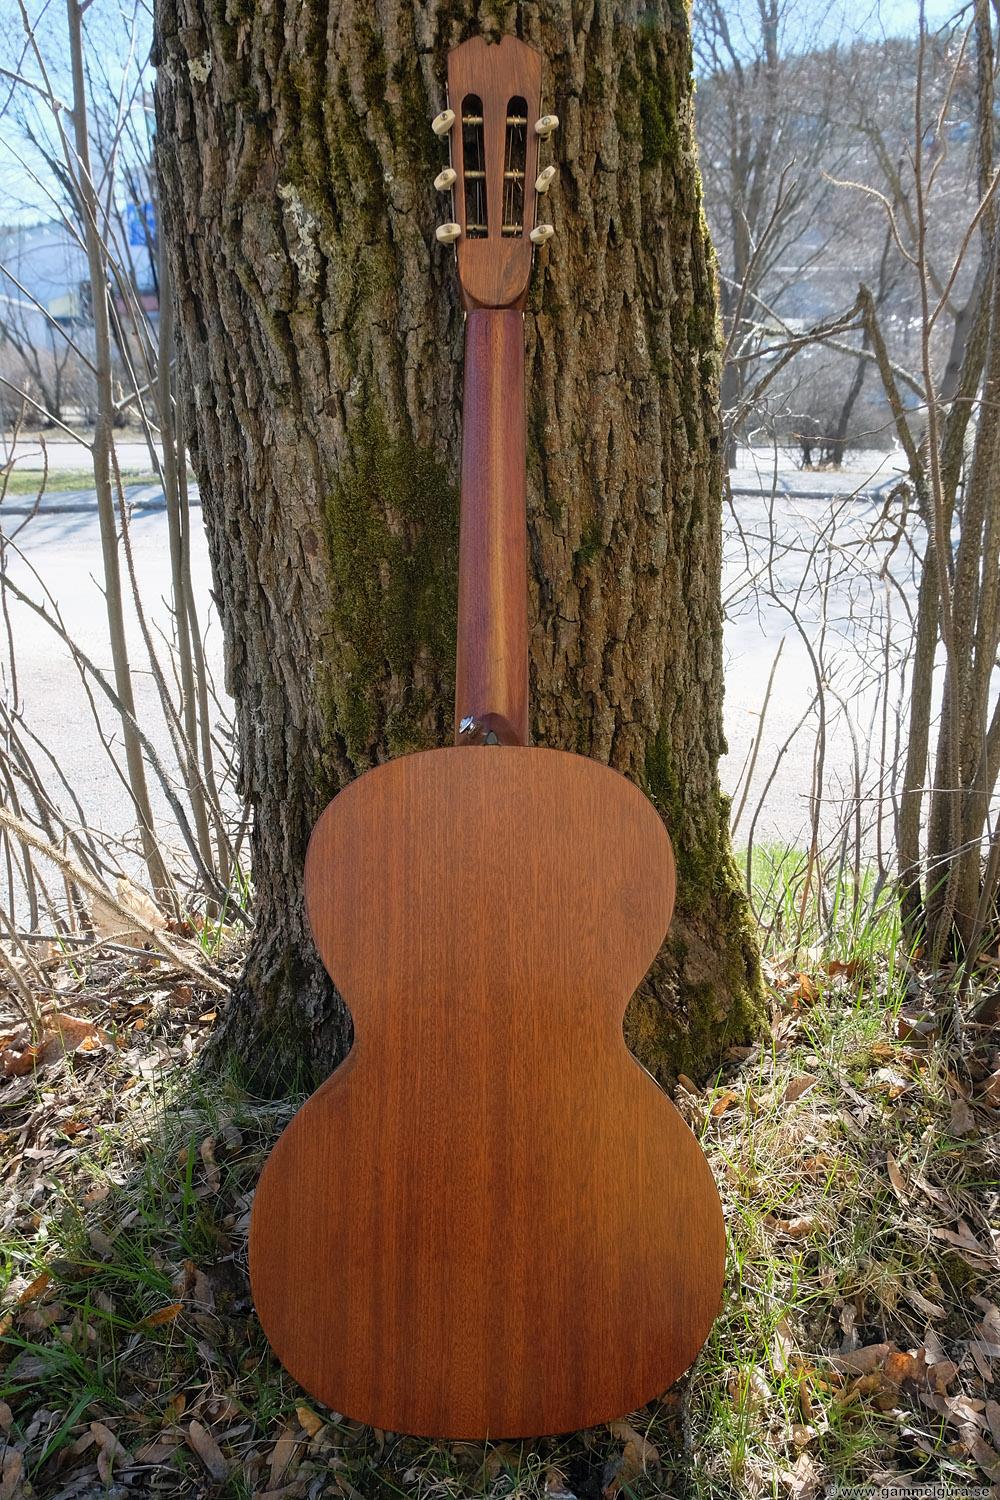
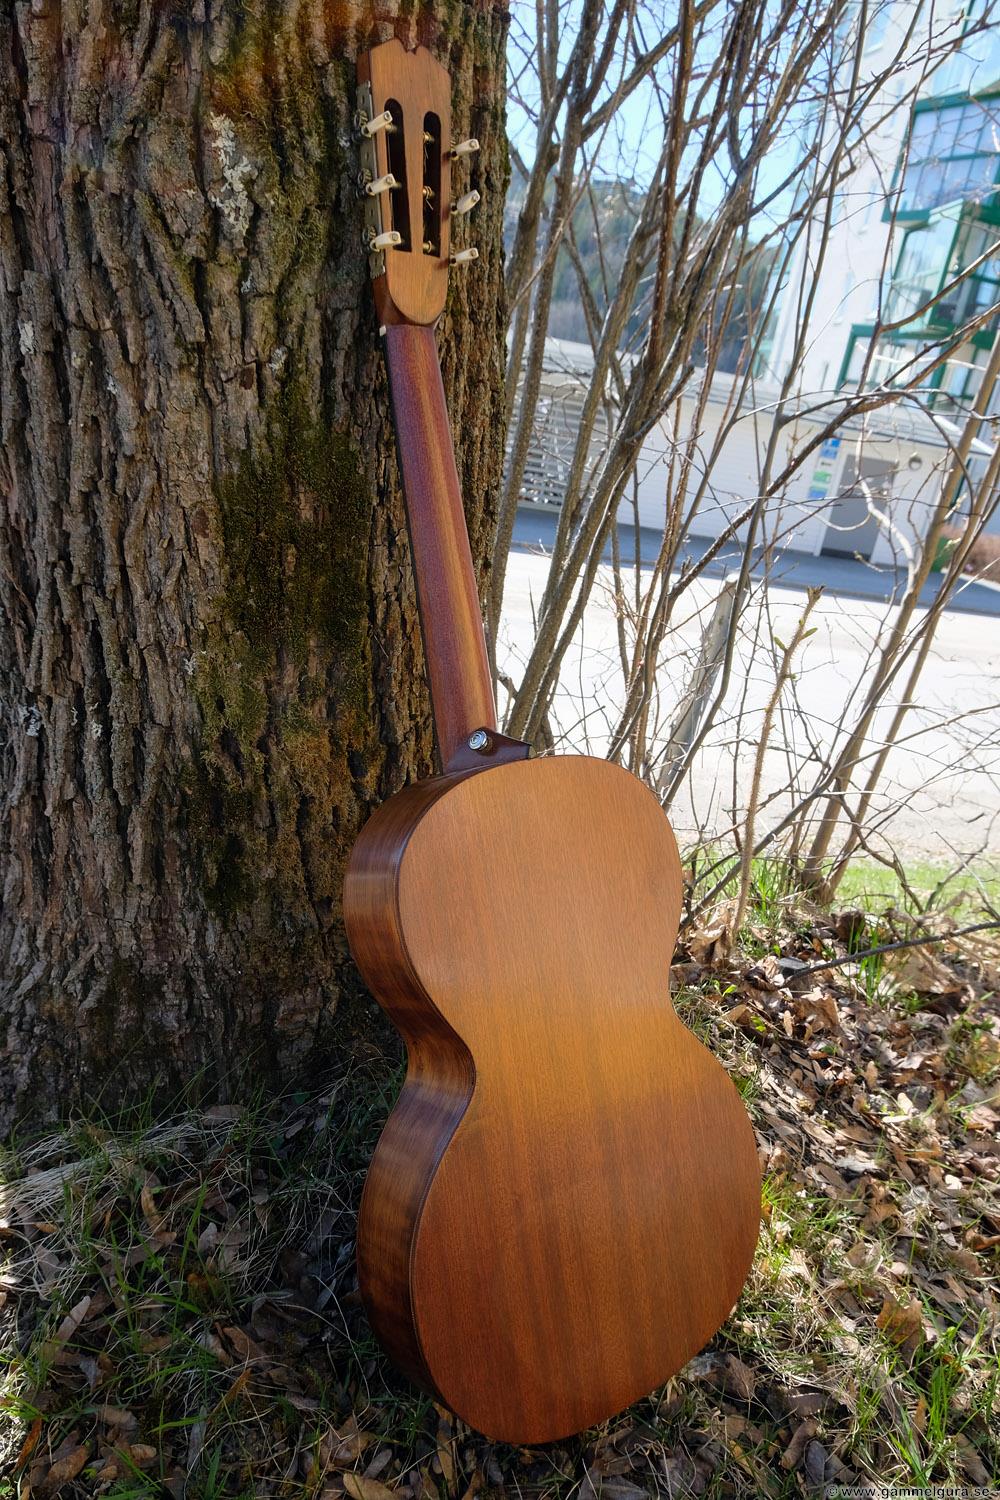
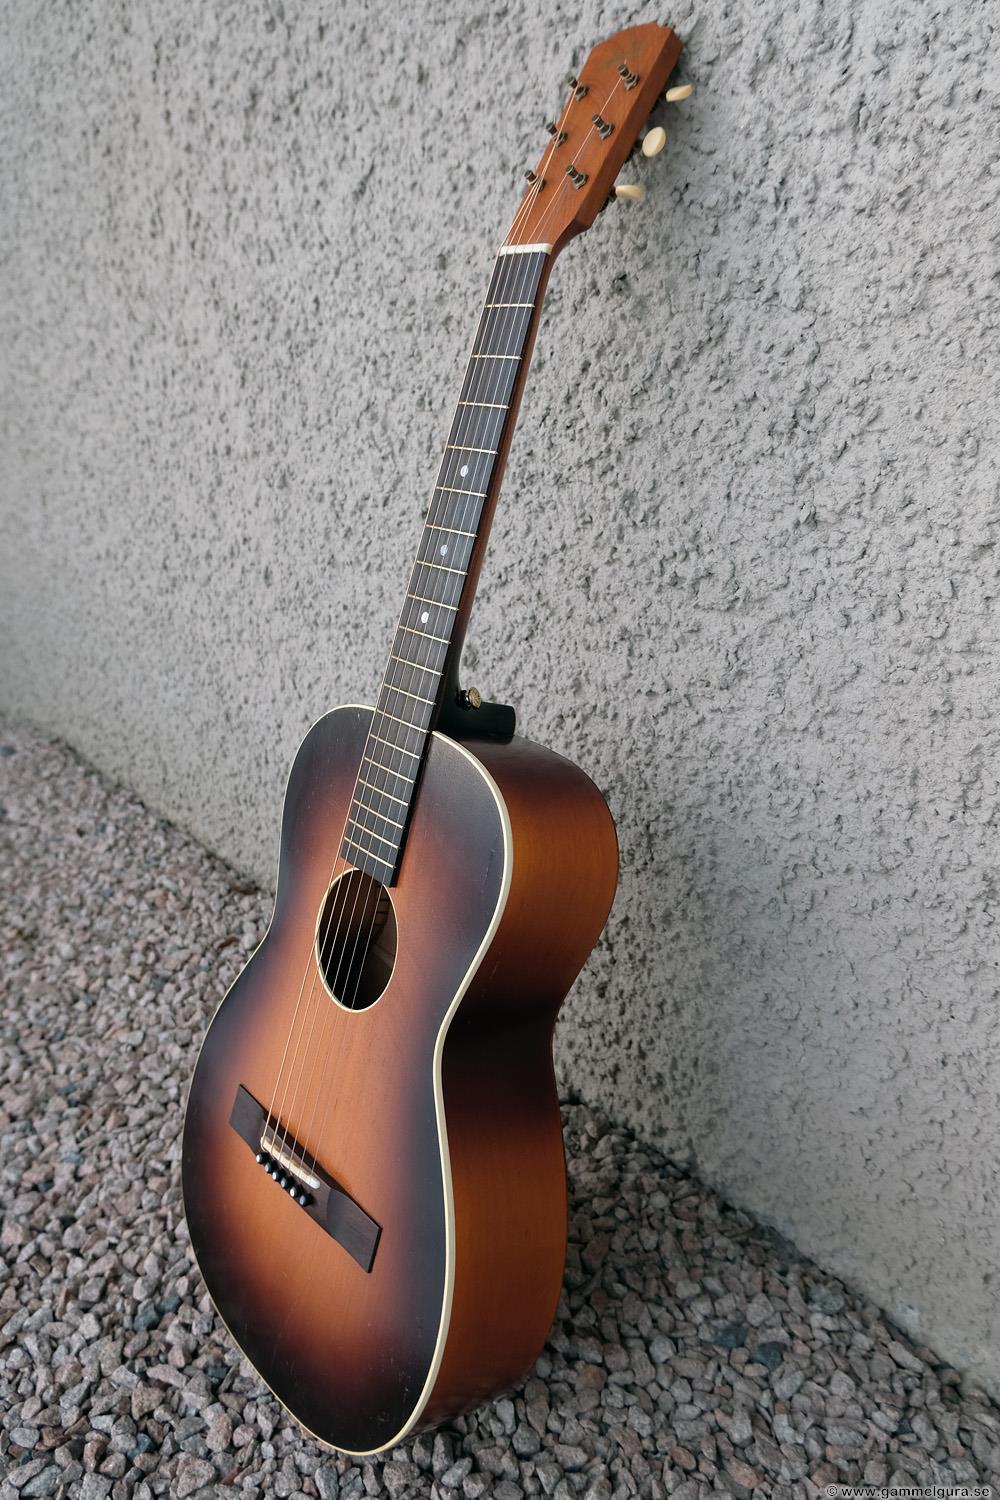
The very latest to be finished was a nice Levin 1915 from my waiting room; number 22. It was in decent condition, the biggest problem was that the flaming birch at the bottom had shrunk and left a big crack along the middle joint. It had a floating bridge with the charming "Mickey Mouse" tailpiece and tuner in good condition. A nice detail was that some of the original paint on the brass plaque on the back of the head remained. The neck was in soft slightly green colored poplar, not birch as in examples after about 1920. For me the poplar neck is better, poplar is too soft for steel strings and most have a bend in the middle, but with a carbon fiber rod, you get a neck that is both stiff and light which usually sounds better than a birch neck. Levin parlor guitars are available with three different deep sides, this one was the thinnest; about 8 cm. Immediately when I felt it, I noticed that it felt promising with long sustain. It turned out that it was also very good when it was finished.


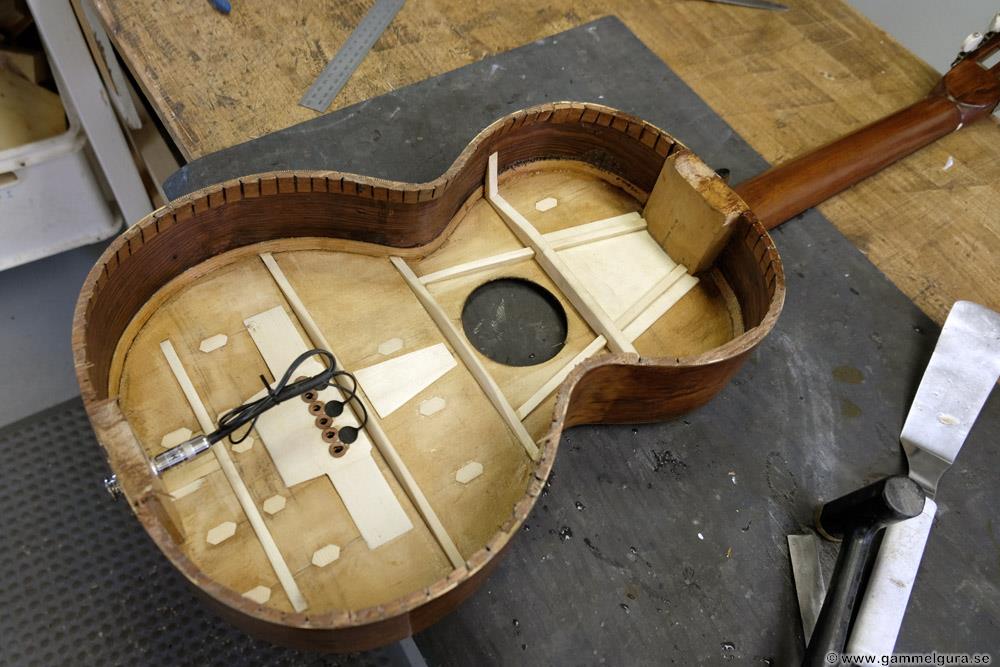
Opening it was not a problem. Inside it looked as they usually do, one of the bottom braces had disappeared on the way. The classic birch stick under the bridge does not enhance the sound, if you remove it the guitar sounds at least twice as good. After several attempts at the beginning of my career, I have concluded that it is not possible to make a floating bridge sound as good as a fixed bridge. Nowadays, it is obvious to convert to a fixed bridge, not least to be able to use plugs and a segmented saddle. It is also much easier to mount a K&K mic with a fixed bridge.
The braces in the top and bottom were removed, the ones at the bottom almost came off by themselves; the ones at the top sat better. The bottom block was split in half and a piece of thin plywood was glued on as reinforcement. The kerfing around the bottom needed to be re-glued in a few places with hot hide glue, a few cracks in the top were also glued. The poplar neck had a carbon fiber rod glued in.
The customer wanted to keep the original tuners if they were good enough. Because the cog with the post is placed above the screw on old tuning screws (up to the early 1920s), even old and slightly loose tuning screws can become tight once the strings are tensioned and the cog is pushed against the screw. These worked almost as well as new after straightening the posts and a round of lubrication. Some of the knobs were a bit loose, which can rattle when playing. A drop of thin superglue in the gap between the knob and the post solved that problem.

The top was slightly deformed in the middle, to make it flatter before gluing the braces, the top was wetted up and pressed overnight. The bottom had shrunk considerably, the crack was too wide to close only with clamps and glue. New wood was needed, either in the form of a center stick or a binding around the bottom. Nowadays, I have concluded that the binding is preferable to a center stick, it is very difficult to smooth a center stick without scratching the paint. The crack in the middle was glued together and when the bottom was then to be glued, I tried not to squeeze the sides together more than a 2 mm thick strip of rosewood could fill the gap all around the rim. In principle, the bottom was widened by 4 mm. A channel for the rosewood binding was milled out when the bottom was glued in place, and the binding was glued with hot hide glue. It also looks much better with a binding than a center stitch in a figured bottom.
The top and bottom were about 0,5 mm too thick, as usual. The inside of the bottom was thinned out in my drum sander using my vacuum jig, while the top had to be planed and sanded on the inside to just under 3 mm. The burn stamp at the bottom had to be sacrificed in that process, on this one there was still a bit of the stamp left as the bottom was thinnest in the middle. The bottom also received a center stick to hold the two halves together.


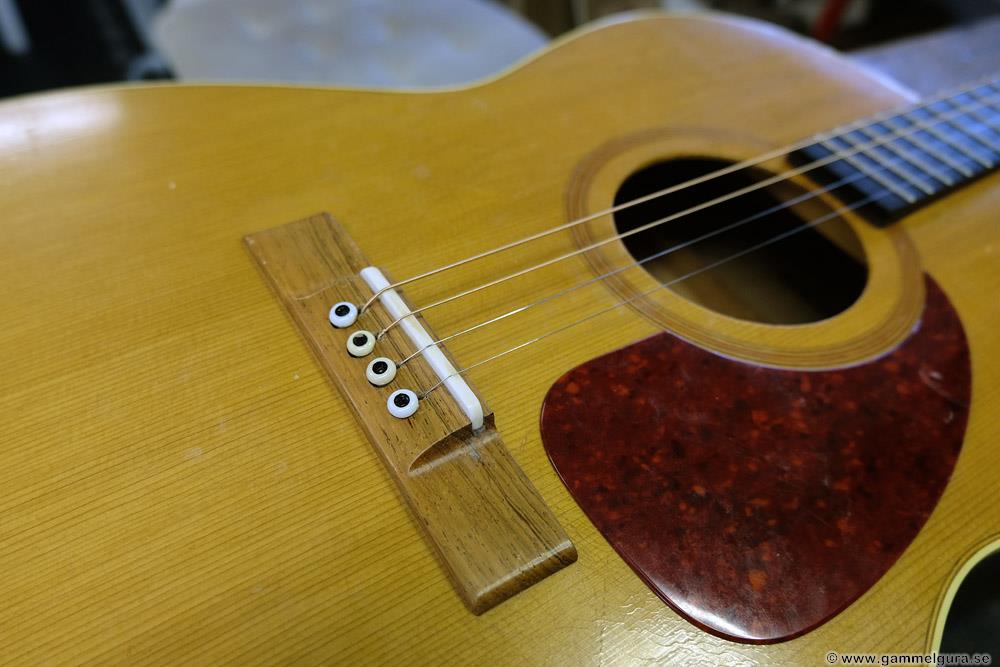
The walnut fingerboard was changed to a light-colored Madagascar rosewood that gotwas sanded to a 16″ radius; a new pyramid bridge was made in the same wood. The customer wanted to keep the pearl dots on 5, 7, 9. I prefer a clean wood fingerboard myself, but it didn't take long to drill and glue the dots into the new fretboard.

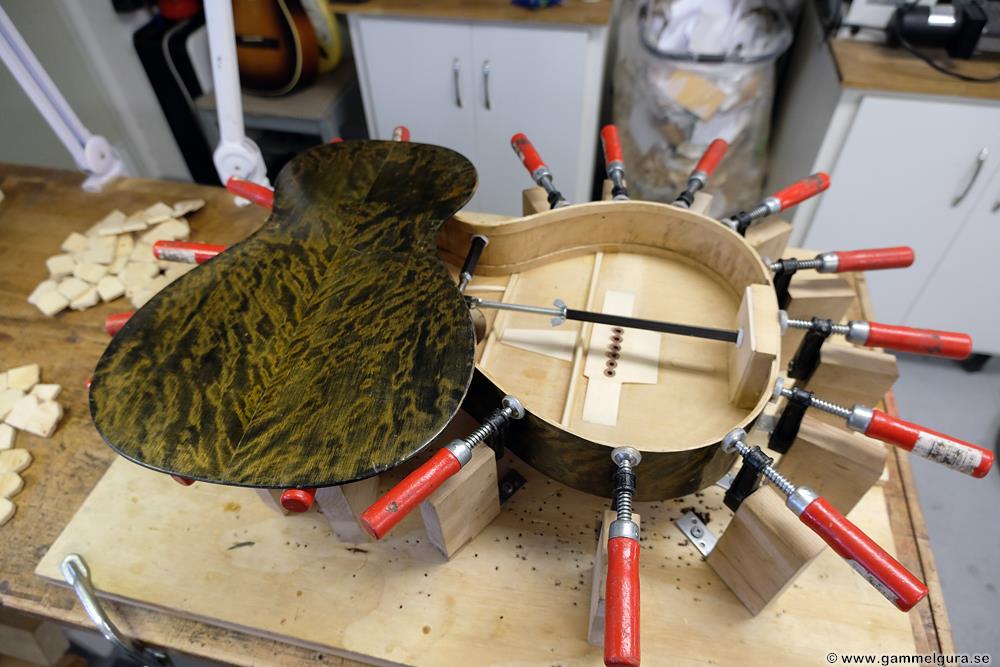
The flamed wood in the bottom and side was a beautiful yellow-green, the picture taken on my work bench when the bottom was glued is most true to reality. In the middle of the darkest winter, it is difficult to take fair pictures of guitars outdoors. The G-string at the nut intonation needed the most correction, and the A-string the least. About 1 mm of the fingerboard was cut off at the nut. The intonation points in the saddle also varied a lot, the saddle had to be about 4,5 mm thick to reach all the intonation points.

It was strung with Newtone Heritage 0.12 strings and allowed to vibrate for three days. It turned out very well with high volume and long sustain; the typical GammelGura sound 🙂 I rarely have problems with wolf tones in my GammelGura nowadays, it's always there of course, but not so dominant that you react to it. I think the segmented saddle spreads the frequencies from the strings so that they don't all end up in the same place as the body's resonant tone for a particular note on the fretboard, which either enhances or kills the tone. It turned out very well!


GG206 A Levin 124 from 1959
It is rare that I do a GammelGura on such a modern guitar as a Levin 124 from 1959. Also, a small "school guitar" with a short 59,5 cm open string length. But it's always fun to have a change.
The guitar was in very good condition, a bit high string height, and bad tuning screws were probably what you could complain about. And the sound, of course! The lacquer was almost too perfect, except for the top, which had scratch marks from a plectrum. "Too perfect" because the GammelGura concept means that the bottom and fretboard must be removed and that the nice lacquer over the joints has to be cracked. An egg has to be cracked to make an omelet, so I did what I could with stain and varnish, and the end result was OK.
Unlike the regular old European guitars, this one had a mahogany neck and neck block. I have not experienced such a heavy and hard neck, I think it is made of African mahogany (which is actually a completely different wood) which is both heavy and hard. To my surprise, the fingerboard was in the finest flat-sawn rosewood. The flat fretboard was thick enough to be sanded to a 16-inch radius, the sanding dust smelled like roses and the color was a lovely dark brown. Levin had gotten the production in order in 1959 and the frets were in all the right place, which rarely happens on older Levins.


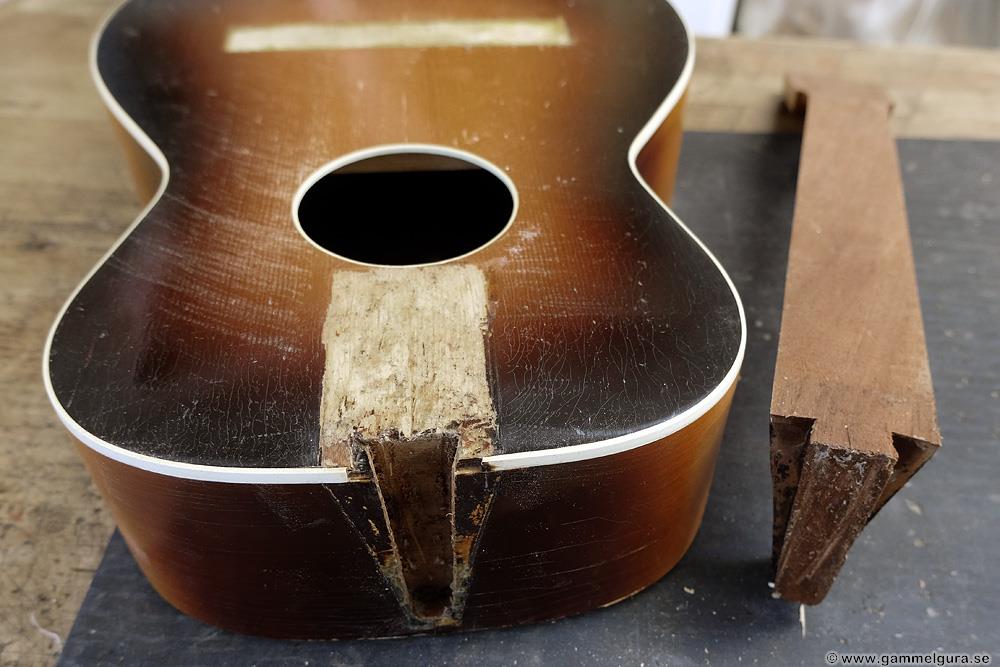
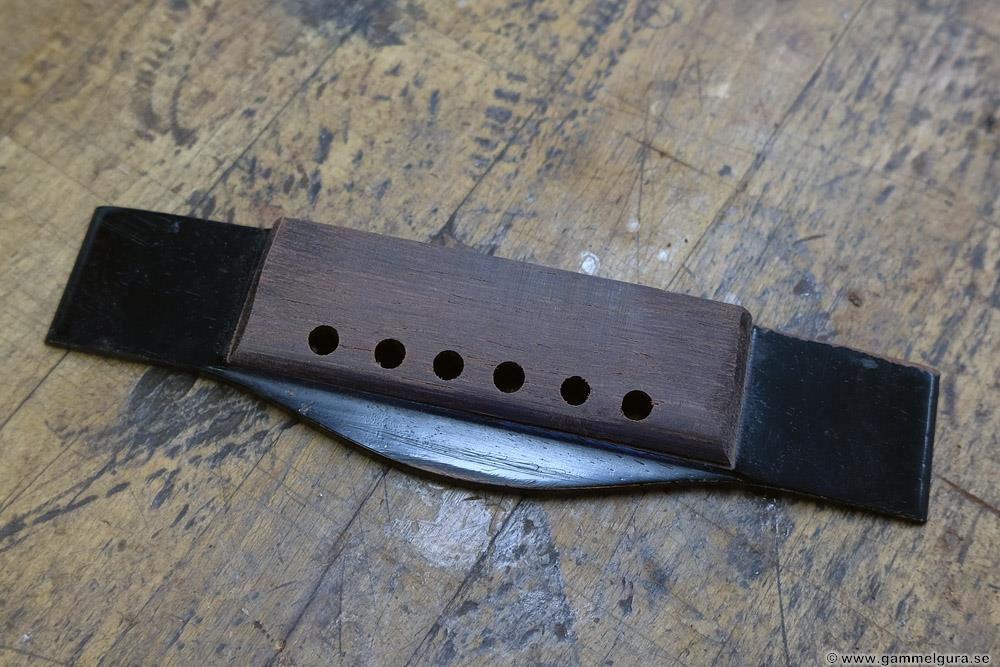
The original bridge was of the string-trough type like on a classical guitar, in my opinion, these Levin bridges are both ugly and not as good as a pin bridge. Under the yellowed varnish on Levin bridges, there can often be found a beautiful piece of rosewood, but not on this one. I replaced the original bridge with a new pin bridge in the finest rosewood that covered the large wound in the top left of the old bridge. A pyramid bridge had been an anachronism, so it had to be a more modern variant without the pyramids. I have previously made modern bridges with sandpaper cylinders and a simple jig in my drill. Now I have recently bought a "spider-sander" to simplify the job and not to destroy the drill.
Unlike older Levin guitars, this neck had a dove tail joint, a definite improvement. After loosening the fretboard, it was no problem to get the neck off with steam and a fair amount of force.


Since the modern glue took some spruce with it when the bridge was removed, a spruce shim was milled in and glued with fresh hot hide glue. Normally only a few pits need to be filled in, here almost the entire surface under the bridge was a shallow pit. The bridge was placed in the right place and low-adhesive tape marked the surface to be milled. Before gluing the bridge, the outer edge of the spuce inlay was colored with spirit-based stain.
The customer wanted brass-colored frets and gold tuners. The nice EVO Gold frets that I used to use are no longer manufactured, but there is a brass-colored alternative available from Stewmac. Bronze-colored Golden Age tuning screws were fitted at an additional cost.
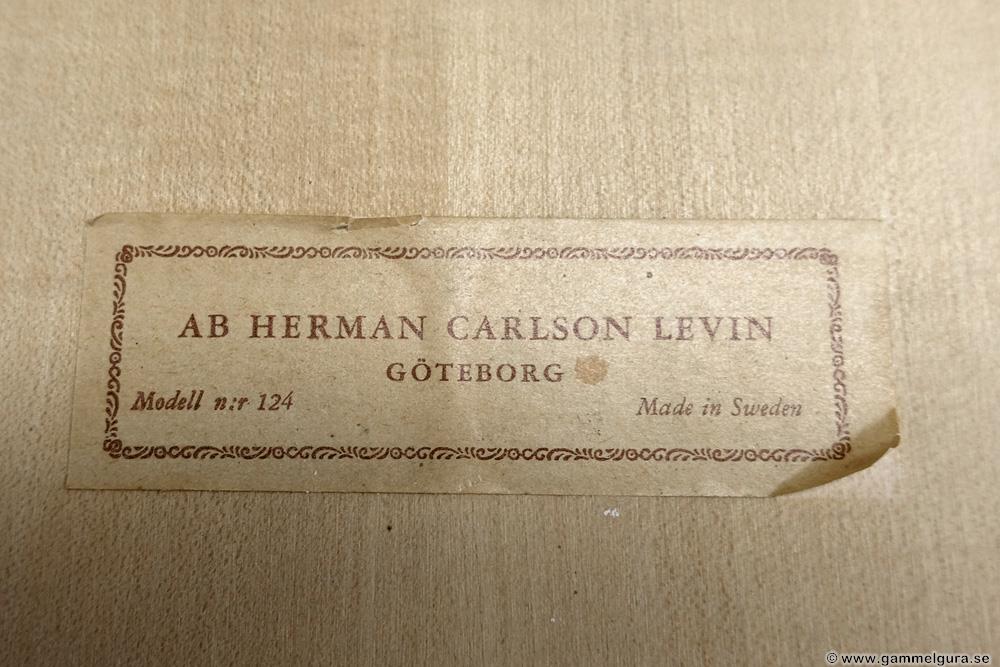


The top was thin, just under 3mm, while the bottom was thicker and needed to be thinned out. The paper-thin label could be salvaged with a razor blade, water, and heat before the bottom was thinned out in my drum sander. Knowing from experience, I glued the label to a thicker piece of matching beige paper with glue sticks before gluing it back to the bottom; if the thin label is glued directly with hot hide glue, the glue soaks through and darkens the label in spots.
The holes for the string posts were enlarged for the new bushings. All the screw holes were pre-drilled with a 2mm drill so they wouldn't break off in the rock-hard wood.


All the braces in the top and bottom were replaced in the usual order, and a spruce bridge plate and dowels were fitted for the spun strings. The first neck set work is done without the bottom to get the chance to curve the brace under the fretboard more or less to completely avoid or minimize a triangular shim under the fretboard. The rim is shaped towards the bottom to give the neck block the angle it gets with a glued bottom. The brace under the fingerboard is clamped in the ends to push up the top and close the gap between the top and the fretboard.


When gluing the bottom, the rim was pushed in about 1 mm on both sides of the waist to fit against the (always) shrunk bottom. The excess protruding bottom was scrapped with a sharp knife, files, and sandpapers. Much time was spent staining the fresh white wood on the edge of the bottom and also along the edge of the fretboard on the neck. The whole guitar was then given a coat of clear spirit varnish.
Nowadays, I have better luck with the neck angle and I rarely need to redo the neck reset. This one went very well and I got the ideal height of the saddle. To get a straight fretboard with 0,15 mm relief, a small triangular shim was needed under the fretboard over the top.
The nut didn't need much adjustment, except for the thick E string. However, the saddle needed to be a little thicker than usual to be able to reach all the intonation points. The pearl dots in the fretboard were replaced with new ones of the same dimensions, the string pegs now have better-centered dots since I got the little lathe. Mother-of-pearl side dots and a gold-tone guitar strap knob were fitted.
It sounds just as good as a GammelGura should after a few days of vibration, even if the small format gives a little less bass than a larger guitar. The 10 cm high sides give enough volume inside the guitar and the thin top makes it easy to drive. Despite the heavy neck, it feels balanced when you hold it, perhaps because it is so small. It has a nice neck, a small size, and better sound than I expected!


Order on the croft
Spent two days getting my queue in order. In the future I will be more disciplined, at least that is my goal. If there is someone who did not send an e-mail but only spoke by phone or visited the premises and who is not on the list, get in touch!
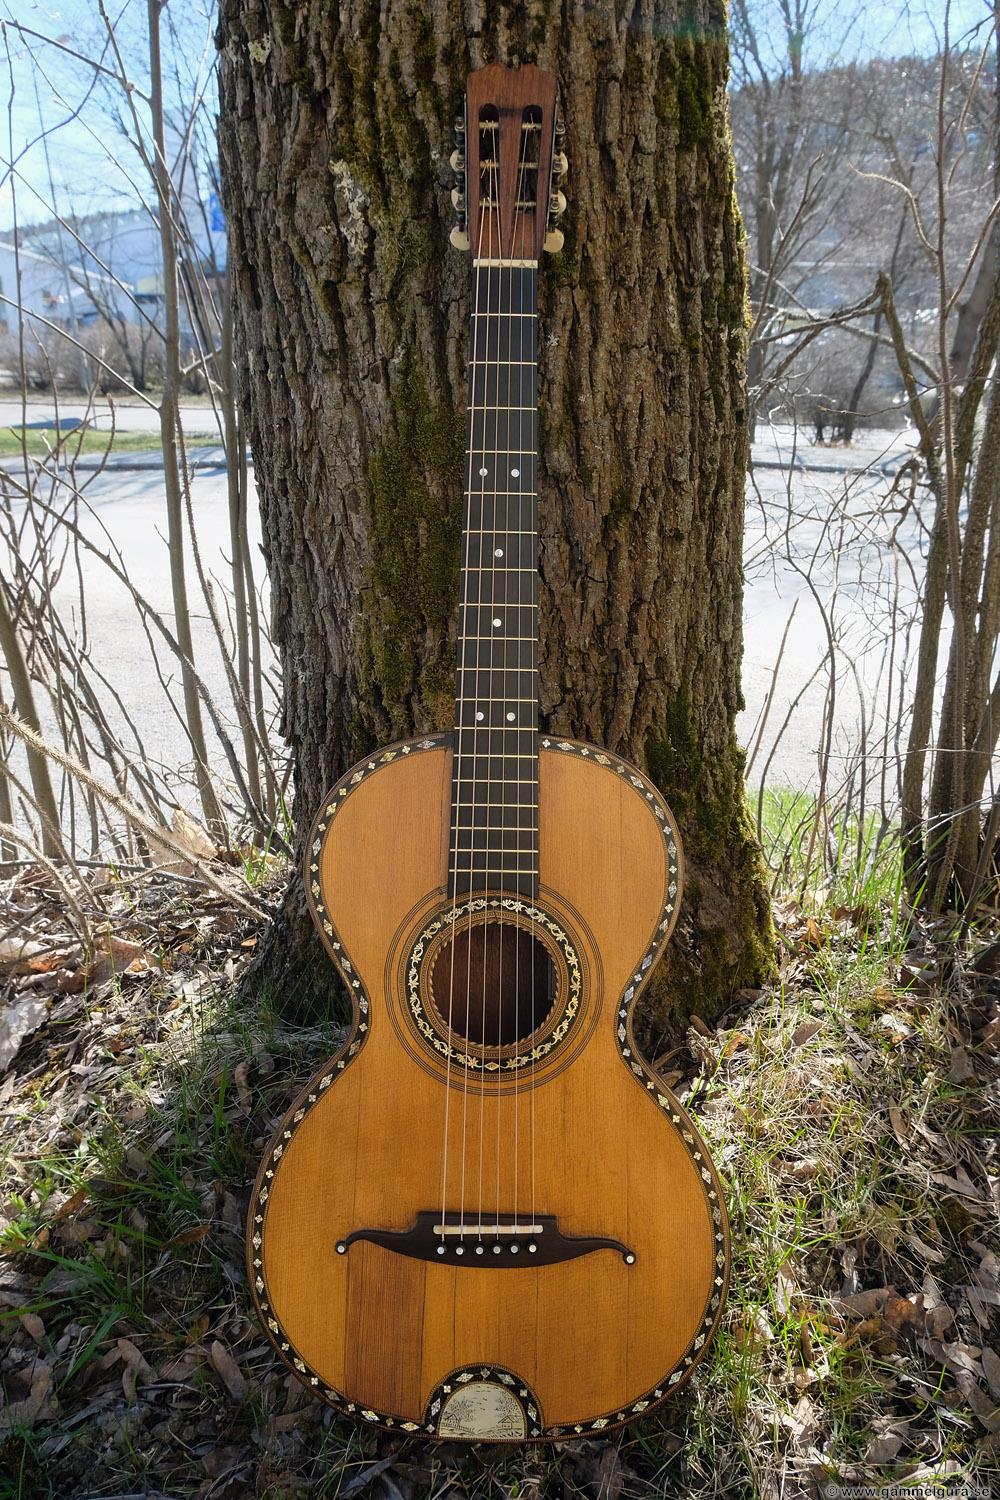
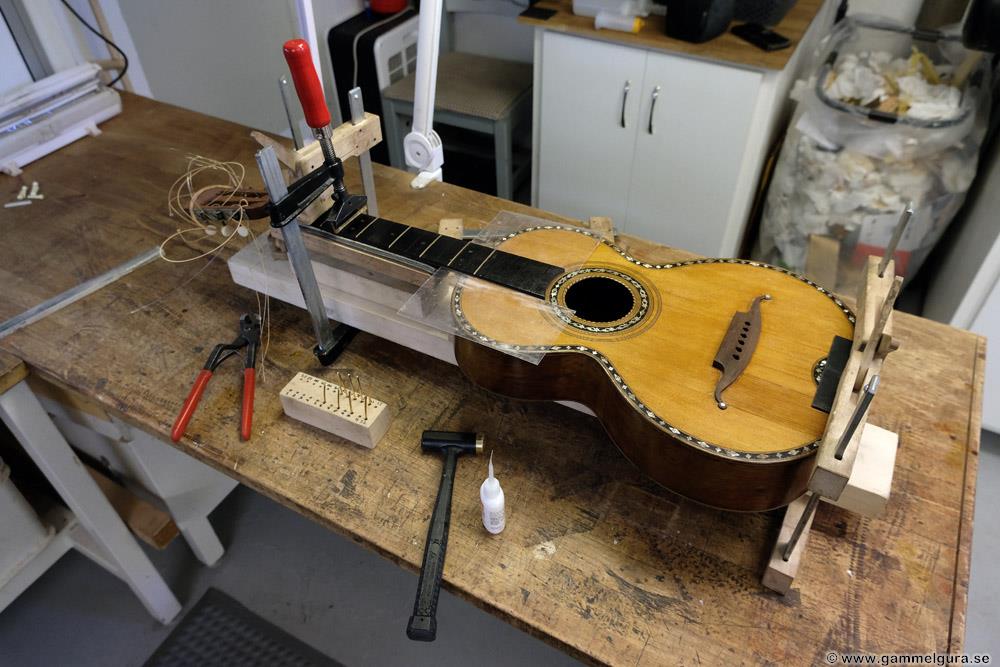
GG202 European *bling* parlor circa 1910
Some GammelGura have passed the shop without getting their blog posts, but I will try to catch up. One problem is that my memory is unreliable...
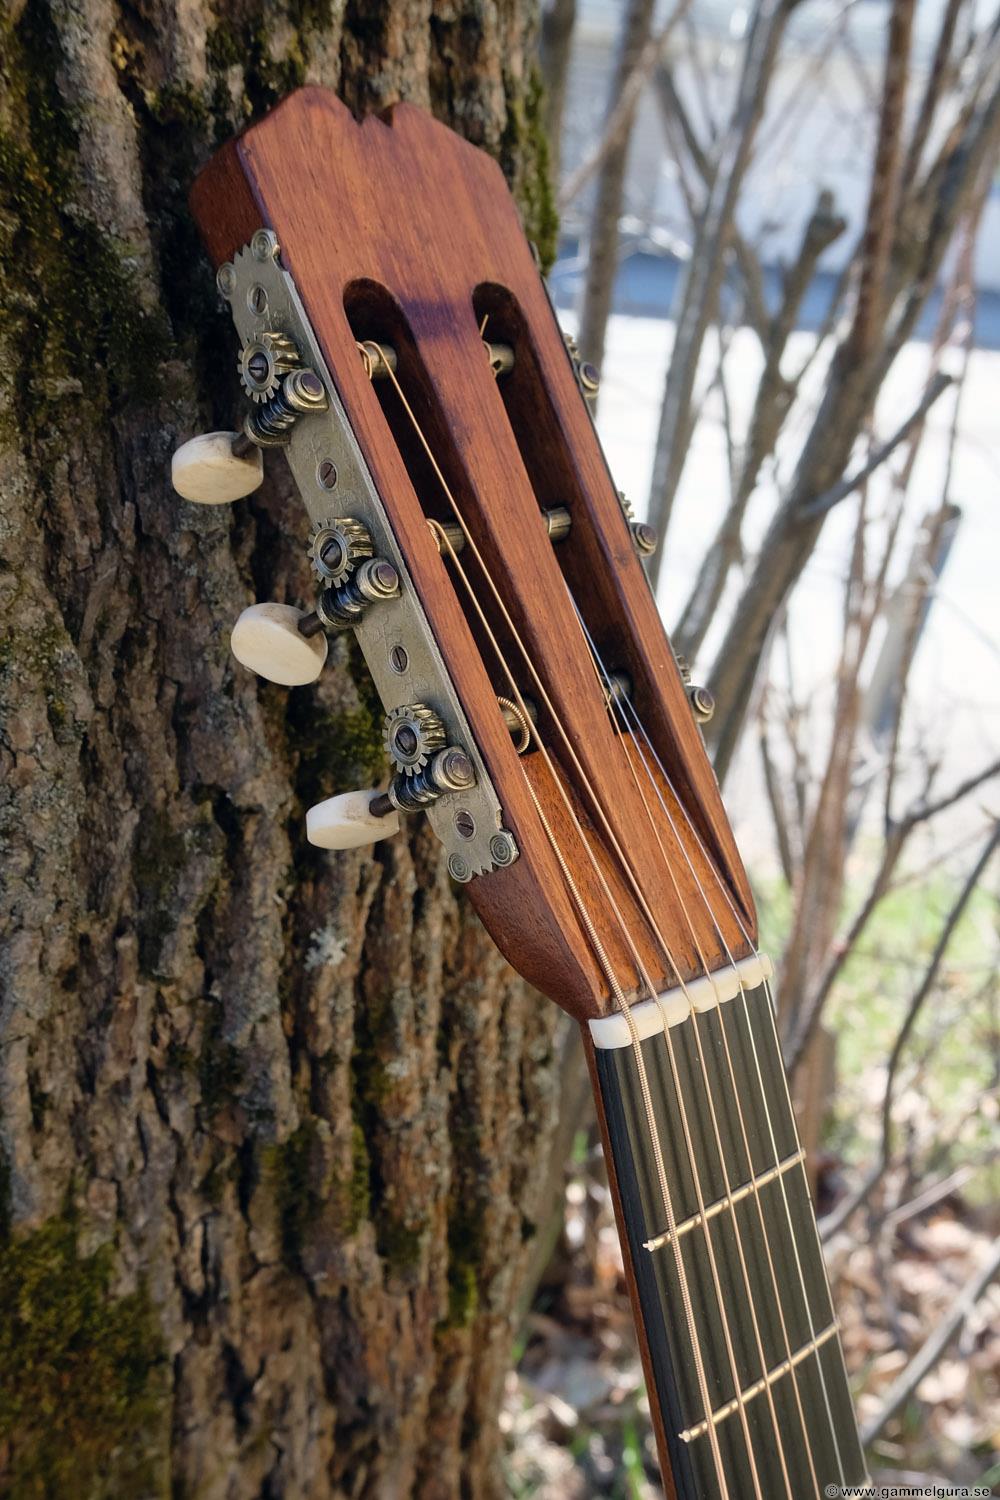
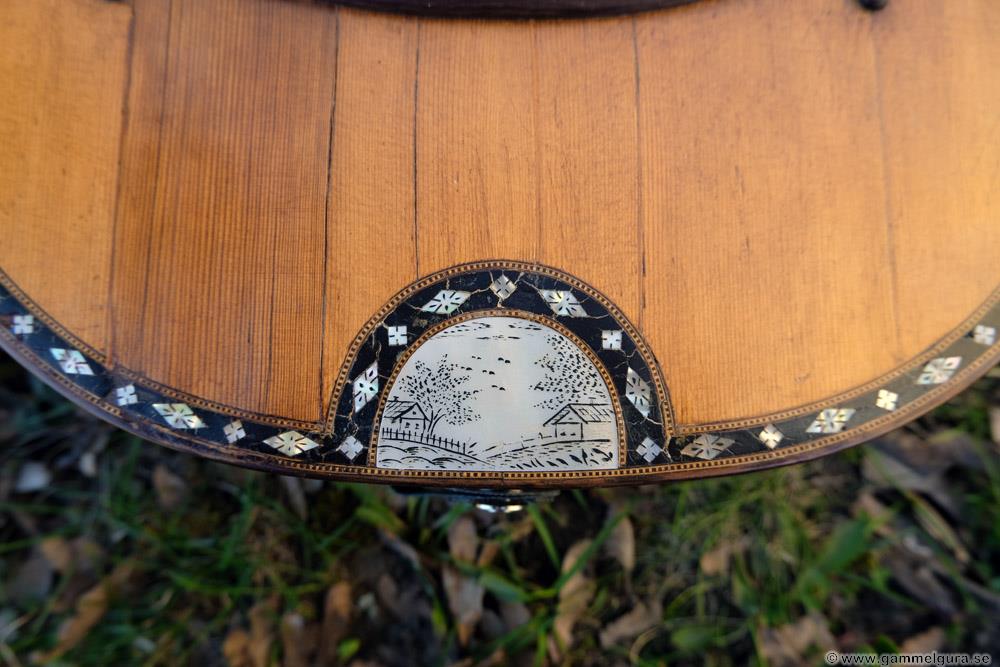
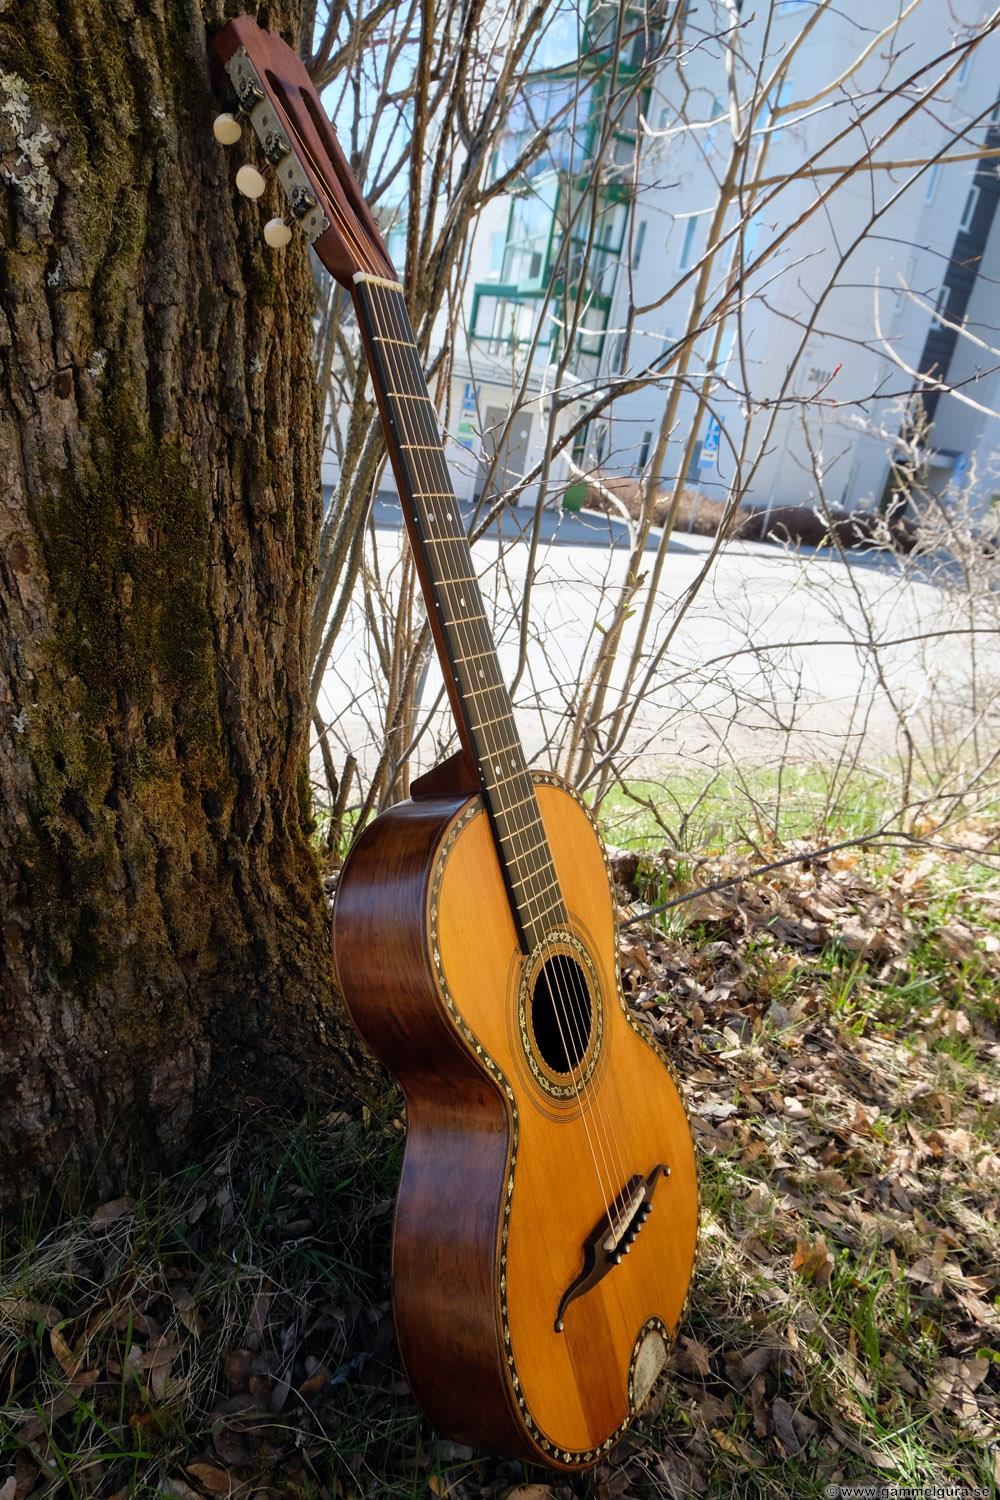
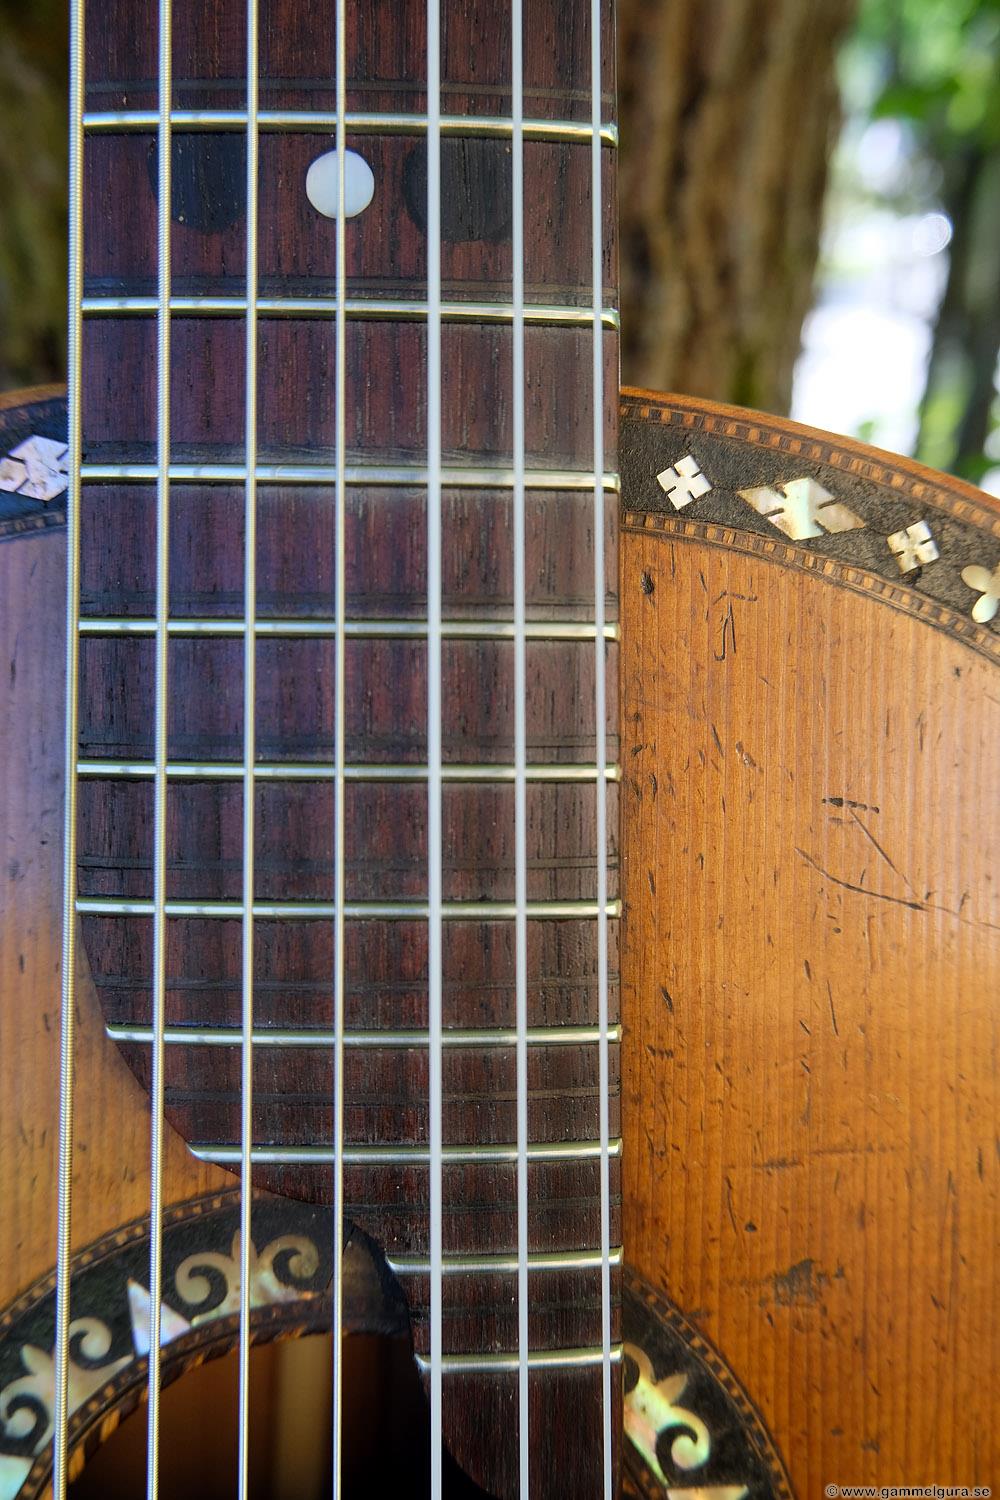
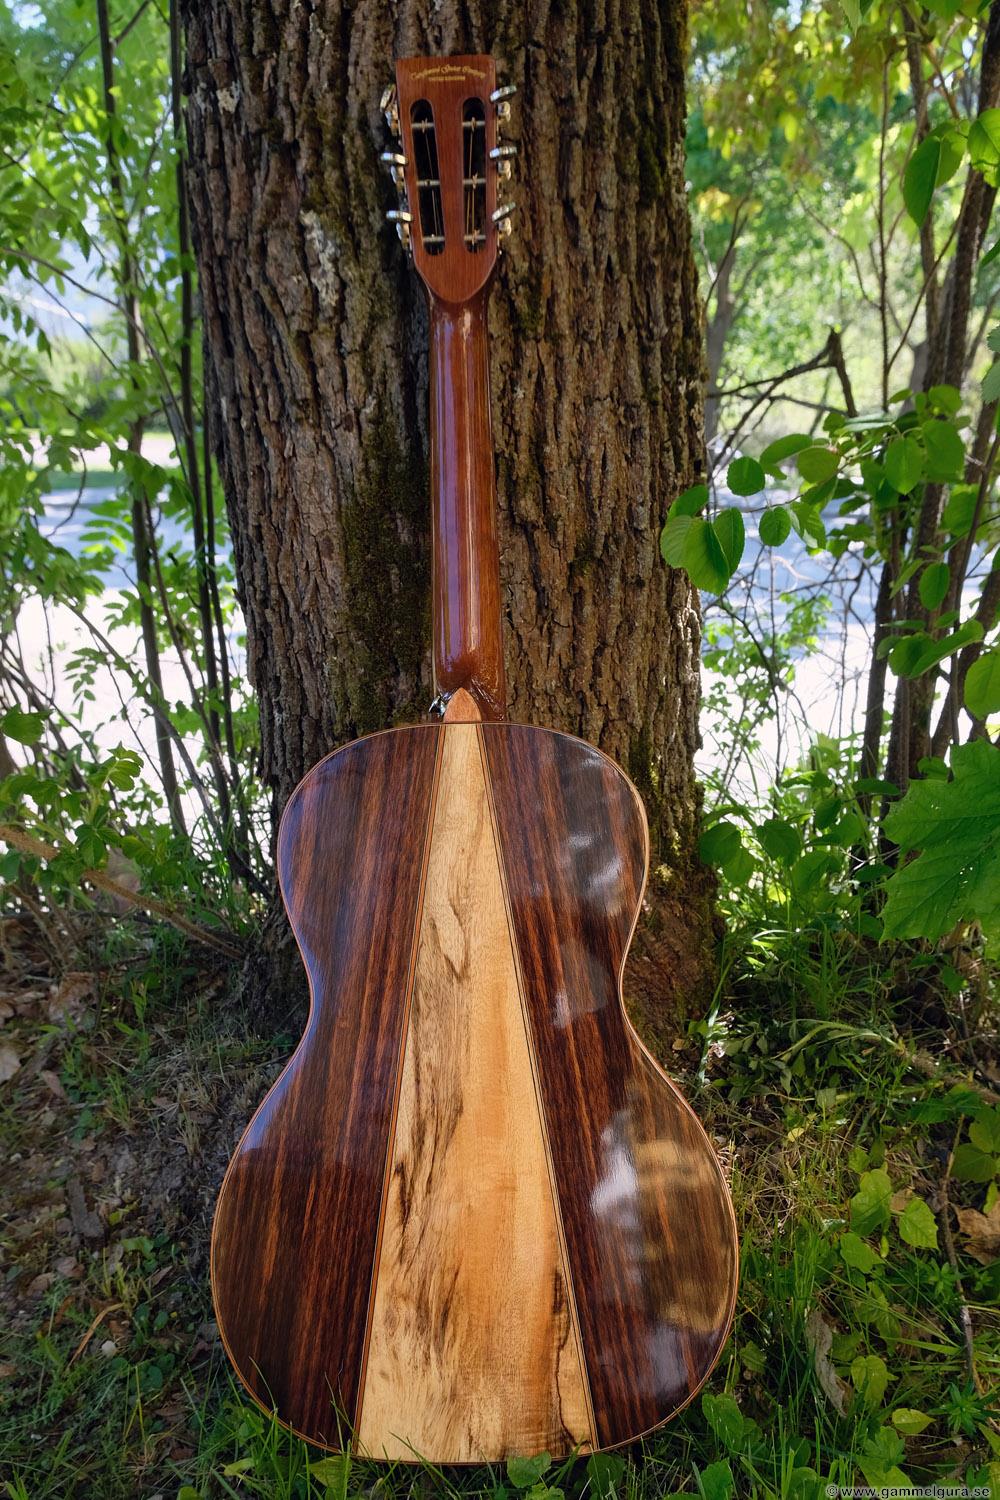
This guitar was a little special with extra pearl inlays, but it was also unusually heavily restored. When it was new, it had rosewood in the bottom and sides, but the bottom had been replaced with a new one in mahogany. The bridge had also been replaced with a replica, also made of mahogany. All the inlays were nice, cut out and engraved, not the mother-of-pearl crush that you often see on cheaper parlor guitars. The ebony fingerboard, mahogany neck and great looking tuners also indicate that it was an expensive guitar when it was sold.


During the renovation, I decided that the new back, fingerboard and the fine and well-functioning tuners had to remain. However, I made a new replica of the bridge in rosewood, mahogany is a bit soft. A piece of the top had also been replaced, or at least been refinished, as it was darker. There were also several cracks in the top, the sides and bottom were, however, crack free.
The bottom was taken off with some difficulty, as the soft mahogany and the lacquer on the outside easily cracks along the edge. The cracks that appeared were glued with hot hide glue. The bottom was braced with mahogany braces, they were well-made, so they stayed put. At the bottom was a pencil shift made by the previous renovator. The text was very difficult to read, but I think it says "The guitar repaired in 1975, (New bottom), Erik Algesten, Gunnarskog". In the top there were some cleats and pieces of the kerfing came off when I popped off the bottom.


In normal cases, I usually thin down both the bottom and the inside of the top if they are too thick. The top was thin enough and did not need to be thinned, the bottom had to be as it was because of the signature and the bracing in place. Maybe it was a bit thick for the best sound, though.
The top was braced as usual and all cracks were glued and given a cleat. Since the top had many cracks below the bridge, I also glued in an extra transverse brace behind the spruce bridge plate, nowadays, I skip it if the top is in good condition for the best sound. I had to give the brace under the fingerboard a stronger radius to push up the top, so I didn't have to make a wedge under the fretboard. To anchor the ends of the brace, two reinforcements were glued at the ends to the side. A K&K mic was fitted.
A replica rosewood bridge was made, the neck received a carbon fiber rod and plugs were fitted between the bridge plate and the underside of the bridge, some of the things that are always included in a GammelGura. I was a little fooled by the narrow and thin neck when I milled in the carbon fiber rod and had a knock through, light came in when I inspected the milled groove. Luckily, the hole was narrow and only a few mm. When I looked more closely, I saw that the neck was slowly tapering in thickness and was at its thinnest at the top near the nut. I have seen this neck shape on several similar guitars, probably to make the neck more comfortable to play. Going forward, I will double-check the thickness and neck width before routing the trench for the 1cm high carbon rod!

I didn't get a good tap tone from the top and thinned the braces a little too much in the pursuit of the perfect sound. It later turned out that the bracing was too weak with strings at tension, the top did not feel stable. It all ended with me having to loosen the bottom an extra time and replace the main bracing above the bridge and below the sound hole with stronger and higher ones. It was a valuable lesson, albeit a difficult one, now I know that I cannot make the brace above the bridge lower than 12 mm regardless of tap tone.
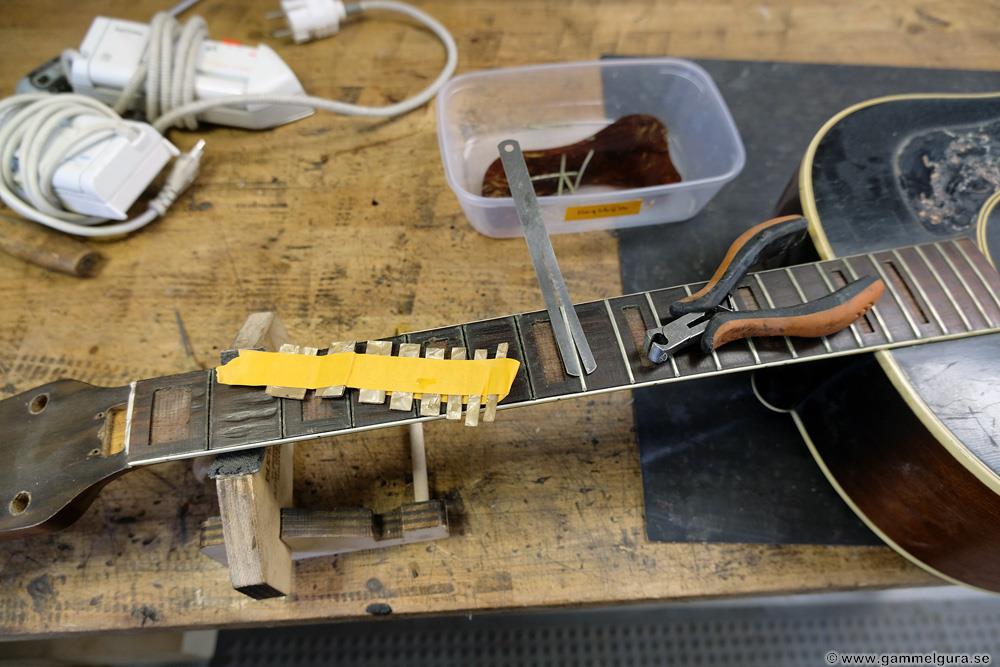
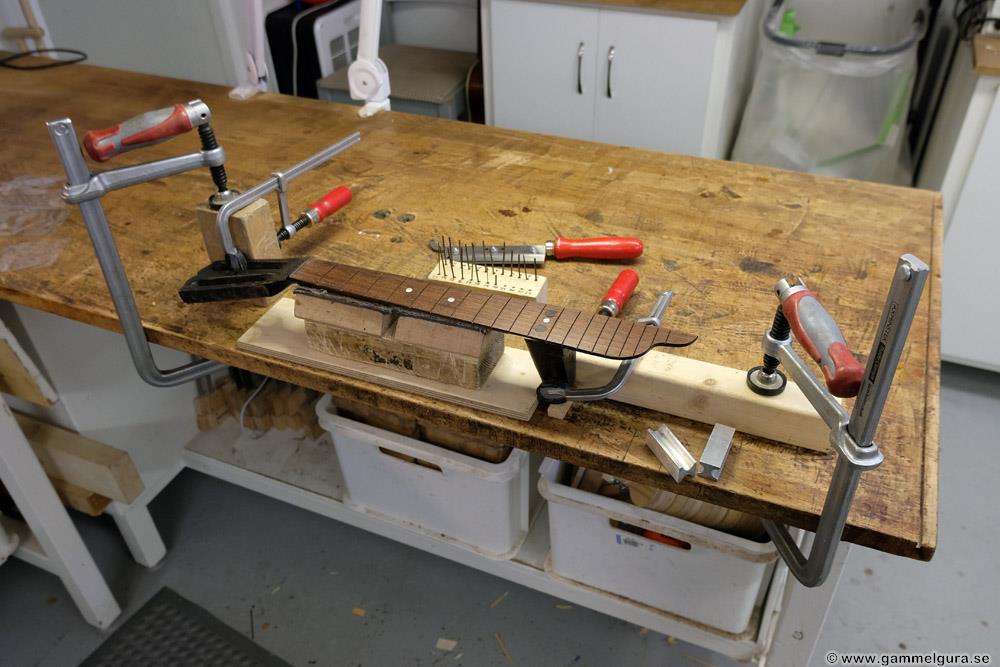
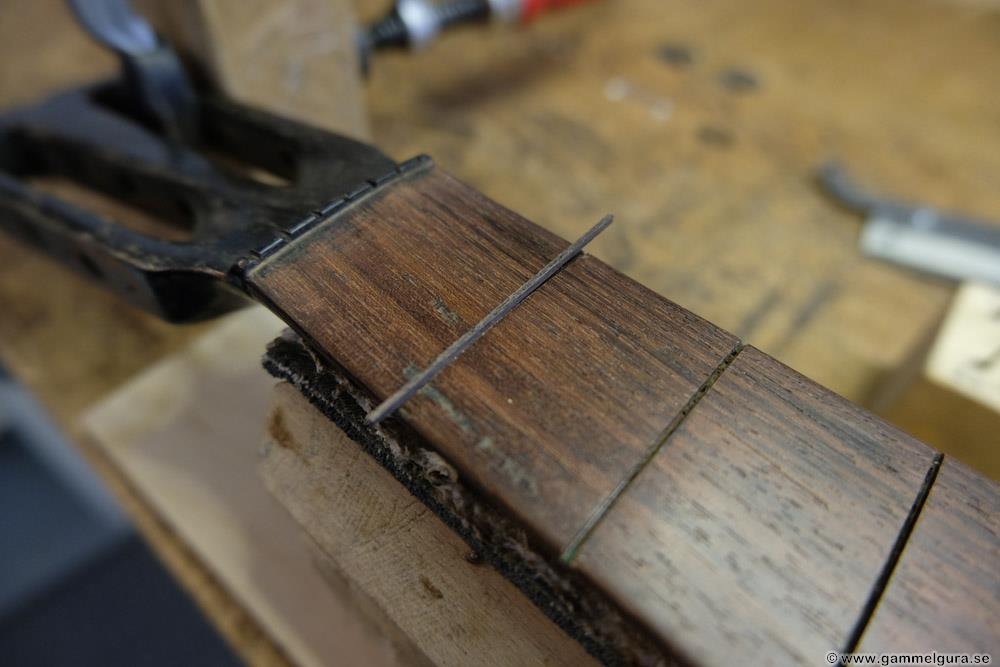
As usual, the frets on the fretboard were not quite in the right spot, so the fret slots were filled in, and new slots were sawn in the right place. The fretboard was also given a 16′ radius. When fretting with the last EVO Gold frets (which are now no longer manufactured) I used my new method of fretting the odd bands first and then the even ones or vice versa. You get more room for both the hammer and the clamps, but also a little less backward bending of the neck.

The nut intonation was measured and the nut and a segmented saddle were fabricated and adjusted. The guitar was strung with my standard, Newtone Heritage 0.12. You can also string it up with regular 0.11 strings, which give the same tension on the top and neck.
When the guitar was finished, I could tell that it didn't sound quite as good as a GammelGura usually does. I blame the hard renovation before. The top didn't have the right tap tone, and the bottom was perhaps a little too thick. Ebony in the fingerboard is also not as good as rosewood tonally in my opinion, but there is nothing nicer looking than a black ebony fingerboard. Maybe all the extra *bling* in and around the top was another minus.
But everything is relative, as long as you don't compare it to another GammelGura it actually sounds great! It certainly is pretty 🙂